JamieStefankoPhotography
-
Posts
34 -
Joined
-
Last visited
Everything posted by JamieStefankoPhotography
-
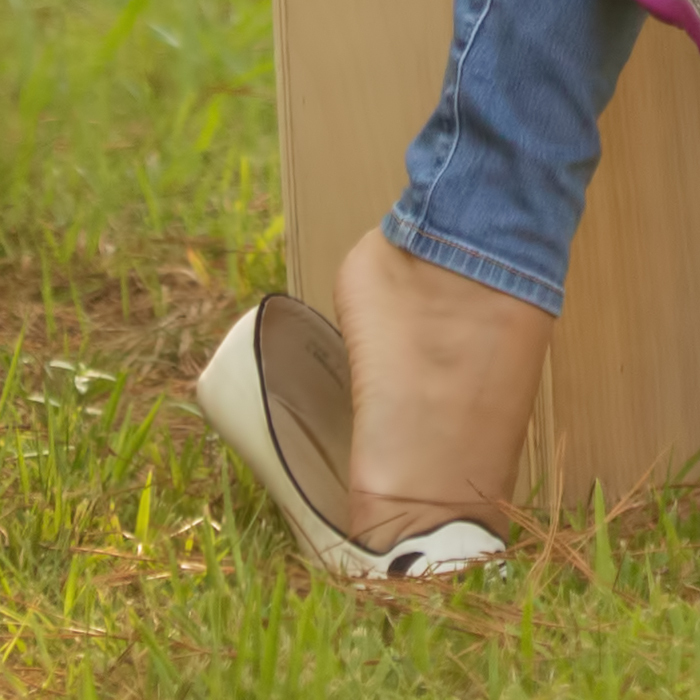
Can you fix my shoe? :)
JamieStefankoPhotography replied to JamieStefankoPhotography's topic in Help with editing
And that would be perfection, thank you! How did you manage this? -
Seriously. I had to rush and get a family photo done for a school project for my daughter, so I did this with a timer. Only one face swap, I was so proud! And then I saw my stupid shoe. I only have one image with the shoe on my foot, but I can't get it to look right (it was taken when I was sitting down). Any suggestions?


-
Help with a background replacement
JamieStefankoPhotography replied to JamieStefankoPhotography's topic in Help with editing
Damien - I somehow missed the notification for this, just seeing it now. Fantastic job, as always. Will take a closer look after dinner, and give it a try on a few other pictures - thank you. -
Help with a background replacement
JamieStefankoPhotography replied to JamieStefankoPhotography's topic in Help with editing
And you suggest just careful masking around the subject? -
Help with a background replacement
JamieStefankoPhotography replied to JamieStefankoPhotography's topic in Help with editing
Yep, that's what I'm looking for. I really don't mind a dark grey instead of blue either (meaning, grabbing from the color in the background) if it makes it work easier. This is why I ended up resorting to that stupid Quick Select. -
Help with a background replacement
JamieStefankoPhotography replied to JamieStefankoPhotography's topic in Help with editing

-
Help with a background replacement
JamieStefankoPhotography replied to JamieStefankoPhotography's topic in Help with editing
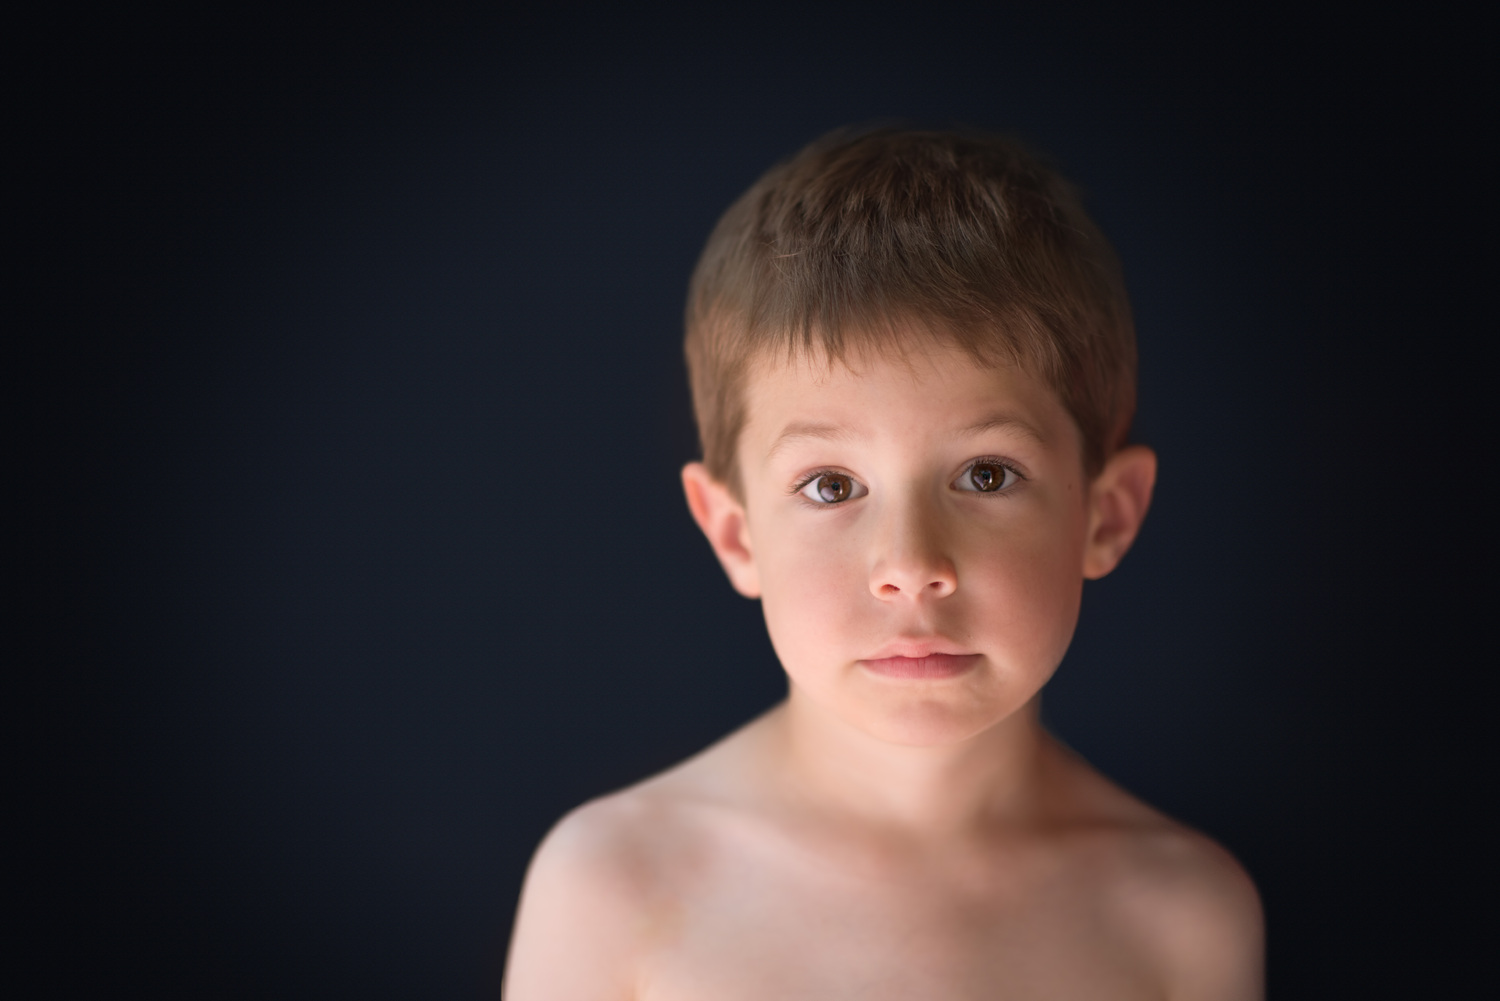
Sure. However, there's one pixel layer I'm having trouble getting rid of, and that's the separate one of my son away from the background (and even this isn't perfect, but better than what I'm coming up with). The most careful of masking isn't really helping me with this. -
Help with a background replacement
JamieStefankoPhotography replied to JamieStefankoPhotography's topic in Help with editing
I did. I was literally just trying different things to see what would work, it's not my normal workflow. -
Help with a background replacement
JamieStefankoPhotography replied to JamieStefankoPhotography's topic in Help with editing
And I'm wondering if the issue is that I used solid color layers instead of gradients. -
Help with a background replacement
JamieStefankoPhotography replied to JamieStefankoPhotography's topic in Help with editing
Sure - I used the dreaded Quick Selection tool, but believe me, it was a last resort. There's levels work above not shown, but that's mostly on his face.
-
Just trying for a realistic looking background replacement - the joys of not having a studio and backdrops. Not looking to print it, but the banding was pretty awful - think the noise layer is at 40% here. Anything I can do to improve this? SOOR and edit.
-
I can say, it does look a bit magenta. So, maybe add some green?
-
No, more of a matte-ifying effect, likely due to the cotton rag paper. I should test it against that metal print profile from h+h, but I assume I should get test prints back first, right?
-
With soft proofing off, my current setup using Method 2 looks good, so yay, haha. Wish I had some h+h samples to hand, have to go remedy that, but happy with Musea at least.
-
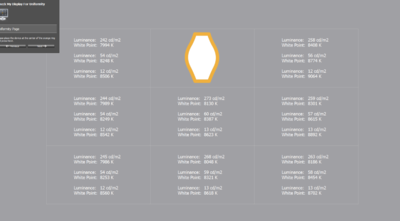
As per Method 2:

-
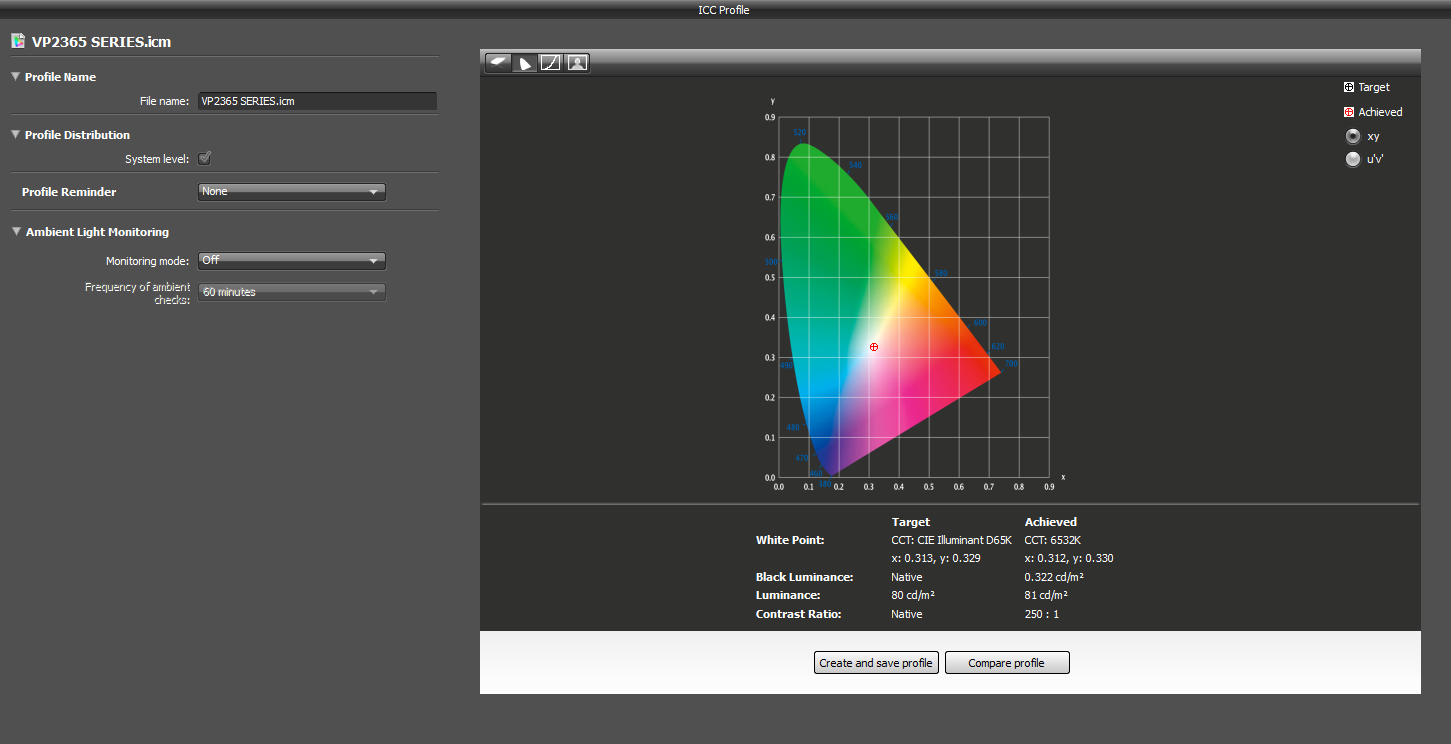
Aaaand this is 6500K. Ooof. Sooooo, skip this and go to method 2? Like, I don't even know, ugh.
-
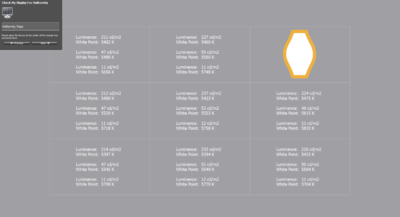
I just reset it to factory defaults, lol. So, it looks completely wonky right now!
-
This looks a bit different from the instruction screenshots - I have three values per box.
-
So of course I did the first step (not even calibrated yet, just set it to 5000K) and it almost matches perfectly, lol. Of course, right?
-
Alright then. It's a very overcast/rainy day, still better off waiting till nighttime?
-
That's likely exactly it. I had saved the profile, but maybe ultimately upgrading to Windows 10 did me in somewhere, sigh. I think I should be following this. http://www.damiensymonds.net/cal_i1DP_pc1.html
-
Bah, they're a bit off from Miller's too - I upgraded my PC less than a month ago, so it's a new calibration.
-
Before I ordered prints, I soft proofed them with their profile, its that where I went wrong? I don't remember how I did it with Miller's, it was ages ago.
-
I've been using Millers for some time, and I was calibrated for them. I'm switching to Musea (though I'll also be using one other lab for canvas prints). I haven't touched my calibration other than my standard monthly recalibrate, and I received my test prints from Musea yesterday. I have their ICC profile on softproof, and when comparing, theirs is definitely warmer. So, now I need to match my prints, right? I confess, when I first calibrated to Millers, I didn't have to change a single thing, haha. Do I try to do this through the X-rite software, or what? Also, if you use two labs, do you just choose the lab you use the most when calibrating?