Jamie Brown
-
Posts
65 -
Joined
-
Last visited
Everything posted by Jamie Brown
-
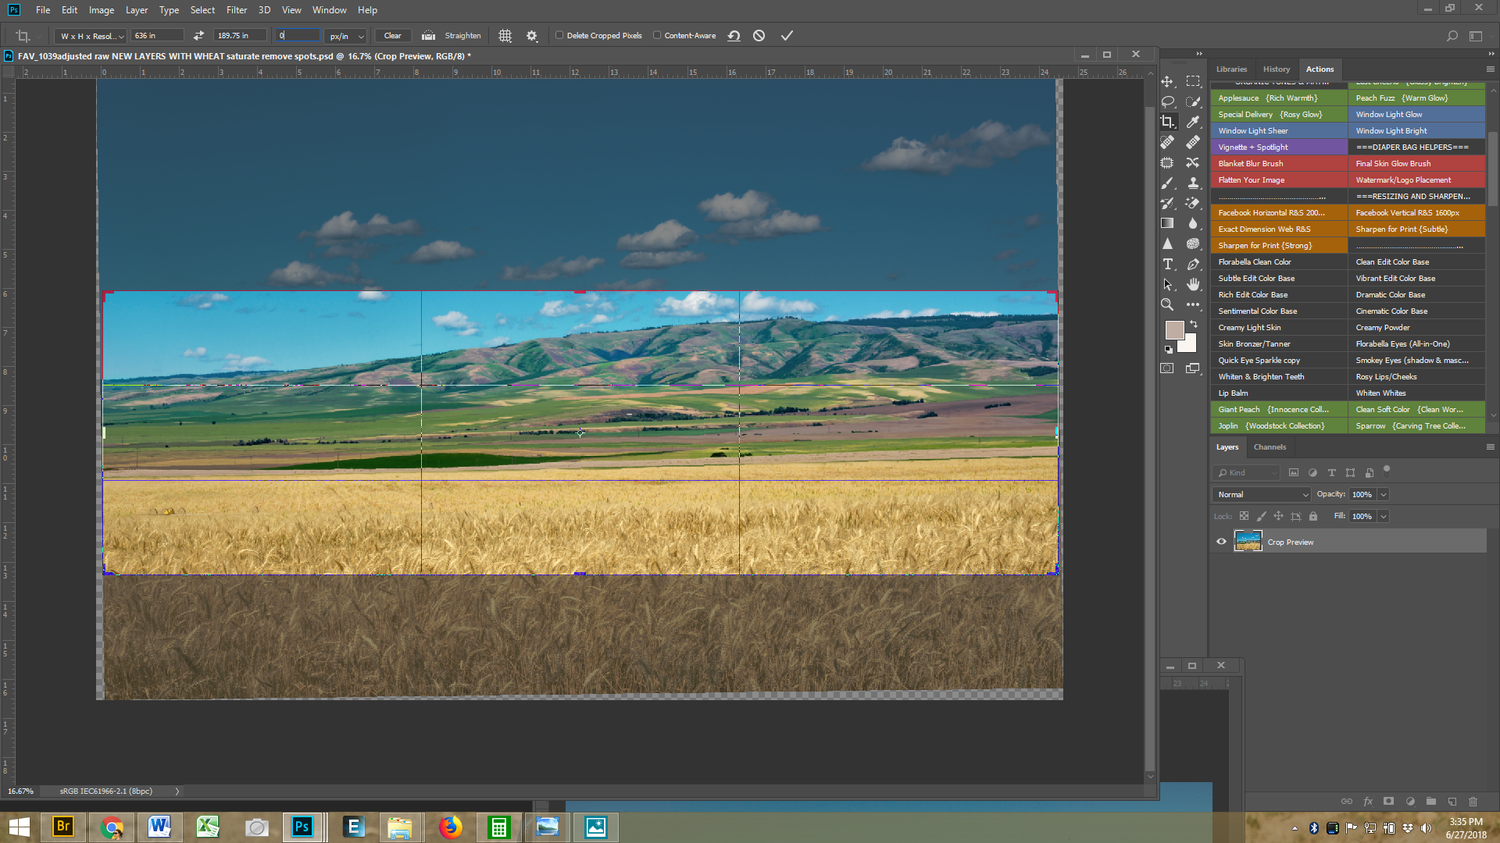
Trying to retain as much wheat in foreground on bottom landing area as possible... I wonder if I should go back to layers and "lift" the wheat up higher in the scene to keep it more visible.

-
Damn, most of the wheat is going to be cropped out.
-
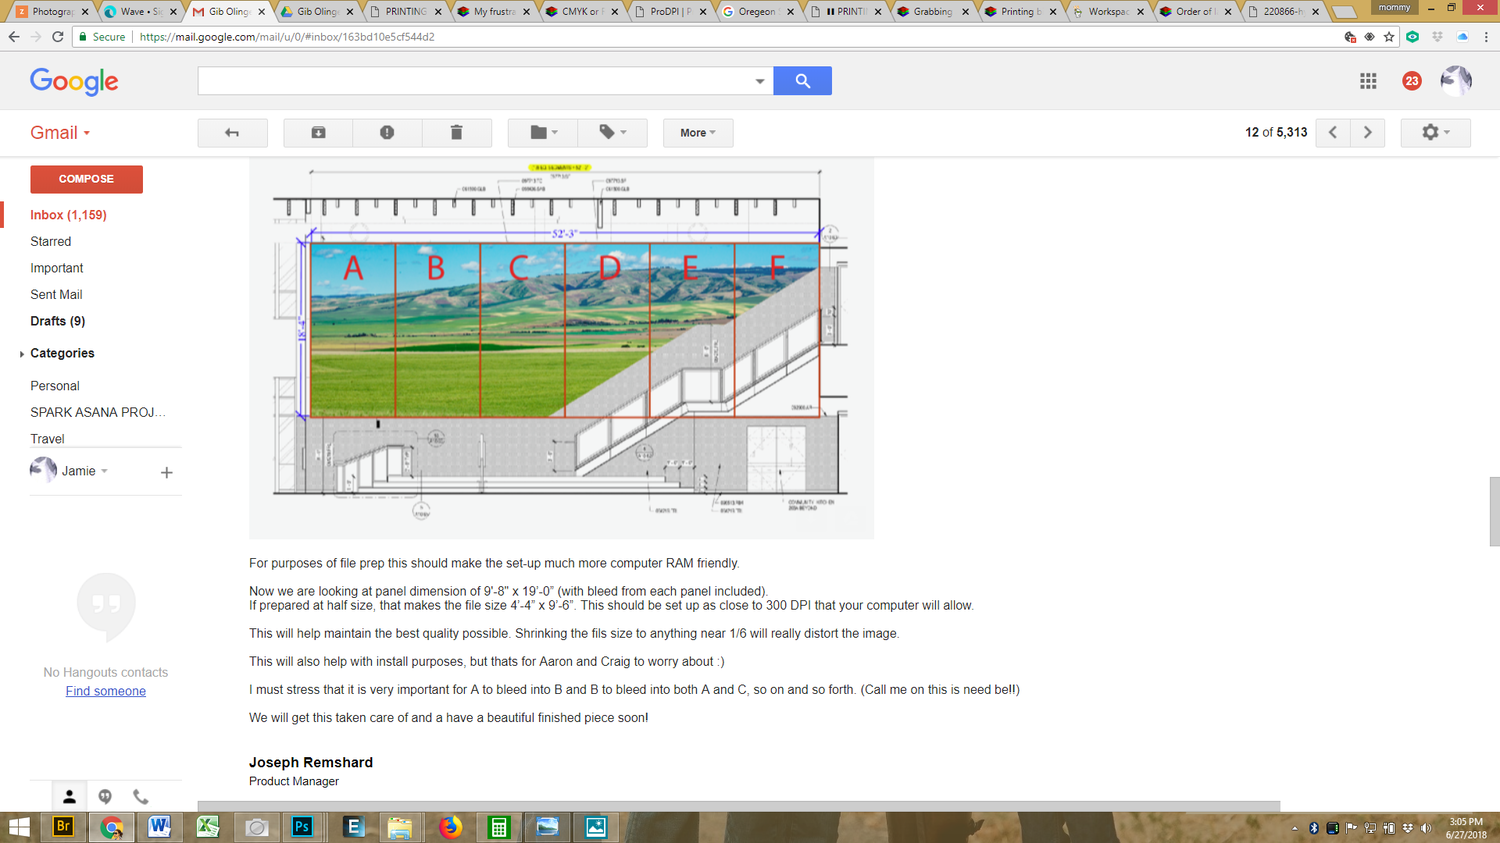
These were the last measurements I received (I believe they are NOT accounting for the 4" bleed I will need to double check) Full size: 636 inches by 189inches + 3/4" Half size: 318 inches by 94 inches + 3/8"
-
Thanks! Am I cropping at 100% size or 50% size?
-
Ok... they asked for 16bit, which is why I switched it from 8 bit to 16 bit in the first place. I do not remember how I did this nor do I remember how to change it back down to 8. Let me do some research...
-
Forgot to attach the screen shot of their idea on making each panel a separate photo.

-
A while back they had suggested that I actually create multiple images like a triptych (because I couldn't create one file large enough). I felt this was too daunting of a task at the time. I'm hoping with your help we can take this one single image and stretch it to the max!! Otherwise I don't know what I'd do!
-
I left off with the layered psd file, including the bottom layer being the healing layer I just removed all the dust specks with. Should I flatten this now or leave it as is for the next step? Still not sure what the best order of events is.
-
Ok, let's move forward then so I have an image that is printer ready if they ask for that. That way if they are unable to take the image to the printers as is, they have a solid final draft they can make the strike off from. The tech looked at it and said he thinks the image I submitted looks good, as compared to my previous sample. But I have not heard an official, "this is perfect we will print as is" yet. If you have time I'd love to take the next step then, based on your educated assumptions.
-
Oh, yes, then I do understand. This may have worked for this specific photo scenario if I don't need to make any adjustments to the background or stack any layers between them. But if I do, then I'm screwed. Alright, well I guess we are done here at this point? I have submitted a sample to them and without knowing any more about how best to crop or resize or what resolution to set it at or specific CYMK color profile I'm not sure how to proceed. Would you agree?
-
Hmmm... maybe I'm not understanding the pixel edits needing to be on the bottom... so why won't this layer work? Do I need to heal directly onto the background? Or how would I actually heal the background in a blank or merged layer?
-
"All of this assumes that they are competent Truth is, they might not have a damn clue. Make sure you read as many reviews as you can before choosing a printer for your press products. Make sure people are saying that they produce good work. The fact is, no matter what kind of files they ask for, you’re taking a massive leap of faith about their color-management. Some labs just have NFIWTF they’re doing. If they ask for RGB files, cross your fingers and hope it’s because they have very accurate CMYK profiles that they convert to. If they ask for CMYK files, make sure you ask all the right questions about the conversion."
-
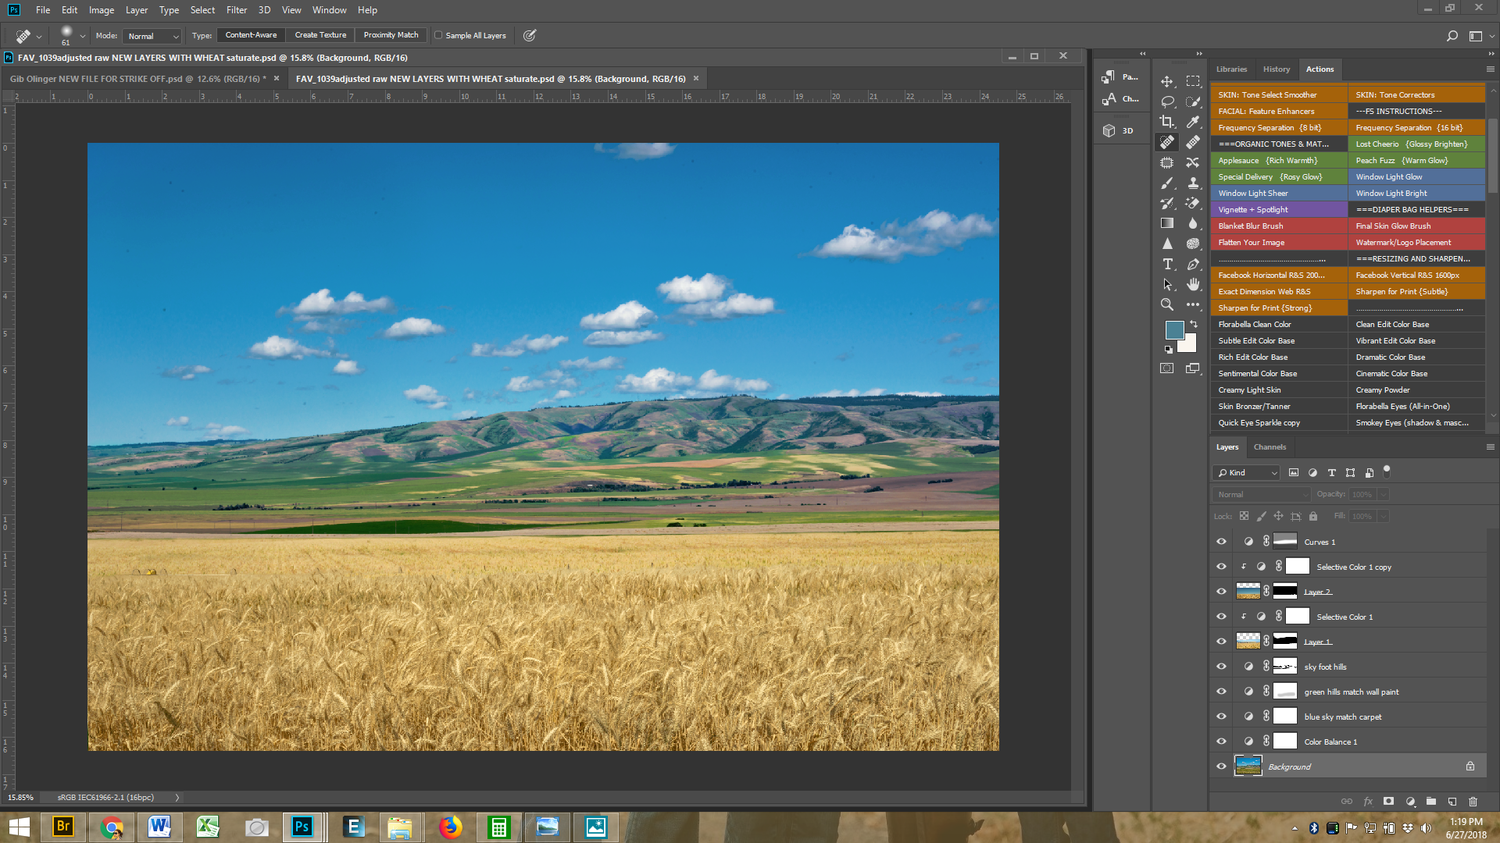
It IS the lowest layer. Most all of the sensor dust is located in top portion of the images (which is the bottom layer) the new layer of wheat is layered over the top of this image and the sensor dust specks were above (that has been masked off)... But in other situations where this may not be the case I will use your workflow steps.
-
Thank you for comment about photo, I meant to congratulate your son on 1st place, too! So, I did just go back and remove the spots on layered file, so that's taken care of. I tried the ctrl+alt+shift+e and it didn't work with healing tool, so I just ended up adding new blank layer and oddly it worked. I didn't think it would, but I can toggle the spots on and off now. I resaved the whole thing as a layered psd. I have NOT heard back from CYMK, what I think is happening is there is a 3rd party selling these fabric tracks who is not the actual company printing the panels... so they don't know as much as they need to. The gentlemen I've been communicating with is sweet as pie and I've been grateful for his help with giving me more info and troubleshooting along the way. (Even if it's limited knowledge.) He thought the default CYMK SWOP v2 was appropriate profile. Let's pretend for a min that this company doesn't know what they're doing. What would YOU do next to prepare the file? I'd love to get a step ahead of them and be DONE with this project. It's giving me a bit of PTSD and as much as I wanted to be a part of such a cool project I fear that every time I see this darn thing it's going to be a bit of a trigger emotionally if it's not done properly. It is going in my son's brand new school that's being built across the street from my photography studio. (Surmounting pressure because as you know it will be seen by thousands at ribbon cutting and by generations of children and parents for decades to come.)
-
I called the printing company and said I wasn't sure what step to take next, wasn't sure if I should clone spots on layered file (seemed reasonable) or if I should flatten then do it. He suggested flatten THEN remove... so now if I need to make any adjustments to layered sections I've lost all that fricken cloning/healing. I may as well go back and start doing it now to the layered file. Right above the wheat swap layer and right beneath my level adjustments... right?
-
If I have to clone out those effing sensor dust specks one more time I may lose it... I have done it to the image at various places FOUR times only to have to start from the beginning because of an overlooked or skipped step. FML. So, I did just read about your workflow right before you responded and wrote the steps out.

-
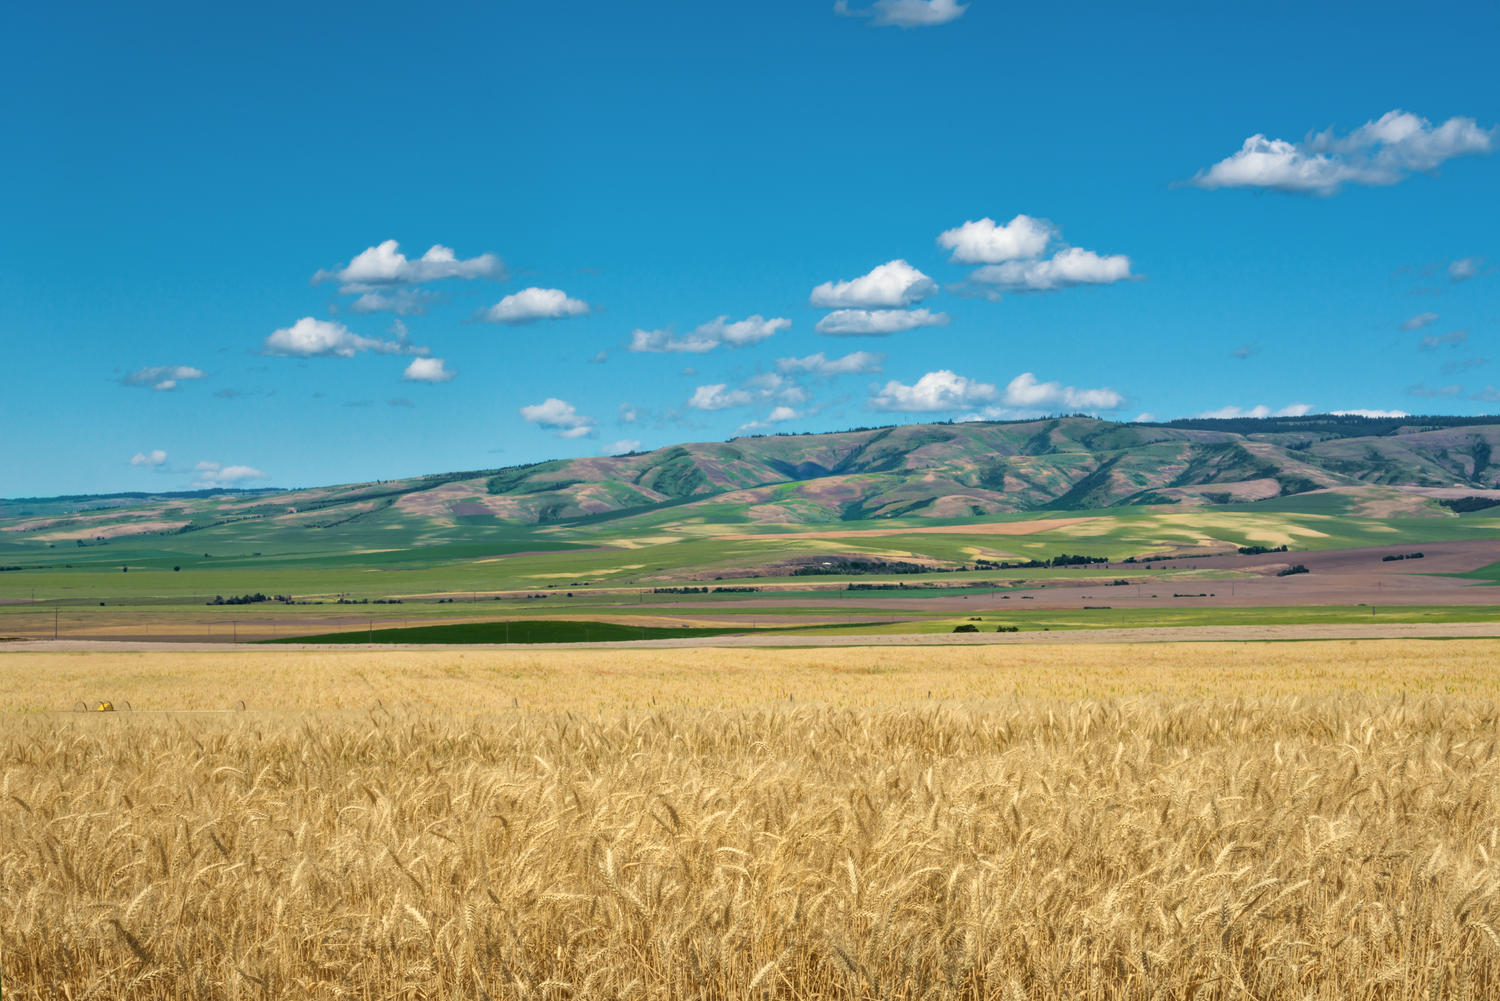
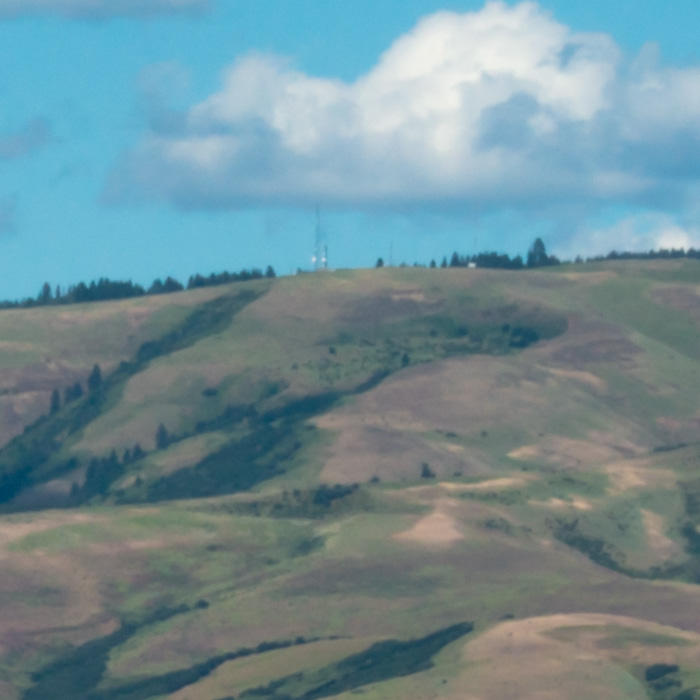
Also should note that on this NEW EDIT I just used the singular image, not a stitching of multiple images, because frankly I did not shoot it properly from the get go to truly take advantage of maximum pixels. (Meaning I did not shoot the area of the hill I wanted in the scene with a 600mm telephoto zoom lens and did not photograph that scene using 35 images that I could then stitch together to create one massive image at 25,000 pixels x 49,000 pixels.) So stitching together the 3 horizontal shots I took to only then crop it to the 1.25 image space that fits the wall appropriately may not have been working to my advantage in the first place like I had hoped. I did add a section of wheat in the foreground that was in focus to give more clarity to that section of the image since that will be what's at eye level and closest to viewers. So I now only have a "measly" 7360 pixels x 4912 pixels that will need to stretched to over fifty feet wide. I did not crop it to the specific section of the image, nor I did not sharpen it or adjust the ppi or resize the file at all, I also did not convert it's color profile. I just sent it to the printers so they attempt to do all that on their end (by their trained technicians) who will then find a 12x12 square that they will then stretch to print on a 24"x24" inch test strip of fabric to see what happens. At that point, depending on how it looks I may be either joining one of your classes or checking back to see if you have any further tips or tricks to see this project to completion... Lord, help me.

-
I'm getting lost in this thread, not sure how to address individual "quotes". But, here is where I am at. I have adjusted the layers to where I feel comfortable. I have saved this psd file. Now I have a flattened (unsaved) file... what comes next? Do I save this before moving forward as a jpeg? tiff? eps? psb? Do I now go through and remove all sensor dust from the image, or should I do this to the layered psd file prior to flattening? Do I crop to the appropriate size? Do I sharpen (knowing you are unable to give me advice on this without taking the class which I fully can respect)? Do I convert to CYMK? Are you able to tell me how to take this file and crop/size it to their exact specs of 4" bleed on all sides with the overall space needing to be 636" x189 3/4" or should I let them do the, converting to color profile, sharpening, cropping and resizing on their end?
-
Just heard back from the printing company, here is what he sent me: We can upscale the image so that the pixels themselves do not become visible as larger visible squares. In doing so the image does not get sharper or really higher resolution, but it won't be pixelated. After all, we are only as good as the resolution of the original photograph(s). I've not ordered the strikeoff yet, so if you want to upload an edited image and indicate where I should draw the strikeoff from, I'll crop out that part and order it tomorrow morning. The strikeoff will be 24” x 24” in dimension. Do you want to select a 12” x 12” area out of the artwork that will be doubled in size for the printing (matching what will occur in actual production) that will be submitted to the contractor and owner for review? It seems they have a pretty big focus on the clarity of the wheat.
-
I have not applied ANY sharpening in camera Raw while opening into PS, I did however in that first noisy version. Which is I think why I like it better than these last 2 non-noisy crop samples I posted. They just look so soft right off the bat. I know this is a landscape, taken from far away so there is not much that's tack sharp like the eyelashes I'm used to looking for. I suppose if the individual trees on treeline are defined that's the equivalent of the eyelashes on a face?
-
Ok how about now? It's at 36 for luminance and 27 for color and I also made adjustments to other sliders as well, like detail is cranked to 40. This is so time consuming, this project has been a beast to "volunteer" time for. :'( I will not move forward until you feel satisfied with noise removal because I moved ahead last night and painstakingly removed all sensor dust spots on an image that will now be trashed.
-
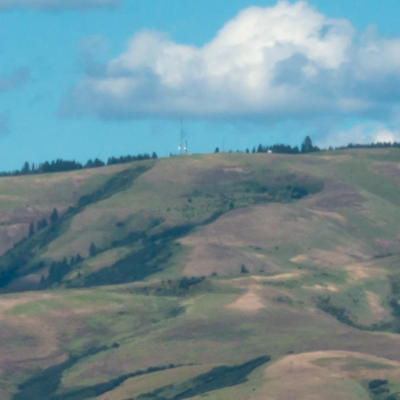
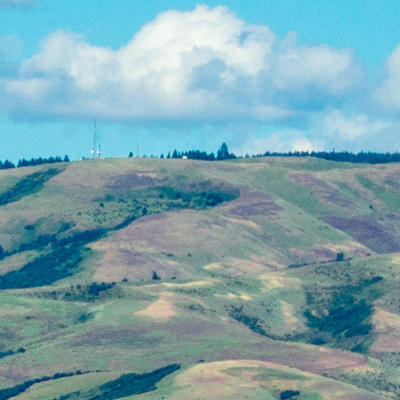
Ok here are the 700px 100% crops of both the "first draft" I was working with and the "back to the drawing board" version. The first Noisy one is from the sample I sent to printers I believe. The other one is the one I just went back to the raw and started from scratch... to eradicate the noise I really felt like I had to make it look awfully plastic like... hoping you're going to give me some tips at end on how to remedy that? Because at this point I like the first noisy one better because I can at least make out some of the details. Here are the settings I used for new edit: luminance=63, detail= 0, contrast= 0, color= 33, detail=16, smooth=4 Looking back at these numbers I'm worried I should have brought back some detail and contrast?

-
Ok, going back to the original files. Although my Camera Raw has like 10 sliders to tend to, not just the simple luminance and color.
-
I'm sorry I have an appointment in about 15 min. I may need to pick up later. If you have any more advice, a checklist for me that I can pick up where we left off when I return that would be awesome! I promise once this is all said and done I'll send you a photo of me standing in front of this GIANT 53 foot wall as proof your techniques work! Should I start from the original RAW files (narrowing it down to 2 since you've said I don't need more images stitched to get better resolution)? Should I use the edited sRGB files I posted originally for this? Or is there noise that I did not remedy when I converted them from RAW to JPG? Once I (stitch) edit those together, what's the next step? After all edits are made, flatten and save as what format? How do I sharpen, resize and crop to those specific measurements and at what ppi? Oh and WHEN do I convert to CYMK, I'll find out from them WHICH one specifically. Thanks for troubleshooting... I should have approached you THREE WEEKS ago when I started! You would have saved me a lot of time and headache and heartache. No good free deed goes unpunished, right? Dude, wait, how do YOU get paid?