Kiwiellis
-
Posts
76 -
Joined
-
Last visited
Everything posted by Kiwiellis
-
I have. But I am to the point in the class where I have to submit images for white balance and I just am having trouble finding good images to complete this. I printed out the colorbar sheet and used it to shoot a couple of sessions, and my white balance results are worse now than before when I was using my WhiBal white balance card, which I've used pretty predictably for years. So it feels like I'm kinda at the point where I can't really go forward.
-
I'm through the RAW class? What did I overlook?
-
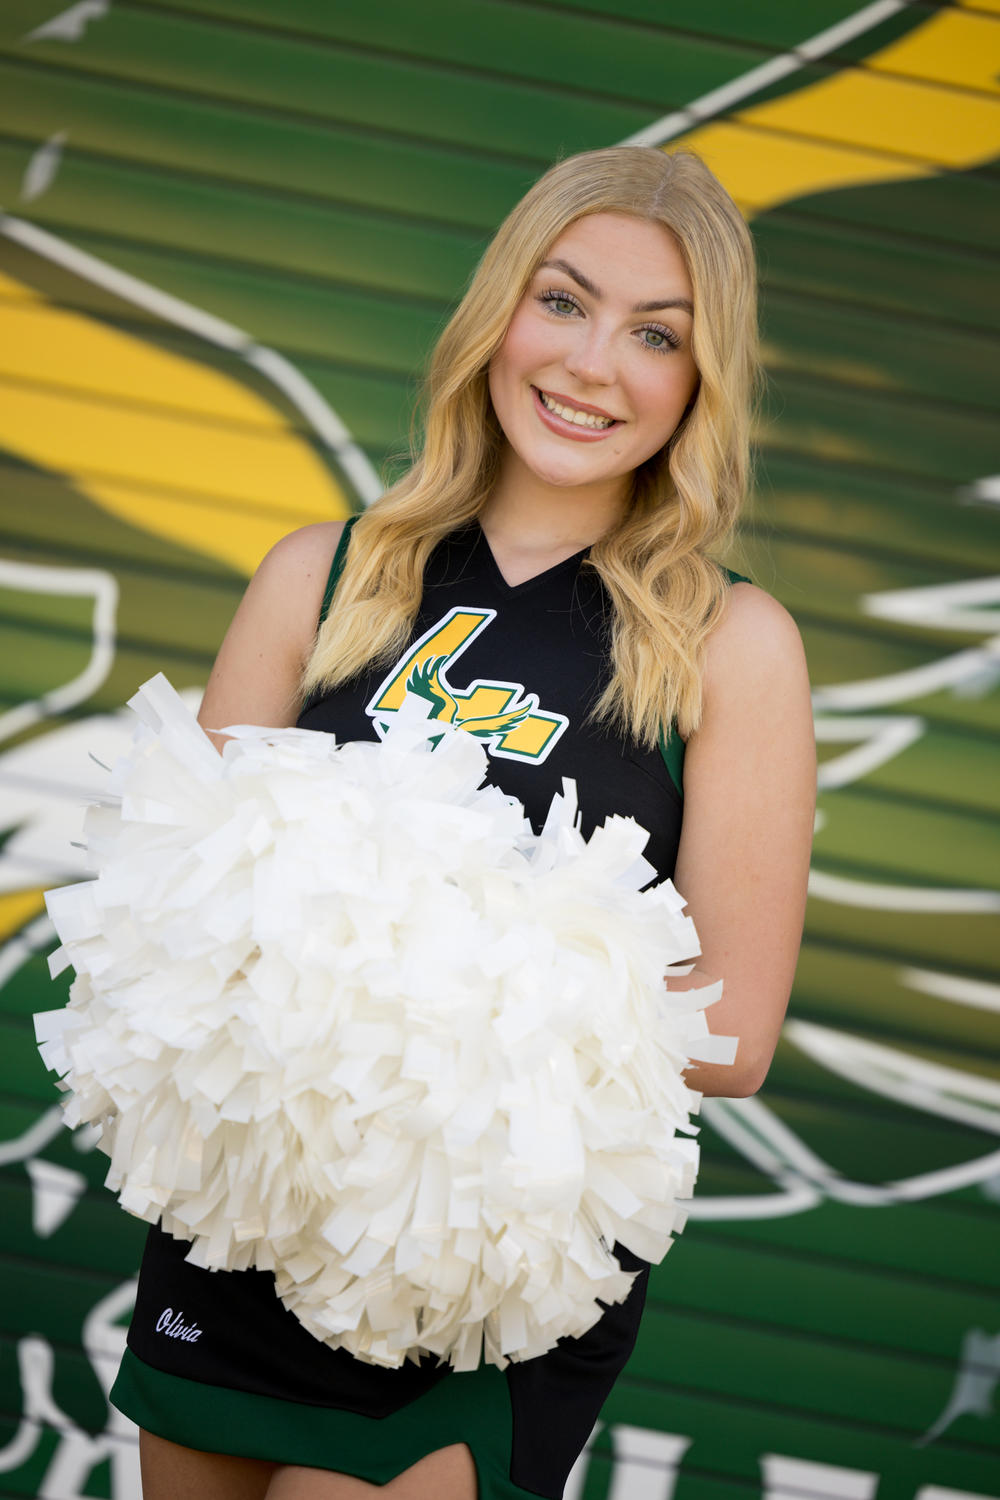
I'm having trouble fixing my daughter's dark roots on this photo. I used the Handyman Method. It looks fake to me. I'm not sure if it's the method I need to change or maybe I'm just using a bad color? In my attempts, it either ends up looking too gray/ashy, or too yellow. I feel like I can still see the "line", and the color looks too solid to me because normally her hair has both light and dark shades mixed. What method would you use to fix this?
-
Okay, I'm trying to post over in the Raw Deluxe Class Posting area, but the option to ask a new question or start a new topic is not available there for some reason. Any idea why?
-
Wow! The solid color layer looks great. I did a little cloning to remove the hard bra line, but the color is dead on. I really wish I understood color like this. How can I get better in this area? Are you able to explain how you arrived at the exact color for that? Because I've got several images in this dress that I am going to have to fix. And with the images being at different locations and lighting, they are not all going to be the exact same color I don't think. And speaking of me being terrible at color, ? I did not even realize how off the White Balance was in the first one until I saw these two pics side by side, so I adjusted the white balance on the first image when I re-developed it. This is the SOOR of that one.

-
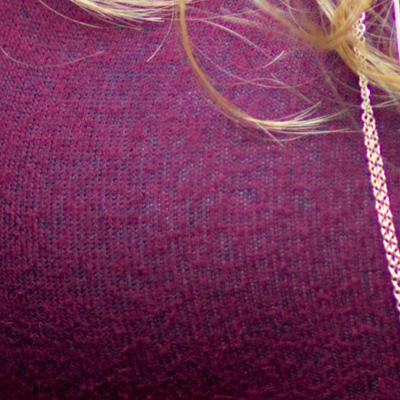
Actually, here's an even better picture of the problem, on a different image. I have done no editing at all to this one yet, but this one makes the problem much more obvious.
-
? Here you go
-
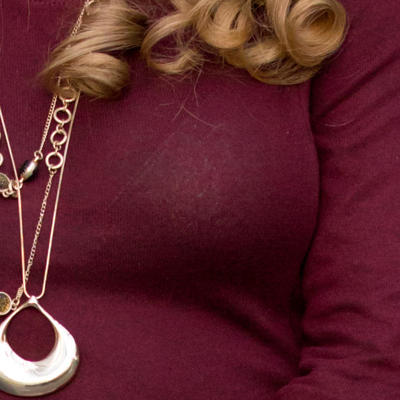
My client has asked me to edit out the white color of her daughter's bra that is kinda showing through her sweater dress. I don't know the best way to do this. I created a new layer and changed the blending mode to color, then sampled the color of the sweater dress and painted that color over it with the brush mode also set to color. It's very subtle and it didn't quite get rid of all the whitish color showing through, I don't think. What is the best way to accomplish what I'm trying to do? I'm attaching a before and after pic of the fix I attempted. Honestly, it's hard for me to completely see what my client is talking about - I think some of what she is seeing is just the lighting, and it's lighter in the areas facing the light source? I may have been looking at this way too long. LOL


-
File too big to save
Kiwiellis replied to Kiwiellis's topic in Photoshop / Elements / Bridge / ACR questions or problems
Okay found it. I was looking for "PSB". I usually edit in 16-bit just to keep quality high while I'm editing and then usually convert back to 8-bit when I'm finished. Do you think 16-bit is not necessary? -
File too big to save
Kiwiellis replied to Kiwiellis's topic in Photoshop / Elements / Bridge / ACR questions or problems
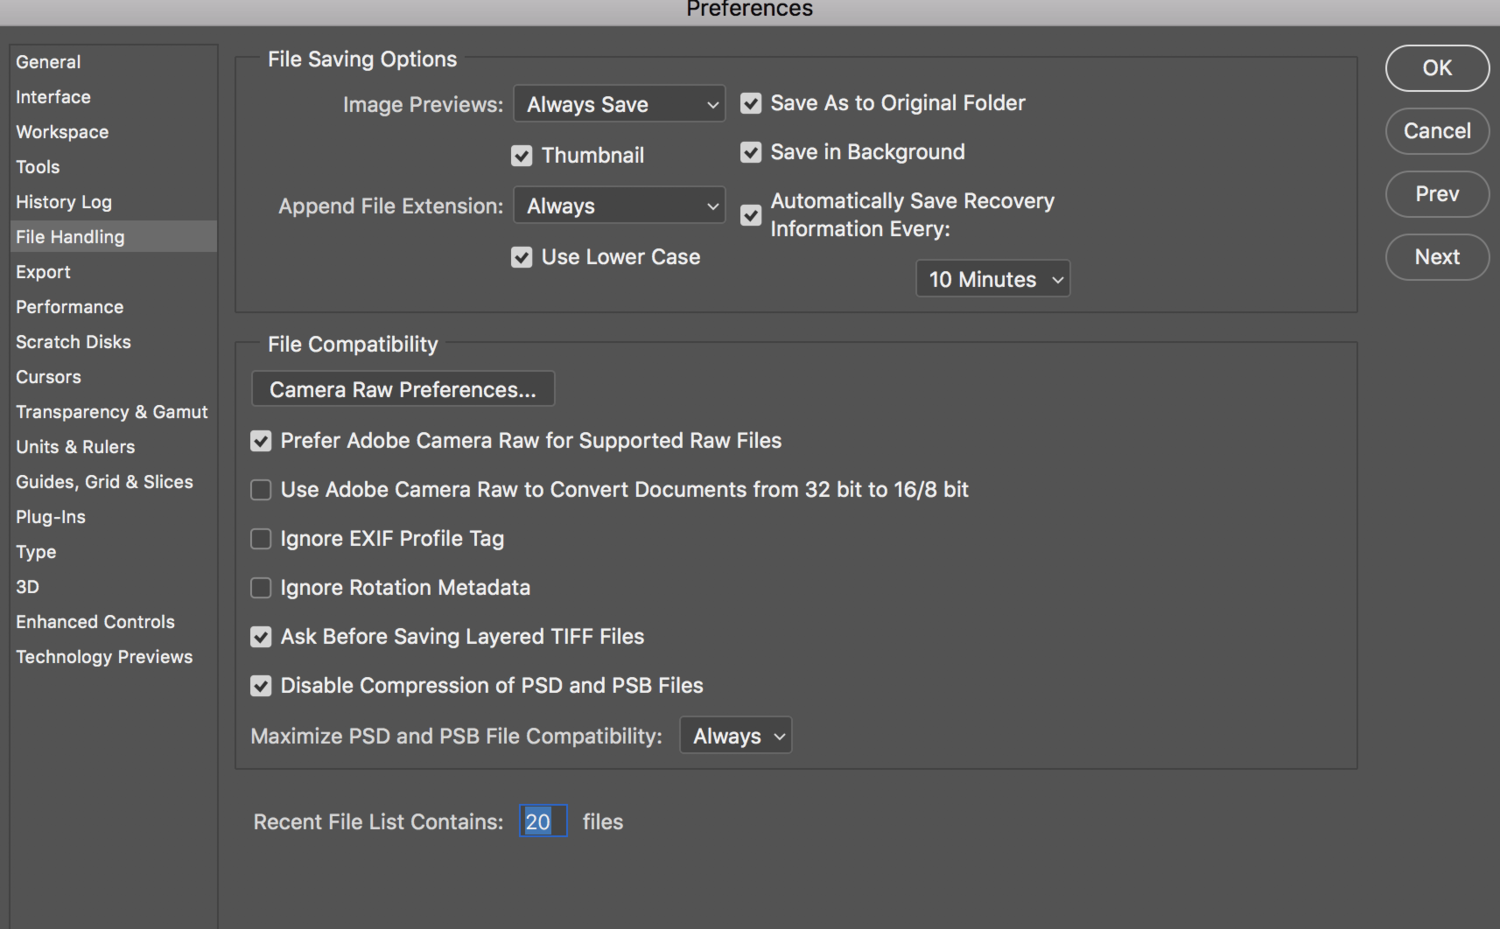
Here's what my File Handling Preferences look like currently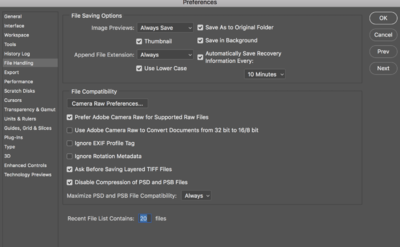
-
File too big to save
Kiwiellis replied to Kiwiellis's topic in Photoshop / Elements / Bridge / ACR questions or problems
Oh yes, you are right - I'm working in 16-bit, so that is why it's so huge. I did not even know what a PSB file was. Do I need to change something in my settings to be able to do this? I don't see PSB as an option in the save dialogue box. -
It's been a while since I've done any heavy editing in photoshop, but 'tis the season, and I am having a problem. I am in Photoshop CC, and I've just completed all my levels edits. I've been saving my file as I went, but I guess I added too many layers, and now when I try to save the final file, it tells me that the file is over the 2GB file size limit so it cannot save it. I do not remember ever running into this before CC, and if I did it was because I had too many pixel layers. In this particular file, there are only 2 pixel layers - my original and one other editing layer. The rest of the layers are either levels or curves layers. There are 17 of those layers. Is there a way I can save this file without having to merge any of these layers? I don't want to lose the ability to go back and change stuff later. Sometimes with fresh eyes I'll realize I pushed something too far, etc. I don't know why this is all of a sudden an issue, but I'm hoping I can adjust a setting or something somewhere and it will allow me to save it?
-
Realistic fog or mist effect
Kiwiellis replied to Kiwiellis's topic in How to achieve a certain look or effect
I've tried a few times and I can't come up with something I'm happy with. Just looks hazy and not real to me. I guess I should've sprung for the fog machine. In-camera is always better...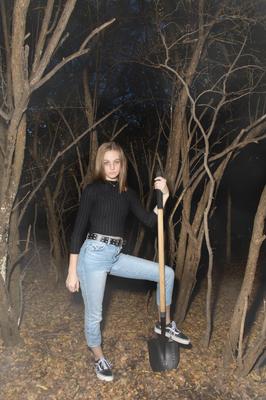
-
Realistic fog or mist effect
Kiwiellis replied to Kiwiellis's topic in How to achieve a certain look or effect
Awesome! Thanks, guys! Gonna play with this now... -
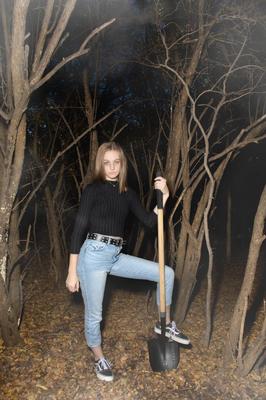
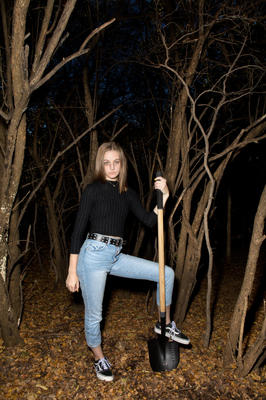
Is there a somewhat realistic way to add a spooky fog/mist effect to this photo? We did a series of photos in the woods and we are going for a dark, kinda spooky effect for all of them. We were on a low budget, so no fog machine. LOL The look we were going for is that she is eliminated by headlights and burying something in the woods. Was thinking if we could realistically add some fog or mist that it would add to the darkness and spookiness of the images. If you think this can be done, how do I even start?
-
So how will I know how to set the values for the channel mixer layer for the other background colors she wants? On the next image I'm doing for her, she wants blue.
-
Thank you so much! I'll play with this today!
-
That's great!
-
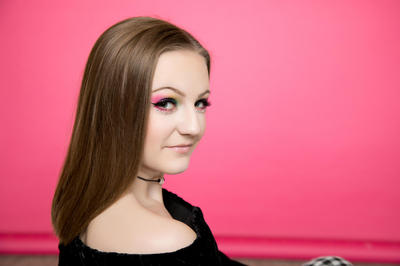
I think it might need to be a little more golden yellow to match the smidge of yellow eye shadow above her right eye. But wow! Ok, so how do I do this? Did you extract her, or just mask her? I've got quite a few other shots from this shoot, and she wants them all with different color backgrounds. Had I known I would've shot on white instead of that awful pink. But can't reshoot now.
-
What's the best way to change the color of this background to bright yellow? I've been trying to follow the tutorial "extracting subject from green background" because of the hair. I can't seem to get a clean black & white mask - can't seem to get the background to go completely white and her to go black on the levels layer. Is this the best method to use in this instance? If so, do the values on the channel mixer layer need to change based on the particular image. I played around with the sliders to try to get more contrast than the 0/100/0 was giving me. Any direction you can give would be so appreciated. I have a feeling I'm making this way harder than it needs to be.
-
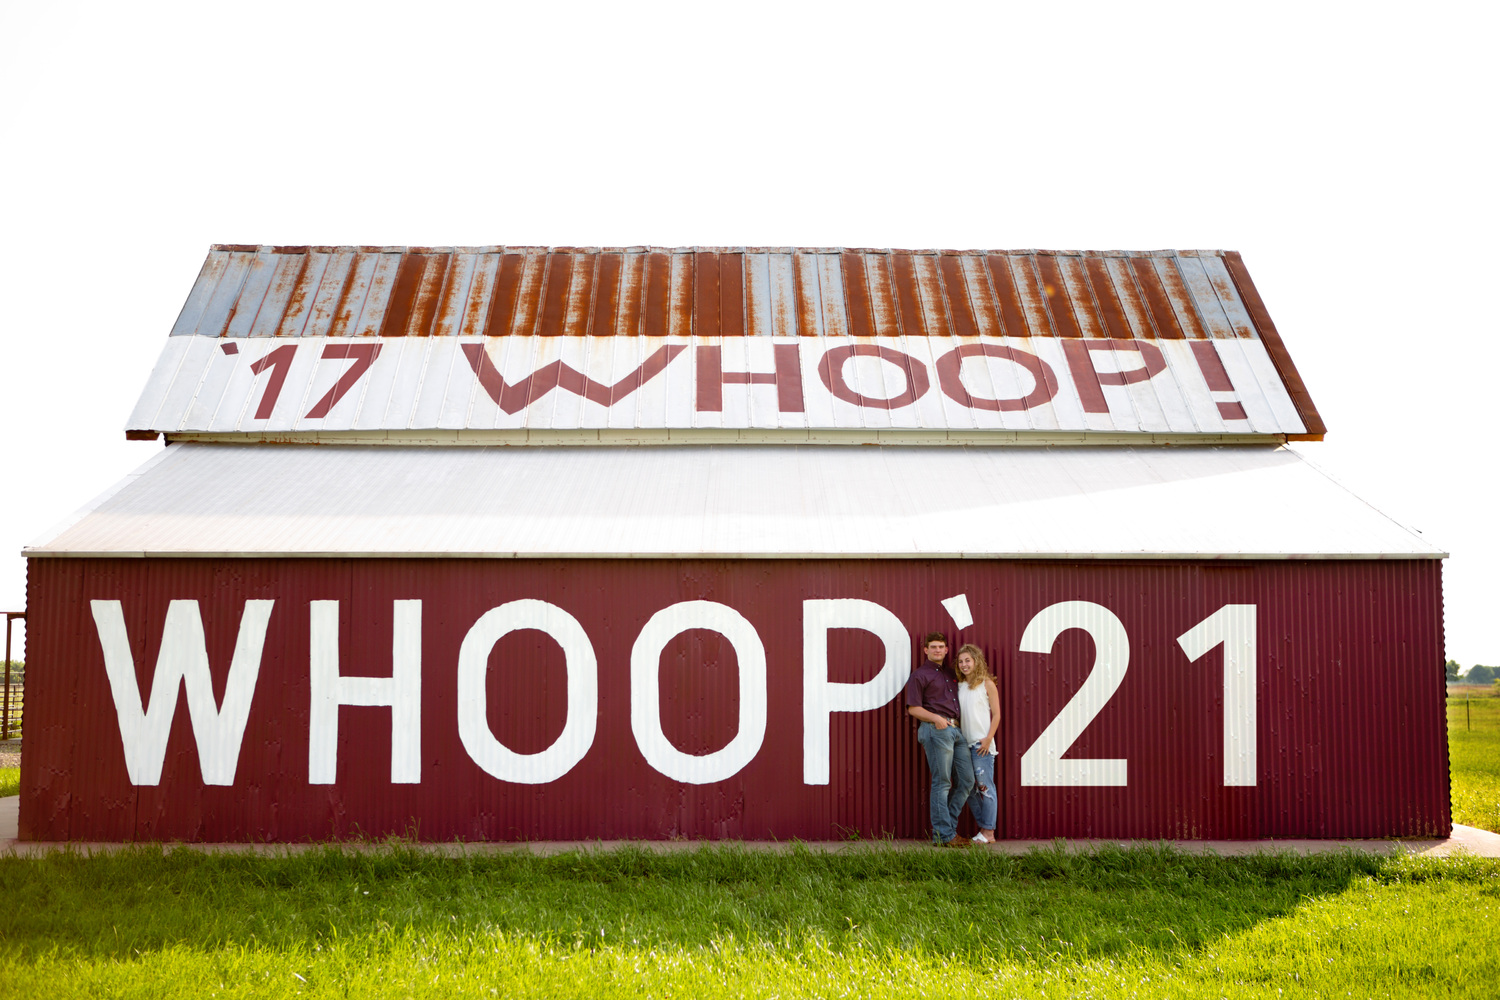
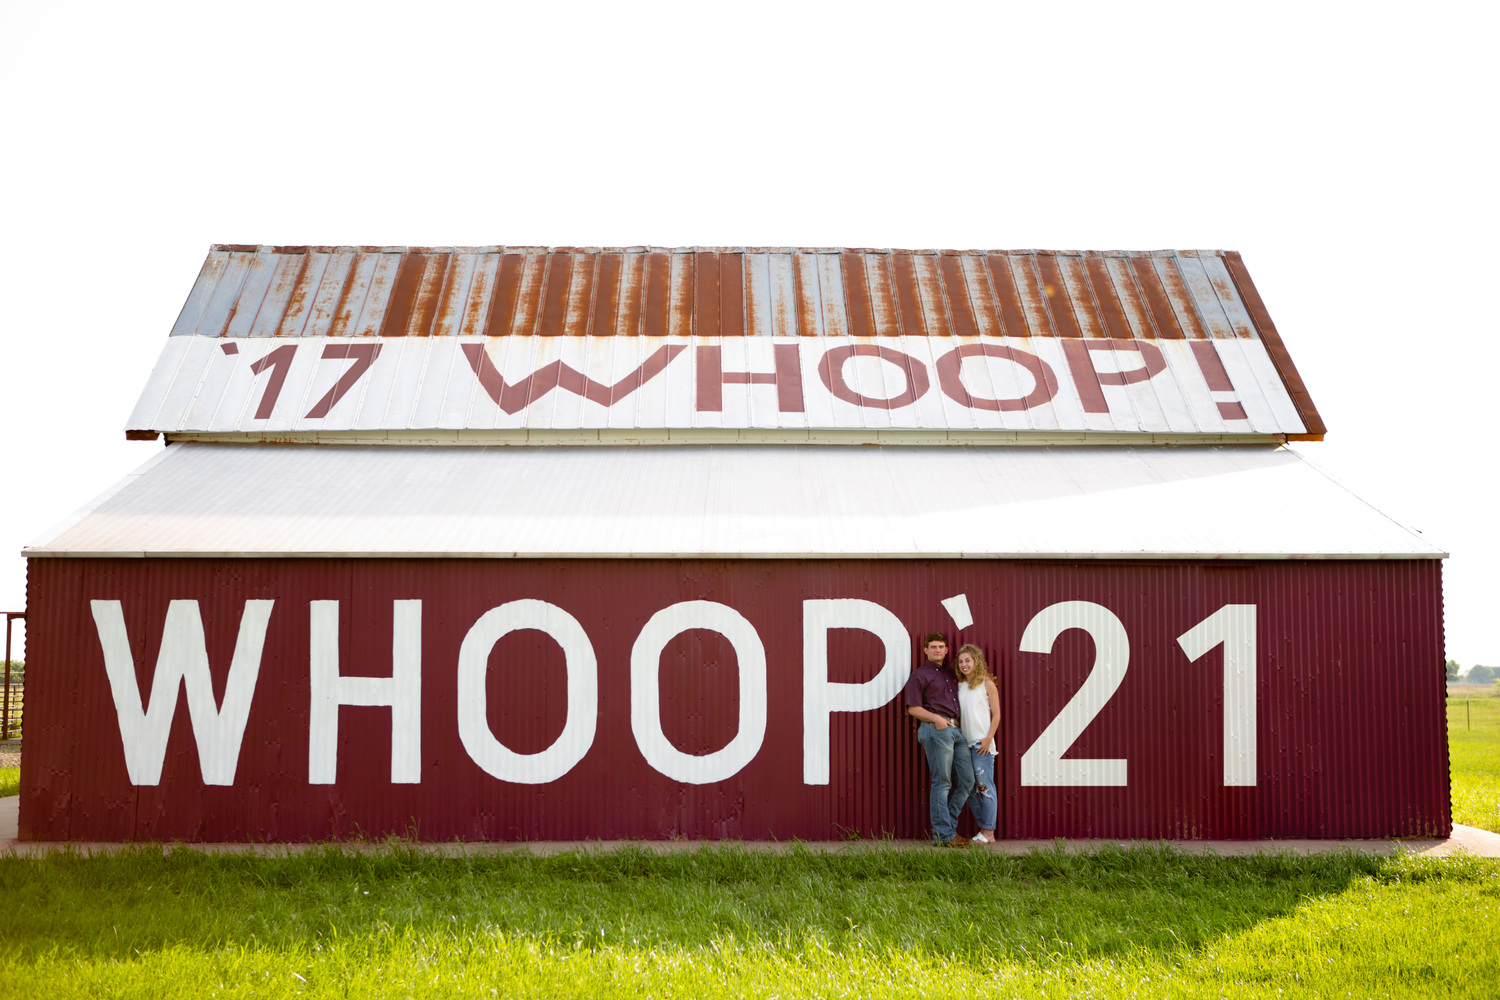
Best way to change painted numbers on a building
Kiwiellis replied to Kiwiellis's topic in Help with editing
It's a phrase they say for Texas A&M University. From the Aggie Glossary: "Whoop!: Aggie upperclassmen say this as an expression of approval. Freshman and sophomores are not supposed to say it." LOL Thanks so much for your help! -
Best way to change painted numbers on a building
Kiwiellis replied to Kiwiellis's topic in Help with editing
I'm having a hard time seeing the green you are talking about. I took a little out though. Did this help?
-
Best way to change painted numbers on a building
Kiwiellis replied to Kiwiellis's topic in Help with editing
Better?
-
Best way to change painted numbers on a building
Kiwiellis replied to Kiwiellis's topic in Help with editing
I was matching the apostrophe and the original '18 was darker too. But I agree - might as well try to match it better. How about now?
-
Best way to change painted numbers on a building
Kiwiellis replied to Kiwiellis's topic in Help with editing
Okay, how about this?