Abak671022
Member-
Posts
137 -
Joined
-
Last visited
Everything posted by Abak671022
-
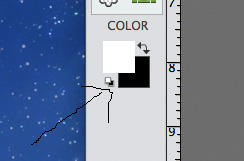
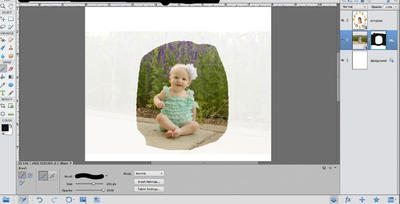
Thank you soo much for this help! I have started placing my first photo and I'm noticing a problem. I'm not sure if this is something I should take to the layers and masks class, but I'll ask it here and if it needs to be moved just let me know. I was masking the first photo and when I turned off the scan layer to check the masking, I can still see the edges of the original photo (though the opacity is extremely low where I had roughly masked over where the other photos will sit. I'm attaching a screenshot of my layers panel with the scan layer turned off so you can see what I mean. I had the brush opacity set to 100% and it isn't a soft brush either, so I'm not sure exactly where I'm going wrong. I also checked my colors to make sure they were set to default black and white.
-
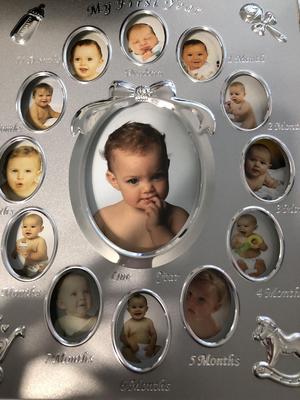
I haven't checked my lab lately because it's been awhile since I printed anything, but the glass in the frame is 9.25 x 11.25 so that would be sort of an odd size for a print. I measured the paper that is included in the frame and from the top of the top photo (newborn) to the bottom of the 6 month photo is 9.75 in and from the far left of the 9 month photo to the far right of the 3 month photo is exactly 8 inches so an 8x10 could potentially work. I'm not opposed to doing one 8x10 and taping it to the glass if it would be easier to get a more uniform appearance to the photos.
-
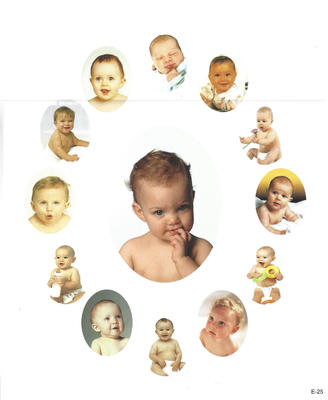
I have 2 composite frames that were gifted to me that I would like to fill with photos I've taken of my daughters. All of the images I plan to include in the frame are similar, but they were taken months apart, obviously, so they are all composed slightly differently. What is the best way to print these for the frame without having to do tons of trial and error as far as size of print? I know each image will ultimately have to be cut down to size for the frame after printing, but if I printed each image in a 4x6 size, I can't guarantee the pictures will all look uniform after cutting if that makes sense. I'm drawing a blank as to what to do. I'm attaching a photo of the frame so you can see what I'm talking about. Thanks!
-
Richer colors in beach photos?
Abak671022 replied to tropicmom's topic in How to achieve a certain look or effect
Thank you so much! -
Richer colors in beach photos?
Abak671022 replied to tropicmom's topic in How to achieve a certain look or effect
Hey Damien, I tried to download this PSD and open in Elements but it just shows a folder next to the layer mask so I can't actually see the steps you took because the folder won't expand. When I hover my mouse over the folder it says "indicates a set." Is this because I have elements? Is there a way to duplicate this effect in elements? Thanks in advance! -
Richer colors in beach photos?
Abak671022 replied to tropicmom's topic in How to achieve a certain look or effect
I ❤️ this! Thanks for sharing..can't wait to try this on a few of my favorite beach photos. -
Sure thing I will post there next, but didn't want to spend any more time if it wasn't worth it
-
-
Well it was a group of photos from my maternity session...I had actually pulled one of the pics from the session to practice in the RAW class. All the photos from the session were pretty terrible (I pretty much handed the camera to my MIL and didn't really check the settings until we were done bc the mosquitos were getting us pretty badly...so I know they didn't get switched from RAW) but there were a couple of our family and then one of me and my daughter that I wanted to try and salvage...I did use one of the family pics in the RAW class but the one of me and my daughter is the one that's exporting as a .jpg. I had cropped the picture in Photos to send to a family member but even after I clicked the "revert to original" it still didn't give me the raw
-
I have some old photos that I have on a laptop that were imported off my camera's SD card directly into iPhoto/Photos (not sure at what point they were imported whether it was before or after the switch). I know..I know this is bad. Anyway in the past when I have found a photo I wanted to deal with I've just "exported original file" and the .nef file is exported from Photos. I've come across a couple of photos from a session I know were all taken in RAW, but now when I try to "export original file" from Photos, all I'm getting is a .jpeg file and some associated .aae files with the same img name as the .jpg files. Anyone had this happen before? Where are my RAW files? I have other backups I can probably dig up from somewhere as well as the original SD cards the photos were taken on, but they aren't as easily accessible at the moment. Thanks for any info you might have on this Ashley

