Silvia2
-
Posts
17 -
Joined
-
Last visited
Everything posted by Silvia2
-
Brightness step missing
Silvia2 replied to Silvia2's topic in Monitor calibration questions or problems
Hi Damien Thought you'd be interested in my solution. Been researching a lot on Google the last few days and trying out all kinds of things to find a solution to my calibration problems, made a few discoveries for this specific monitor model: 1) The custom preset mode is notorious for being very unreliable and glitchy for calibration. Should not be used. Standard preset has been recommended. 2) There's a hidden menu! Once accessing it, I can reduce brightness for any preset mode by tweaking the preset's RGB values in the hidden menu, without having to go into the custom preset. 3) Recalibrating using the Spyder software and hidden menu and standard preset (6500K) where I tweaked its RGB values: colours better but reds still too saturdated, gamut test much better, sRGB= 100% ! However, I still wasn't totally satisfied. 4) I stumbled across DisplayCal (https://displaycal.net) last night, via a forumn, installed it this morning and ran a calibration with it using my Spyder4 Pro device. RGB values tweaked using the hidden menu and standard preset. Calibration ran a long time, maybe 45min. The match with my prints is amazing (best yet). I think my sRGB is 99%. And look at the gamut test! DisplayCal has been a calibration saver for me! So it seems I can keep my monitor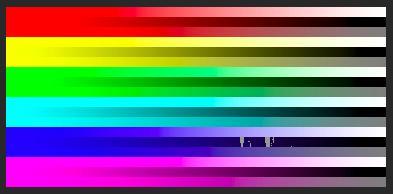
-
Brightness step missing
Silvia2 replied to Silvia2's topic in Monitor calibration questions or problems
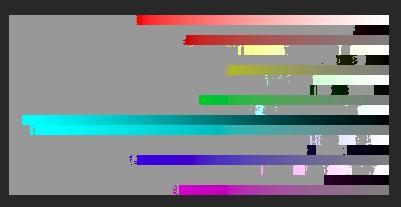
I do love my monitor, so I hope I can work out the calibration problems. I'll see if I can find someone with a monitor and test my calibrator. I've now tweaked the RGBCMY saturation sliders and recalibrated (using gamma 2.2, white pt = native, brightness = native), images match my prints quite well, but now once calibration is completed the spyder software shows me that my new calibration is 70% sRGB (which I guess is understandable if I've fiddled with the saturation values). With the usual calibration where saturation is untouched the calibration was 100% sRGB. Does this matter hugely? 1 step forward, two steps backward... I did your gamut test quickly, see attached
-
Brightness step missing
Silvia2 replied to Silvia2's topic in Monitor calibration questions or problems
I do love my monitor, so I hope I can work out the calibration problems. I'll see if I can find someone with a monitor and test my calibrator. I've now tweaked the RGBCMY saturation sliders and recalibrated (using gamma 2.2, white pt = native, brightness = native), images match my prints quite well, but now once calibration is completed the spyder software shows me that my new calibration is 70% sRGB (which I guess is understandable if I've fiddled with the saturation values). With the usual calibration where saturation is untouched the calibration was 100% sRGB. Does this matter hugely? 1 step forward, two steps backward... -
Brightness step missing
Silvia2 replied to Silvia2's topic in Monitor calibration questions or problems
OK thanks. I've been struggling for weeks and it is very fiddly. I"m at the point of considering to replace my monitor for something easier to calibrate ? Any recommendations that's not too expensive (I bought my current one second hand so it was affordable). HDMI -
Brightness step missing
Silvia2 replied to Silvia2's topic in Monitor calibration questions or problems
Hi again Damien I've sorted out my light problem I think. I've now recalibrated to be able to note down the exact steps I need to follow for this monitor, so it's repeatable on a monthly basis (this monitor is not easy to calibrate, more so because I have to use the sutom mode to be able to use lowered brightness! ). I can't get the colours right again, too warm/yellow. In your notes somewhere you say then to adjust the rgb sliders for the monitor to make it cooler, because the max white point given by Spyder is 6500K. I've only been adjusting RGB in the "Gain" menu of the monitor. Can I also adjust RGBCMY in the monitor's "saturation" menu? I feel the colours are too saturated. Is adjusting the monitor's contrast also an option or should I not touch this at all? Thank you so much. *custom mode -
Brightness step missing
Silvia2 replied to Silvia2's topic in Monitor calibration questions or problems
Thanks Damien. No I haven't tried moving it around but I will try. But I've jus had another photographer friend visiting and he agrees my CW globes are not cool, definitely not 6000K. So I'm pretty sure this is the problem and I'm aiming to have new cool down lights installed. -
Brightness step missing
Silvia2 replied to Silvia2's topic in Monitor calibration questions or problems
Hi Damien This is rather a late reply , I got side tracked by two large contract jobs back then, which have now come to an end. So I have time again to focus on my photography. Thanks very much for your info on how to get my screen birghtness down. I moved the RGB sliders down to 50 and it helped!! I have now spent so many hours and days working through all your calibration notes and following all the steps, I had new photos printed from my lab just to be sure, I've calibrated at night in the dark. Using Spyder 4 Pro. I just can't get it quite right and have come to the conclusion that it's quite likely my light. Why I say this is when I compare my prints to the images on the screen: In my usual lighting conditions my prints look darker and colours not quite similar (and less contrast), but then as a test I thought I'd shine my cell phone torch light on the prints and I could then see what I see on the screen (colours and contrast are almost a perfect match). I have two fluorescent "CW" globes but they look slightly warm to me (1110Lm, so with two I supposedly have 2220Lm but it doesn't feel very bright to me). I took the globe to the lighting shop and they told me that CW means 6000K (I'm not convinced though because it really doesn't look cool). I wanted to get a globe of 4000-4200K but to no avail (still looking), however, this would make my room even warmer (if I'm to believe my CW globe is 6000k). I feel it needs to go cooler. We don't have the best lighting shops around so unfortunately I'm not able to make much headway with asking them things or being able to find the correct product. Anyhow, my light is not right above me, it's about 1-2m to the right on the celing. Should I aim to get a light right above me? Am not sure where's the best placement for the light. What is the best colour for walls - would 15% grey be acceptable? Thanks very much. Silvia -
Great thanks! I am quite knowledgeable with layers and masks but I'll check the description to see if I'm missing anything.
-
Hi Damien Which of your classes would you most recommend for photo restoration and colourisation, please? Thank you. Regards Silvia
-
Brightness step missing
Silvia2 replied to Silvia2's topic in Monitor calibration questions or problems
Thanks, I understand now!! The colours seems to compare quite well. I may have to go a tiny bit warmer. The screen is brighter than the print - nothing I can do about that because my brightness is on 0. Pity the screen has this drawback. Thanks very much for your assistance! -
Brightness step missing
Silvia2 replied to Silvia2's topic in Monitor calibration questions or problems
I will need to redo my prints next week, due to above misunderstanding. -
Brightness step missing
Silvia2 replied to Silvia2's topic in Monitor calibration questions or problems
... So the aim is to get the on screen colours to look close to the print and if they don't to change preset until it's close. and thus no colour profile required.... (which would be great). Was just confused by your article on soft proofing. But I think I understand what you mean now... slowly getting there (sorry for the hassle) -
Brightness step missing
Silvia2 replied to Silvia2's topic in Monitor calibration questions or problems
I guess for brightness it doesn't, but what about checking the colours (at the end of your instructions Part 12 you have a section on colour). If I print without softproofing then the printed colours will look different to what is on screen surely? -
Brightness step missing
Silvia2 replied to Silvia2's topic in Monitor calibration questions or problems
Ok I see, thanks. And I would compare based on using the printer's colour profile in Photoshop. -
Brightness step missing
Silvia2 replied to Silvia2's topic in Monitor calibration questions or problems
Hi again. I've now gone through the proper calibration process and when I got to the brightness, my brightness reading was too high. I've now reduced brightness to zero and the reading is 109-111. I can't reduce brightness below zero. Is it ok as is? Many thanks... -
Brightness step missing
Silvia2 replied to Silvia2's topic in Monitor calibration questions or problems
Thanks Damien!! I followed the re-installation steps, after a few hick-ups (seems to be a bit temperamental) the brightness step now seems to work . Have kept it at the original software version of 4.5.4. Will try update to 4.5.9 later and see if it changes anything. -
Hi I've just followed the Spyder 4 Pro instructions (software version 4.5.9) for calibrating my desktop screen (Dell U2410). Everything worked perfectly except for the step where the spyder is supposed to measure brightness and then pause and give you the measurement (which should be between 70-110 as recommended in the instructions, and if not you should then have the option of adjusting the brightness until it falls within this range). My calibration process does not pause and gives no brightness value, it just works straight through the calibration process until it asks you to remove the spyder and press Finish. So I have no idea what my brightness measurement is. Anyone know why this is happening? When I previously used my Spyder on a laptop screen with an earlier software version I did get this step. Thanks