Control Z
-
Posts
43 -
Joined
-
Last visited
Everything posted by Control Z
-
Wide gamut changes?
Control Z replied to Control Z's topic in Questions about tutorials and articles
But of course! -
Wide gamut changes?
Control Z replied to Control Z's topic in Questions about tutorials and articles
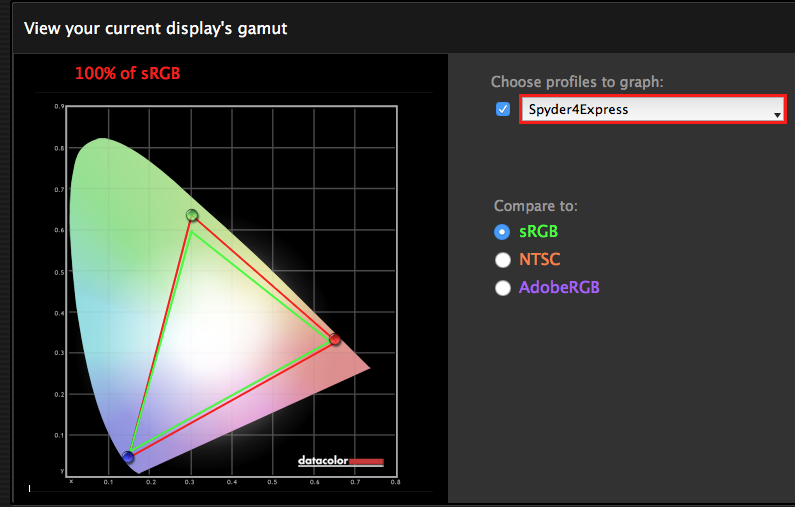
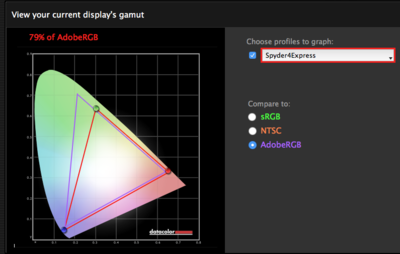
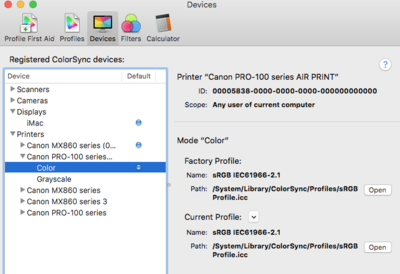
Thanks, this is all so confusing, especially since I can't find anyone else out there on the internet that agrees with you, though what you say makes perfect sense. If I'm printing to a printer that prints in a wider gamut, wouldn't I not get all I could out of that printer sending it sRGB files? Especially if I had a high-gamut monitor? In my case, even if the printer could print those colors, I wouldn't be able to see it while editing since my monitor can't display it, so I guess you would say there's no point in trying. But in any event, it doesn't look like my screen or printer do much more than sRGB. I did some subsequent investigation on my own system: (1) after calibrating with Spyder Express, it shows that my monitor profile is around 100% of sRGB; (2) my monitor profile is only around 70% of Adobe RGB; and (3) my Canon Pro-100 printer profile is sRGB.
-
It seems that many new computer screens display a wider color gamut than a few years ago (like Microsoft Surface, Macbook Pro, iPad pro, etc.). If you have a wide gamut screen, do you still advise staying in sRGB the whole way through? I assume yes, but is that based on the fact that most printers and a good portion of other people's displays are not wide gamut yet? And do you know whether high-end inkjet printers are limited to approximately sRGB or if they approach Adobe RGB?
-
I usually shoot raw+jpg. Is there a way to just view one of the files (raw or jpg), but add metadata to both of them? For instance, when culling images, I don't want to see doubles, but want to add a star rating to both the jpg and the raw file simultaneously. On certain kinds of shoots, the SOOC jpg will suit my needs with little need for editing, like for family photos/snapshots, but other times the raw file of course is preferred. Aperture did this very well, but Lightroom seems to treat the raw/jpg pairs as completely separate files.
-
OK, thanks.
-
Is there a way to see if other raw processing software displays an sRGB histogram? For instance, I've been trying out other software like Corel Aftershot Pro 3 and Apple Photos, but can't tell what color space it displays in.
-
ACR adjustments in LR catalog?
Control Z replied to Control Z's topic in Lightroom questions or problems
You should be careful whom you trust. Nope. I'll try that. -
ACR adjustments in LR catalog?
Control Z replied to Control Z's topic in Lightroom questions or problems
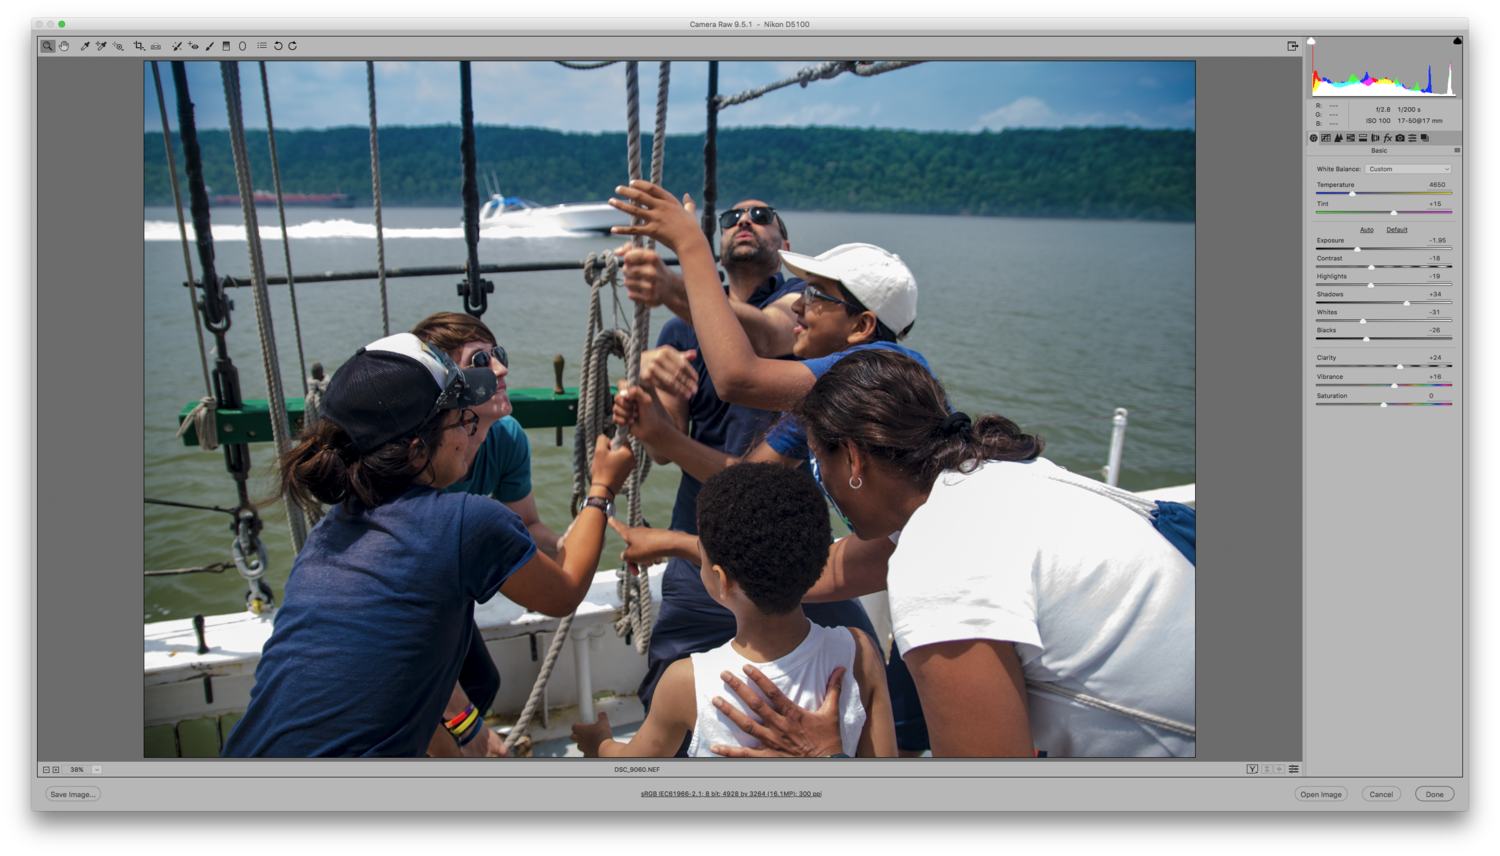
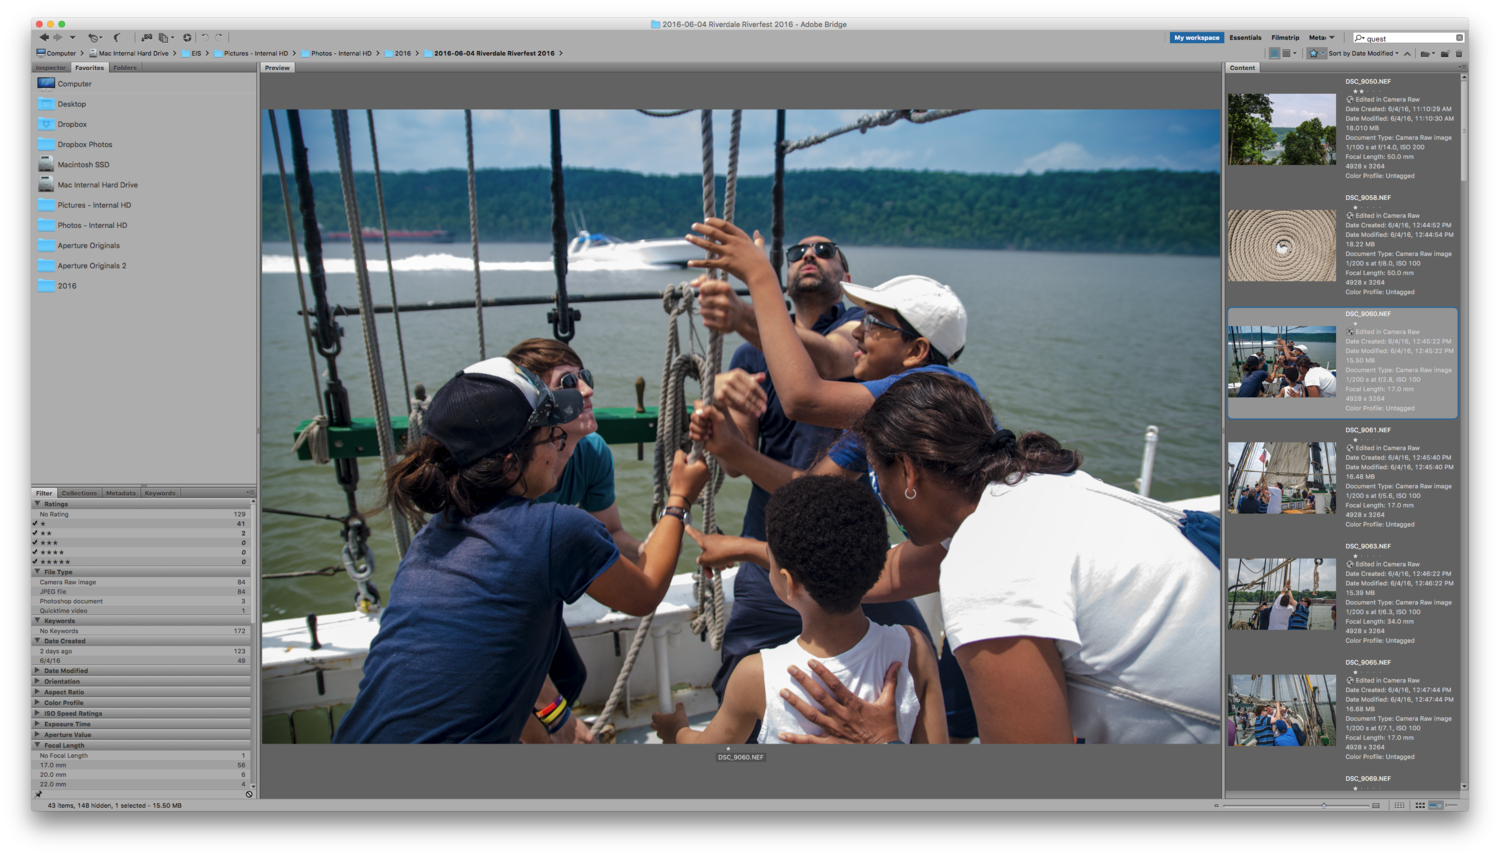
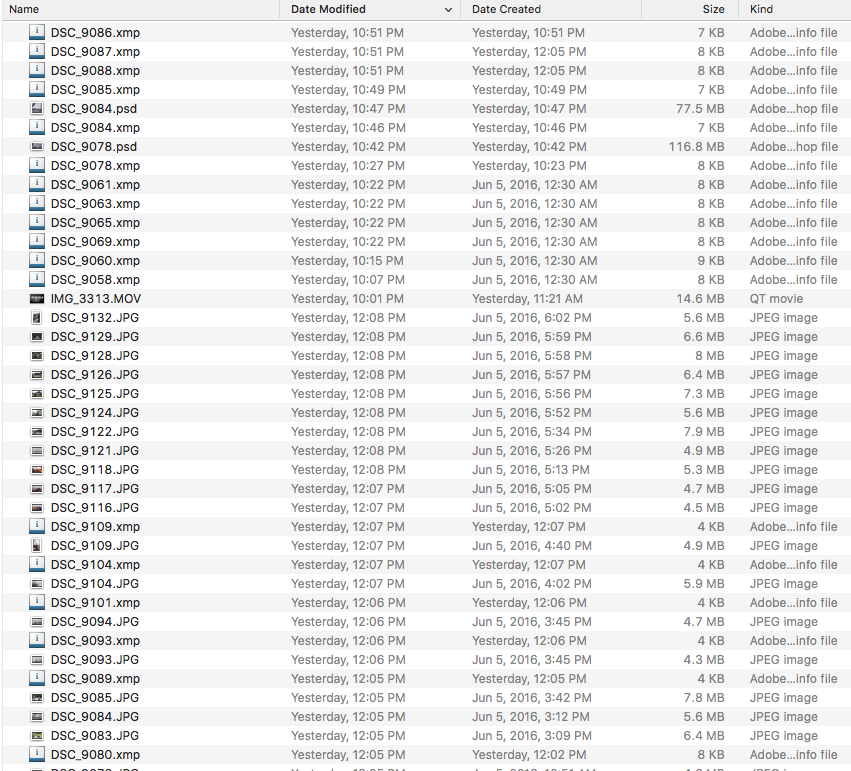
Yes, and me too! Here are screenshots of the same file in Bridge, ACR, and Lightroom develop module, as well as the folder in the Finder, showing that raw file's XMP sidecar file (DSC_9060.NEF).

-
ACR adjustments in LR catalog?
Control Z replied to Control Z's topic in Lightroom questions or problems
Yes, there are XMP files in that folder. When I looked in LR, those edits don't show up. -
ACR adjustments in LR catalog?
Control Z replied to Control Z's topic in Lightroom questions or problems
Bridge is growing on me, but there are things I prefer in Lightroom, though perhaps I don't know how to do them in Bridge yet. Also, things I don't love in LR. I'm fairly new to LR, coming from Aperture, which I really liked. Things I'm having trouble working in one system with: * Face recognition. I'm not aware of that feature in Bridge. * Database library. Though I'm finding Bridge works pretty well, especially if I keep my folders organized by year and date. * I don't like that you can't search within LR for folder names. Often, that is the easiest way for me to find things, especially if I have been lax with keyboarding. * Metadata entry and templates seems easier in LR, though I need to educate myself better. * Casual photo improvement is easier to me in LR (fewer steps and jumping from one program/interface to another). * The keyboard shortcuts in LR make more sense to me (e.g., pressing 1 for one star, rather than command-1). Not sure why the shortcuts aren't the same throughout Adobe world. * The lack of an sRGB workspace in LR is a bummer, and using soft proofing as a workaround isn't great. It also lacks the ability to get clipping warnings in sRGB. But, then again, there are plenty of professional photographers using LR and producing magnificent work, so, notwithstanding Damien's persuasive arguments, it can't be the end of the world. It would be great for the ACR changes to show up in Lightroom, just like the Lightroom changes show up in Bridge. Not sure if the way LR manages its database has anything to do with it. I realize you're supposed to use one, but if the two are compatible with one another, that would be better. -
I have been using Bridge/ACR more these days, but still like the convenience of Lightroom for more casual or bulk work, and for cataloging/metadata/faces. I made some Camera Raw adjustments and added stars in ACR, then later imported the folder with those files into Lightroom. However, those adjustments are not displaying in Lightroom. I still see the unedited, straight out of camera raw file. Is there a setting I'm missing? When I go the other way, from LR to ACR/Bridge, the LR adjustments show in Bridge/ACR because they are being saved to a sidecar file. Thanks. Follow-up question--does anyone here use Lightroom to manage photos but use ACR/Photoshop for more serious editing?
-
Well good thing he's on another continent!
-
Thanks, I will work on it. I know you'll probably freak, but another quick and easy, though admittedly imperfect, method to get the background to white is to use a combo of adjustment brushes and gradient adjustments in ACR or Lightroom, with the exposure slider cranked all the way up, with the Auto Mask box checked, so it avoids the hair.
-
I guess what I'm asking is that if you have to carefully mask the hair, how this is easier than carefully selecting the background?
-
And how to handle the patches of white inside the hair curls just above the right shoulder?
-
So mask between the red line and just outside the hair?
-
OK, I'll play around with it; thanks. At some point, would you be able to go through your thinking on how you figured out this process? For instance choosing the multiply layer?
-
Right, but when I paint black over the hair, the original white background shows through the spaces in the hair. I don't understand how to separate the hair from the color without detailed selection.
-
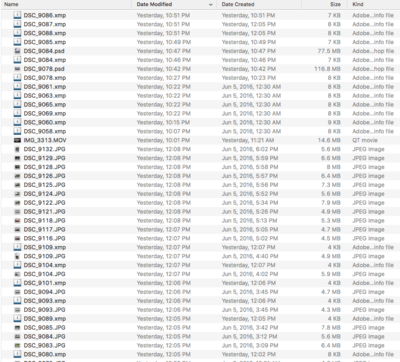
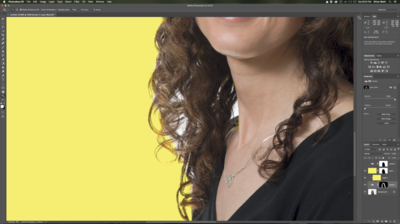
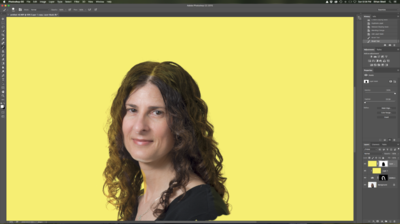
I took some quick headshots against an imperfect background and would like to make it a solid white (or any color, really). (I had a flash on the background and had hoped to blow it out to pure white, but only the bottom got overexposed.) I followed the instructions in the tutorial, but it's not coming out perfectly. (Tutorial: http://www.damiensymonds.net/replace-background-hair) The photo with the whitish background is the before image, the one with the yellow background is the after. I didn't choose yellow for any particular reason. I just added a new layer and filled it with a color. As you can see, the hair has a yellowish tinge. Is there something I'm doing incorrectly? When I fill the yellow layers with white, it looks basically fine, but any color other than white shows through. Is there an easier way to make the background uniform? Thank you.
-
I understand what you're saying and your overall editing philosophy and keeping one raw master, but, for my purposes, I don't often need to also work in Photoshop. For instance, creating a black and white and color version of a photograph just seems easier to do in ACR/Lightroom than going to Photoshop. Perhaps I'll come around to seeing it your way with more experience.
-
Thanks! I was playing around and tried that after asking the question. What a difference!
-
Computer info: I have a Mac desktop running 10.11.4 (El Capitan) and Photoshop CC and Elements 13. It is over 2 years old (mid-2011 iMac, but I just replaced internal hard drive with SSD), and has 20GB of RAM. Its hard drive has 472GB free out of 1000GB. There also is another internal HD where I keep my images, with 422 GB free of 1.9TB on the main partition. There is an additional 1GB partition on that drive. The last time I shut down was more than 24 hours ago. I have never run a cleanup program on the new SSD, but was experimenting with a free version of Clean My Mac 3. And please let me know if you'd prefer that I split this up into separate questions, but they all came to me at once while trying to work.
-
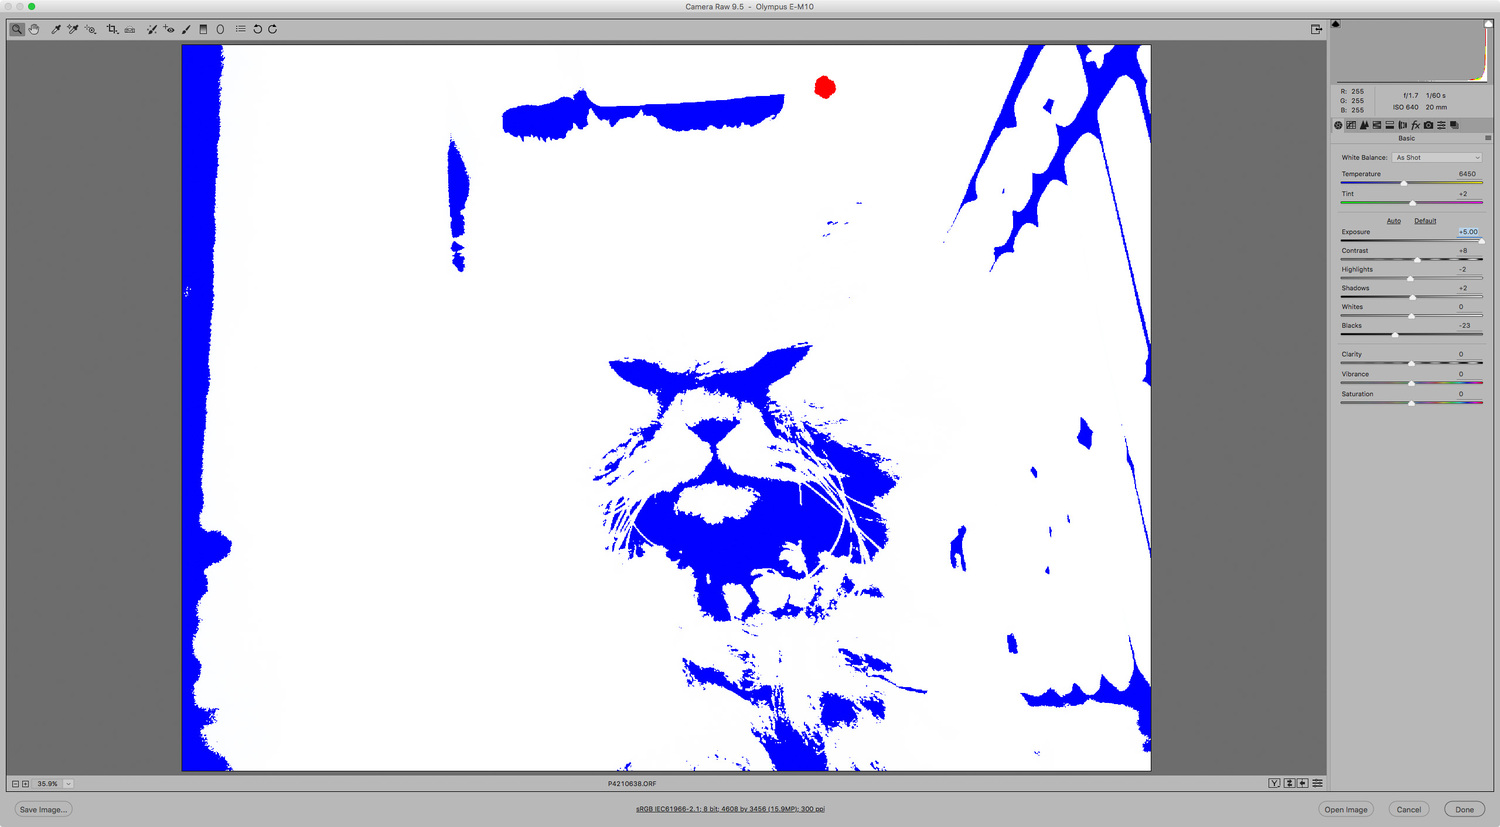
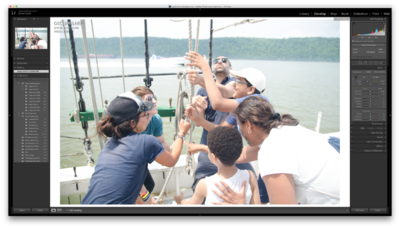
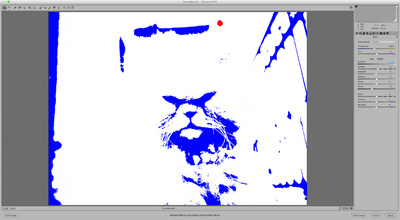
I'm trying to give Bridge/ACR a fair shake, but I'm having some difficulties. Perhaps separate posts might be more appropriate, but any thoughts/solutions for the following would be appreciated: (1) Bridge previews look pixellated, making it difficult to judge focus on photos. Even when viewing a full-screen preview, the image looks soft. When I use the 100% loupe, it processes for a few seconds, then renders a sharp image, but the overall larger picture is not sharp. Is there an ideal preview setting, something like the smart preview in Lightroom? (2) Is there a way to view or revert to a non-processed raw file in ACR/Bridge? In the Lightroom develop module, pressing the "\" key shows a before-after. Is there anything equivalent in Bridge and ACR? Or alternatively, is there a way to create a duplicate of the processed file without the raw edits? (3) Is there a way to step back through edits in ACR/Bridge like Lightroom's history function? (3) ACR raw processing seems clunkier on my machine than Lightroom or other raw software (Aperture, Photos, Capture 1). When I move a slider, the whole image darkens momentarily when the slider is being moved, rather than just gradually showing the desired change. This is distracting and make it very difficult to do raw edits. (4) ACR highlight clipping is acting weird. Even though highlights are blown out (the histogram triangle is white), I can't get the blown out areas to display white. Even when I pushed the exposure slider all the way to the right and there is no detail in the photo, only a tiny patch is red. There must be some threshold setting somewhere, but I can't find it. See attached screen grab for an example. In this file, I purposely pushed exposure up all the way. Thanks very much!
-
Viewing the files in Lightroom with the xmp box checked in preferences did the trick--thanks!
-
So if I open the photo in the LR develop module it will write all the edits to the xmp file?