LSSmith
-
Posts
264 -
Joined
-
Last visited
Everything posted by LSSmith
-
Prints are grey
LSSmith replied to LSSmith's topic in Output - print, websites, Facebook, email, client disk, etc
All of the test prints are darker than their onscreen versions. What once matched, no longer does. Reset to factory settings and re-calibrate to latest batch of images (even though they're ugly)? -
Prints are grey
LSSmith replied to LSSmith's topic in Output - print, websites, Facebook, email, client disk, etc
Checking now. -
Prints are grey
LSSmith replied to LSSmith's topic in Output - print, websites, Facebook, email, client disk, etc
To clarify: I am to pull out the prints from a few months ago and check the onscreen versions against them. Correct? -
Prints are grey
LSSmith replied to LSSmith's topic in Output - print, websites, Facebook, email, client disk, etc
I went back and double-checked my posts. In answer to your question, the calibration with matching prints was from a few months ago. At that time the screen matched those prints. Should I pull out those prints and compare the onscreen version (under the current calibration) against those prints? -
Prints are grey
LSSmith replied to LSSmith's topic in Output - print, websites, Facebook, email, client disk, etc
More detailed response re: What did the lab say about the prints?: Finally got to speak with a Miller Labs tech. Per the tech, the images look fine on his screen. He does see a bump in the brightness/contrast in the second batch (the ones with the "holistic solution") over the original batch. His recommendation is to recalibrate my monitor to the second batch of prints (even though they are ugly) so that I have a better baseline to go on with. Once I've completed the recalibration, I'm to re-examine the images on my screen, adjust as necessary to make them look the way that I want to (ie - not ugly), and send the readjusted samples to the tech via the handy-dandy link which he has emailed to me. What sayest thou, to all of this? -
Prints are grey
LSSmith replied to LSSmith's topic in Output - print, websites, Facebook, email, client disk, etc
Quick answers, for now. I am. I'm just in post-huricane mode. I have to unpack my office and set up my office. I did. The only advice from the surgeon: If it hurts, don't do it. No. Partly because I'll be running System Mechanics by Iolo; partly because I can't do anything until the office is set up. For giggles, I looked up Photo Labs using 6500K color standard. WHCC came up in the search. I downloaded and tested their soft-proofing profile. The images were noticeably duller in color and vibrance, when viewed with the soft profile. Not sure if this is significant. Any other labs that I should try? I'll procure one. No, as I don't use it for retouching/editing. The lab tech and I are playing Expert Level Phone Tag. I have another call in to the lab this morning. As I'm mostly in cleanup/setup mode for the majority of the day, the tech and I should be able to speak directly to one another today. Please, God. -
Prints are grey
LSSmith replied to LSSmith's topic in Output - print, websites, Facebook, email, client disk, etc
Off to the surgeon for my appendectomy follow up. I'll check for thread updates later today. -
Prints are grey
LSSmith replied to LSSmith's topic in Output - print, websites, Facebook, email, client disk, etc
Just checked the manual to make certain. It is definitely an HDMI cable connecting the laptop and the monitor. And it turns out that I purchased both the laptop and the monitor at the very end of December 2015. -
Prints are grey
LSSmith replied to LSSmith's topic in Output - print, websites, Facebook, email, client disk, etc
As a semi-non-sequitor, as you're not a fan of Miller Labs, would you please share which labs you do like? -
Prints are grey
LSSmith replied to LSSmith's topic in Output - print, websites, Facebook, email, client disk, etc
HDMI cable. I think that's what it's called. Lemme check. That seems reasonable. Thank you for letting me know. -
Prints are grey
LSSmith replied to LSSmith's topic in Output - print, websites, Facebook, email, client disk, etc
Yes. I should have said images on my screen in Photoshop. *tired brain syndrome* -
Prints are grey
LSSmith replied to LSSmith's topic in Output - print, websites, Facebook, email, client disk, etc
I have a proper monitor. I've listed its info in the grey images thread. -
Prints are grey
LSSmith replied to LSSmith's topic in Output - print, websites, Facebook, email, client disk, etc
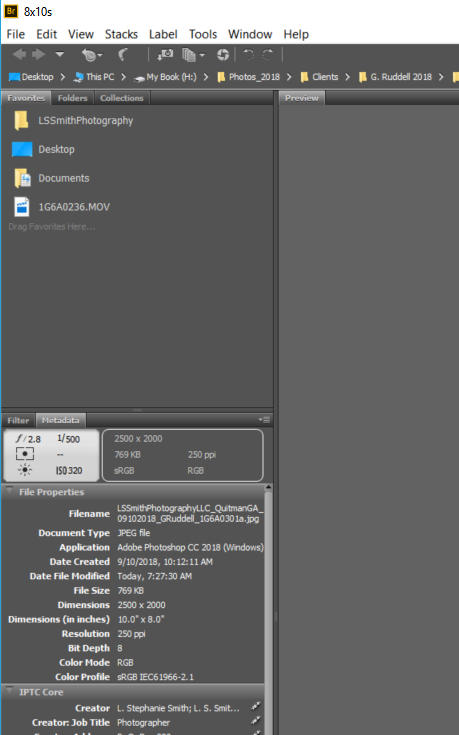
I forgot to answer this one before I answered the blurry screen thread. I use an HP Z Book as my CPU with an HDMI connection to my monitor/screen. The screen is an HP DreamColor Z24x Professional Display, purchased at the same time as the laptop, so it's nominally a little bit older than 2 years. It sits atop my desk in my office/closet. No one is allowed to touch it, and I leave it where it is, as it is, to provide consistent perspective for editing. The editing/retouching of photos is the sole reason for its purchase. I recalibrate it monthly, when the ColorMunki tells me to. Calibrating took a bit to figure out, because I initially failed to realize that I had to go into the laptop's settings, select the correct screen (monitor, not laptop), and then calibrate. The calibration profile turns the screen from a lovely cool set of tones with a blinding white to a loathsome warm tone, which I tolerate because that was what seemed to give the best match between online and printed images. I'm not sure what other info you might need. If I haven't provided what you need, please let me know, and I'll attend to it in the morning, when I'm back at my desk. Thanks! -
Prints are grey
LSSmith replied to LSSmith's topic in Output - print, websites, Facebook, email, client disk, etc
I have a PC laptop running Windows 10 and Photoshop CC. It is over 2 years old, and has 16GB of RAM. Its hard drive has 572GB free out of 913GB. The last time I shut down was earlier today. I have never run a cleanup program. NB: For clarification, laptop is a little bit over 2 years old, if I remember the purchase date correctly. If I R-click on the Photoshop icon in the Adobe CC panel, it says that the version is 19.1.6. As for the cleanup program, I may have been operating under the assumption that "disk de-fragging" and "disk clean-up" were the same thing, and that Windows 10 automagically took care of the de-fragging. I'm now willing to bet money that you are going to correct my assumptions. In any case, it's my turn to turn into a pumpkin, and I'll read your response/take further action, tomorrow. G'night! -
Prints are grey
LSSmith replied to LSSmith's topic in Output - print, websites, Facebook, email, client disk, etc
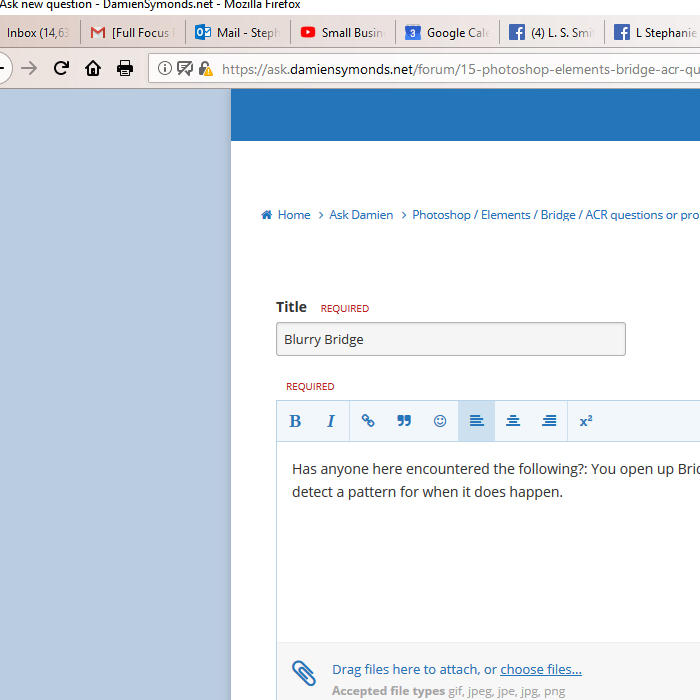
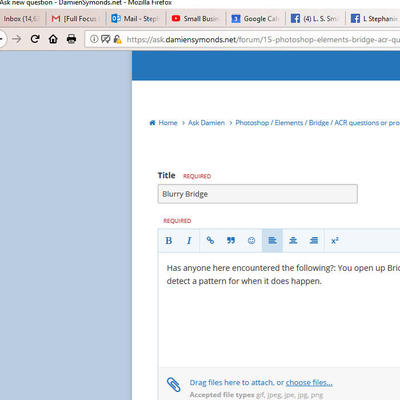
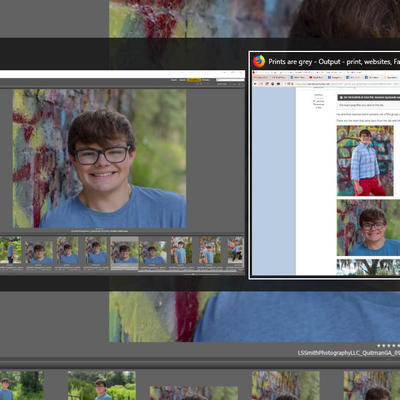
Has anyone here encountered the following?: You open up Bridge (I use the latest version in Adobe CC) and all of the tab and menu text is blurry? It doesn't happen all of the time, and I can't seem to detect a pattern for when it does happen. (Doesn't necessarily happen directly after an update; doesn't look normal for 5 sessions and then goes blurry on the 6th session; etc.) It does not seem to be a critical issue. I'm just curious as to why it's happening at all. I've attached images in the hopes that whoever comments will be able to literally see what I'm seeing. *crossing fingers* Thanks!

-
Prints are grey
LSSmith replied to LSSmith's topic in Output - print, websites, Facebook, email, client disk, etc
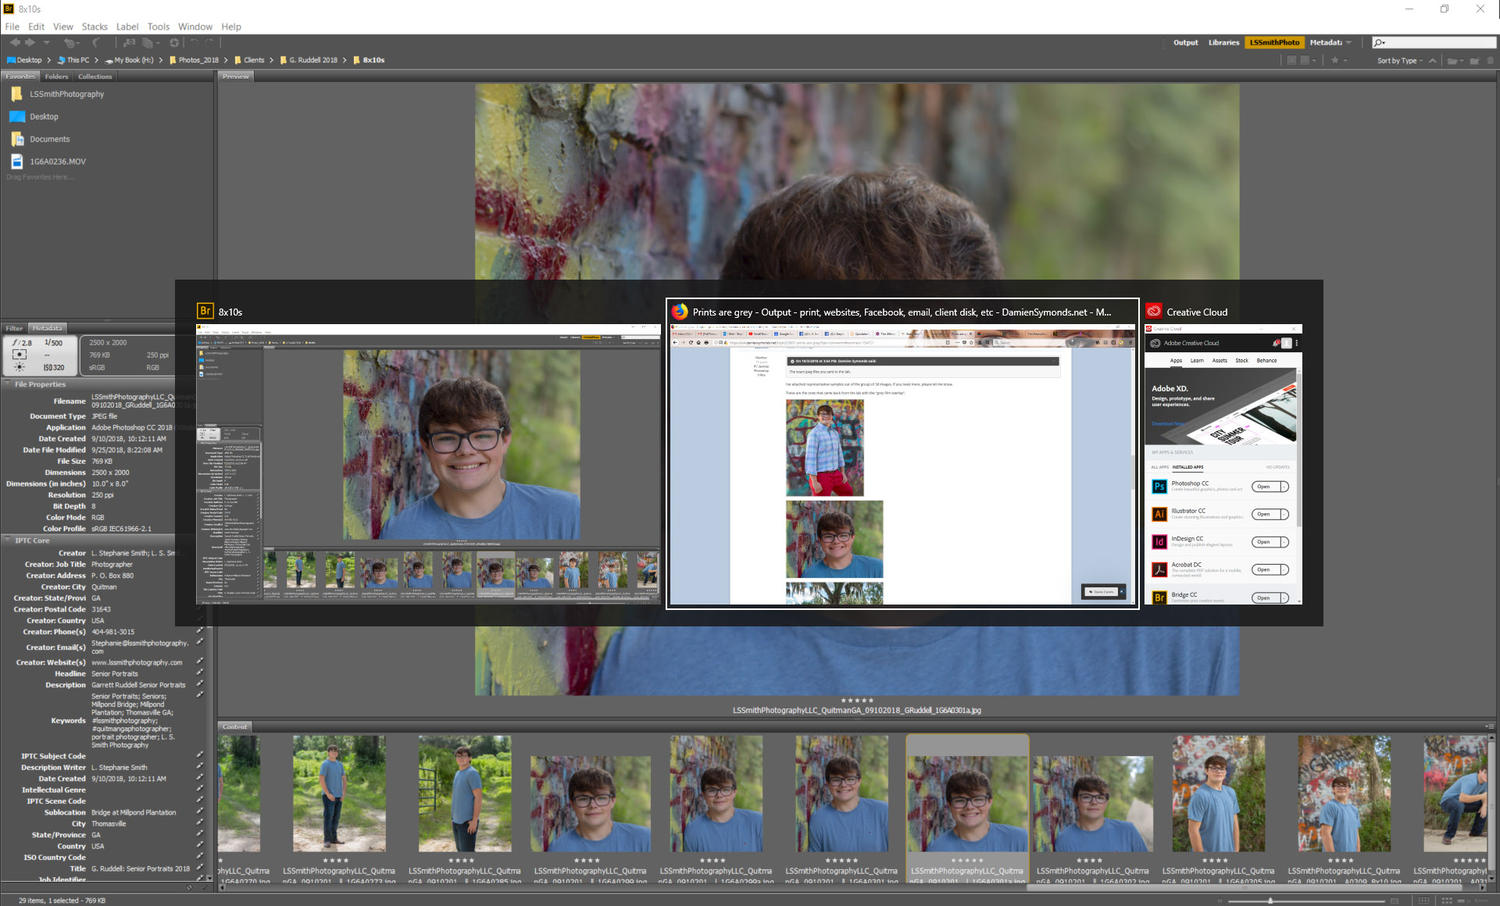
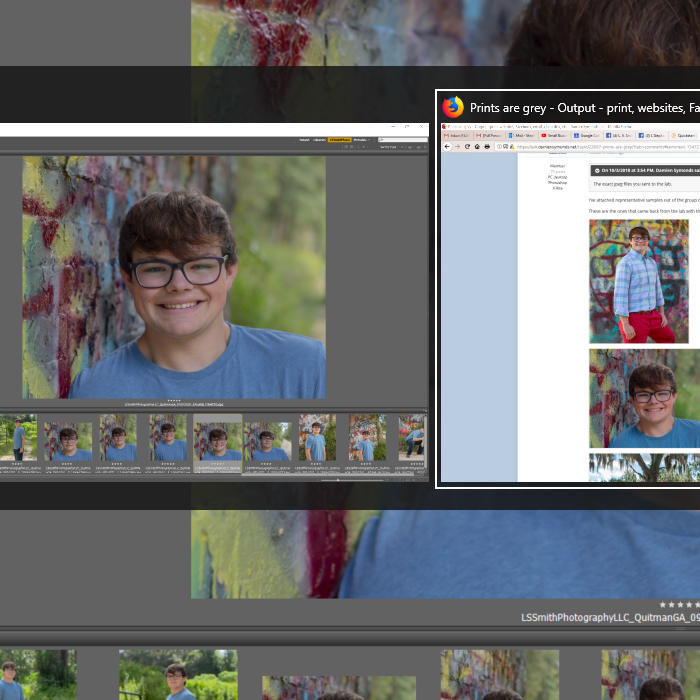
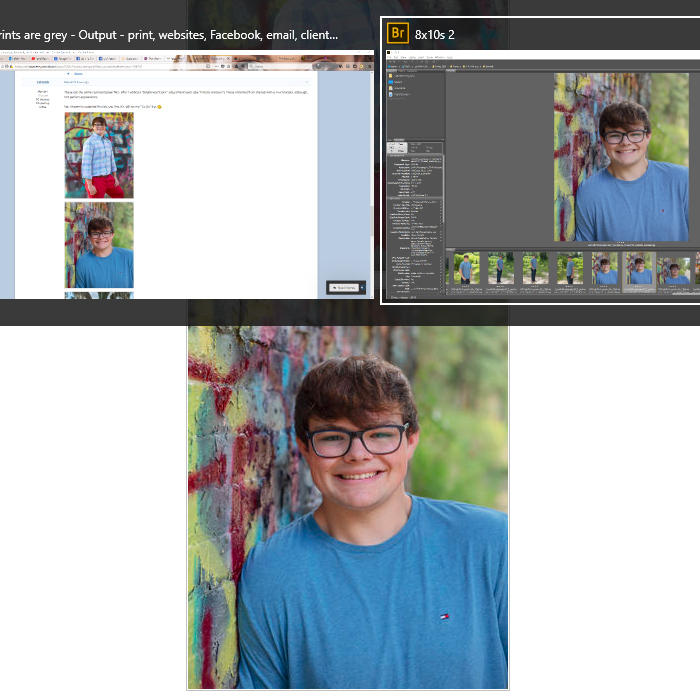
I agree, which is why I posted my questions/concerns, here, a few days ago. Unfortunately, I think that there may be an additional problem. This morning, when I opened up this thread, the images, in this thread, looked yellow and unnatural on my monitor's screen. They did not look this way, yesterday, when I posted them. As I have no way of seeing what the images look like on your screen, I now wonder if what you're seeing is what I'm seeing, now. I tested the hypothesis above (that you're seeing something that did not exist on my screen yesterday). I went into Bridge and pulled up both copies (original and 2nd version) to see if they looked as unnatural and garish as what is posted in this thread. Interestingly, they do not. I put together screen shots with 100% crops showing the difference, and have included them in this post. I hope, although I have very little reason to, that you will be able to see the difference between the image as viewed on my monitor in Bridge/Photoshop, and how the image appears in this thread. P.S. - I've just added the images to this thread. While I can see the difference in colors/intensity between the "image as seen on my monitor" and the "image as seen on this thread", neither set of images accurately show the level of color saturation (far less garish) that I'm seeing on my monitor in Bridge/Photoshop. I honestly don't know what to do at this point. It seems that I simply cannot trust what I'm seeing on my monitor is going to be faithfully reproduced. *very frustrated* They were my images, sent to the lab per your instructions, as listed in the Monitor Calibration for XRite Color Munki. My recollection of the first round of submissions is that there was a significant difference between the onscreen and print versions. At that time, I went back and tested the white balance options, decided that D50 looked like it would get closer results (a better match between online and print), re-edited the images under the new calibration, and resubmitted them for printing. As the results did provide a closer match, it seemed that I had resolved the problem.


-
Prints are grey
LSSmith replied to LSSmith's topic in Output - print, websites, Facebook, email, client disk, etc
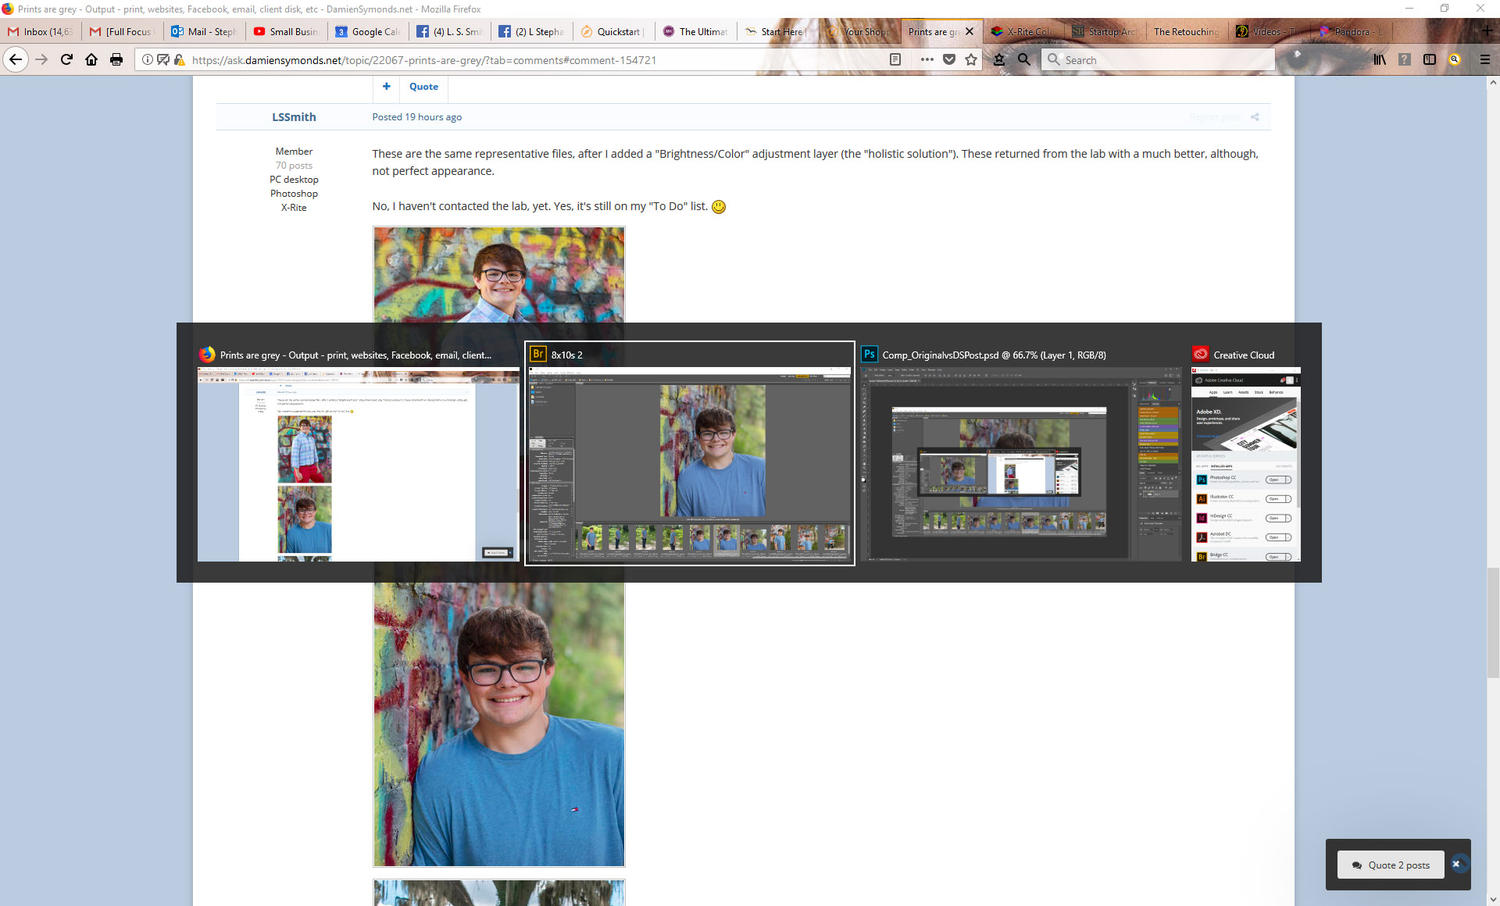
These are the same representative files, after I added a "Brightness/Color" adjustment layer (the "holistic solution"). These returned from the lab with a much better, although, not perfect appearance. No, I haven't contacted the lab, yet. Yes, it's still on my "To Do" list.


-
Prints are grey
LSSmith replied to LSSmith's topic in Output - print, websites, Facebook, email, client disk, etc
I've attached representative samples out of the group of 30 images. If you need more, please let me know. These are the ones that came back from the lab with the "grey film overlay".

-
Prints are grey
LSSmith replied to LSSmith's topic in Output - print, websites, Facebook, email, client disk, etc
Not yet. The lab's time zone is one hour behind mine, and my daily allotted work time was eaten up with finding and applying the holistic "solution", and sending the redone images off to be printed. Calling the lab is on my "To Do" list. That being said, I tend to lean towards possibilities where my methodology is at fault. Miller is a highly-respected and widely-used lab, here, in the States. Of the two parties involved in this transaction, it is far more likely that I'm doing something wrong. I sat down to prep files for posting, and realized that the usual protocol for posting images (say, as in the RAW class) may not be what you are looking for. Could you please provide me with the specifics of what you'd like to see? (Ex: Screenshot of CR2 file; 100% crop; JPG that produced "grey results"; JPG with "holistic solution" applied, etc.) Thank you. -
Prints are grey
LSSmith replied to LSSmith's topic in Output - print, websites, Facebook, email, client disk, etc
I can, tomorrow, when I'm back in front of my computer. (On half-days due to an emergency appendectomy last week; yet another factor in the time crunch.) -
*giggling* I can agree that "fascinating" is not the proper adjective given the frustration involved on your part. I hope that we both find solutions for our respective challenges. Good luck!
-
As an aside, this is a fascinating topic which may be related to an issue that I just asked for help on. I hope that you find a solution.
-
Good morning, from South Georgia! I had thought that my monitor was properly calibrated. (Yes, I used test prints and the slight differences were tolerable.) Now, however, I've received prints back from the lab and they all, to varying degrees, look dull and grey (as if someone put an opaque grey filter over the images). It was an outdoors shoot, divided into two types of location: brilliant full sun and under a graffiti-marked bridge. 1. The images taken in full sun look markedly less grey and de-saturated than those taken under the bridge, but they are noticeably less brilliant (to me) than the digital images. 2. I double-checked that the color profile at the bottom of each image read sRGB IEC61966-2.1, in both PSD and JPG. They all do. 3. During the retouching process, I did adjust (generally downward) the saturation levels of some of the photos. (For the record, desaturation was applied only to the skin colors via masking, for those images where I felt it was necessary. The desaturation was NOT applied to things like the brilliant graffiti colors, which look dull and lifeless in print.) I have compared the prints of saturated and desaturated images to the on-screen versions. The saturation, or lack thereof, does not seem to have influenced the greyness of the finished print. 4. As part of prepping my files for printing, I used the soft-proofing profile provided by my lab (miller labs), to make sure that what I was seeing on my screen was what I was going to get in print. The images looked fine in soft-proof. 5. I triple-checked to make sure that the color-profile of the images was sRGB IEC61966-2.1, before I proceeded to crop, sharpen, save to jpg for the prints. 6. After I received the pictures from the lab, I did what I always do: check them in the white light of the day. The grey overcast look was readily apparent, even in the full-sunlight-shot images. 7. I brought the images into my retouching space, pulled up the digital images in Photoshop and compared prints to digital files. Definitely a grey overcast over the entirety of the printed images. 8. I searched through your resources, hoping to find an answer to my specific problem. Either there is no such answer, or I've not worded my query properly enough to get an answer. 9. My retouching space is, literally, a closet, lit with one LED bulb. The light-blocking drapes are always drawn closed over the windows of the room when I'm retouching. The bulb is a 6 W, 4000 K, frosted bulb, if that is of any use for you. I've been retouching in this lighting ever since I started your RAW class, close to two years ago. 10. In reviewing my notes above, I wonder if I'm dealing with a brightness issue with my screen. The current calibration has the white balance set at D50 and the white luminance set at 90. These values were set during the calibration phase with test prints to check the results. The monitor is due for its monthly recalibration. 11. I have yet to test whether the digital image looks the same on a different platform/device (Facebook on my phone, for instance), to see if that can reveal any clues as to the nature of the problem. I am, unfortunately, under a time crunch. The client expects to have prints this week, and I have to deliver. This means that I'm going to have to test a few potential "holistic" solutions, while waiting for your response. If you could please offer some advice on how best to solve this issue, I'd appreciate it. I hope that I've provided enough of the right kind of information to make your task easier. If not, please let me know, and I'll do my best to provide what you need. I look forward to your reply. Warmly, Stephanie
-
Guidelines for desks and chairs while editing
LSSmith replied to LSSmith's topic in Miscellaneous questions or problems
My options for a solution to this problem have been and still are limited by a) lack of money; b) lack of insurance; and c) lack of space. a) At the moment, 56% of my income goes to paying off debt. I have little choice on this one. My budget is arranged so that I can pay off the existing debt in 2.5 years. I cover basic medical and dental out of my budget, but that's it, for medical expenses. b) I have two businesses, in addition to two jobs. The income stream from those two businesses has been unpredictable, and in combination with the income from the two jobs, has made it impossible to get any kind of affordable health insurance. Finding an occupational therapist that I could both afford and who would accept cash payments has proved impossible in my area. c) My office takes up half of my clothes closet, so my desk/chair arrangement has to conform to the space available, and this is where I went wrong in my choice of desk and chair. I'm taller than average, but did not stop to take that into account when selecting a desk that could hold a monitor, laptop (acts as my cpu), a keyboard, and my wacom tablet. I found one that could do the job and that fit both my closet and my budget. Big mistake #1. I had no money for a "desk chair", so grabbed one of the many unused chairs strewn about the house. It's fine for eating at the dining table, but not so fine for working at the desk. Big mistake #2. Now, combine mistakes 1 and 2 with the fact that the inappropriate heights exacerbate my tendency to rest my weight on my right arm/shoulder and my here-to-fore unknown predilection for holding tension in that arm while working on editing photos. (I had not realized that I tended to maintain a death grip on both the mouse---which I've stopped using for the most part, for photo editing---and the wacom pen. *siiiiiiiiigh*) As a result, the muscle knots and shooting pains were epic. Solutions: If changing my work environment is not possible at this time, then the solution is to spend as little time as possible at my desk (without sacrificing the quality of my work). Therefore: 1. I force myself to take frequent, short breaks that involve stretching my muscles. I use an app on my phone to do this (20 minutes work; 5 minute break; three repeats of this, followed by longer 10 minute break; Repeat entire sequence), but using a kitchen timer would work just as well. No round of photo editing may go longer than 2 hours. At two hours, I turn to other tasks and work on them for an hour, before returning to photo editing. 2. I am studying and working on being more efficient and competent at the photo retouching. The less time spent at the desk at this task, the better, so my approach involves the following: a) getting the image as close to perfect, IN THE CAMERA, as possible; b) taking your classes and following your instructions (this alone, brought retouching time down dramatically; c) being mindful of keeping my arm tension free and of not resting my weight on my arm (ie---good posture!) while photo editing. 2a. I really do need to resubmit images so that I can take the next set of courses....Levels, I think? 3. Regular, daily exercise. This is my stress relief and it is absolutely essential. I've noted that on days when I don't get at least a 30 minute walk in, my arm hurts more. Fortunately, two very large, active German Shepherd pups guarantee some kind of outdoors exercise (walking and/or playing fetch) on a daily basis. I supplement that with Zumba classes (gets me out of the house and with people, which is good for my mood), Kettlebell, and Swimming. (Yes, I have a lot of stress. All of this keeps me on an even keel, emotionally, psychologically, and physically.) I realize that this is not the optimal solution, but it's the best that I can do with what resources I do have. -
xmp files
LSSmith replied to LSSmith's topic in Photoshop / Elements / Bridge / ACR questions or problems
Thank you, Damien. I'll put my time and energy where it will be most effective. ?