Trudy Posted April 12, 2018 Posted April 12, 2018 Following this tutorial, any advice as to how you might remove a colour cast/reflection off stainless steel?
Trudy Posted April 13, 2018 Author Posted April 13, 2018 I am struggling to even mask the legs as the reflection is so strong its hard to see where the legs end! That said, I am just practicing with lights and editing and there is clearly all kinds of wrong going on here so if it isn't worth your time don't worry - I will redo on a different background (on this day it was the green or a dirty garage roll-a-door :-0
Trudy Posted April 13, 2018 Author Posted April 13, 2018 This one might be better - less noise, better focus - again just practicing/learning so don't worry if too time consuming!
Damien Symonds Posted April 13, 2018 Posted April 13, 2018 The other thread you linked was very specific, because that poster actually needed the subjects extracted. But that's very rare. Most people only need to change the background colour, or swap another background in. So, tell me about your circumstances. What's your end goal with these photos?
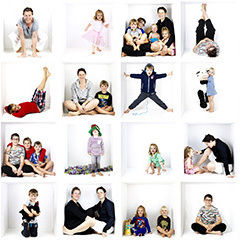
Trudy Posted April 13, 2018 Author Posted April 13, 2018 I want to do a series of portraits of my family and friends (for our walls) using something like the setup in pic; I want to change the background - predominantly the colour but also preserving or mimicking the variation in light to give depth. I have one person with almost white hair, a couple of dirty blondes and some almost black hair - I can use an off white/creamy coloured wall, otherwise a white sheet, or this hideous green monster! I am still deciding between all white backgrounds (my preference) or coloured (different colour for each person, everyone else's! - see palette attached :-*)
Damien Symonds Posted April 13, 2018 Posted April 13, 2018 Just to check, you've read this? https://www.damiensymonds.net/2015/07/blue-or-green-screen-for-background.html
Trudy Posted April 13, 2018 Author Posted April 13, 2018 (edited) I most certainly did; I had no other option at the time but fortunately I can redo them. Figuring this edit out is just for practice and learning really, and in case i bugger it up in a similar way next time! Edited April 13, 2018 by Trudy
Damien Symonds Posted April 13, 2018 Posted April 13, 2018 Oh, yeah, I'm all for practice! Let's do this! I'm keen. So, go ahead and do your raw processing on whichever photo you'd like to use, then post it for me and we'll play with the background.
Trudy Posted April 13, 2018 Author Posted April 13, 2018 Post as JPEG or PSD? (I’m out and about, will need an hour or so)
Damien Symonds Posted April 13, 2018 Posted April 13, 2018 Jpeg. I don't think the site accepts PSD, and anyway, you'd never post anything other than jpeg on a website.
Trudy Posted April 13, 2018 Author Posted April 13, 2018 Let's go with this one. Clearly there is a lot to be done better with the actual photography next time, hope the RAW processing is ok, I'm outta practice!
Damien Symonds Posted April 13, 2018 Posted April 13, 2018 You know I can't talk about raw processing here. Go back to your class notes.
Trudy Posted April 13, 2018 Author Posted April 13, 2018 I followed the flow chart faithfully . Back to the drawing board. Thank you anyway for your time, I appreciate it.
Trudy Posted April 14, 2018 Author Posted April 14, 2018 I have signed up for RAW class again, will calibrate every time until i start getting it right, and booked in for an eye test as I have 3 colour blind (blue/purple) kids and didn't realise I could be too... Can we come back to this when I get all that right? Thanks for your patience/persistence! 1
Recommended Posts
Create an account or sign in to comment
You need to be a member in order to leave a comment
Create an account
Sign up for a new account in our community. It's easy!
Register a new accountSign in
Already have an account? Sign in here.
Sign In Now