
Christina Keddie
-
Posts
808 -
Joined
-
Last visited
-
Days Won
5
Everything posted by Christina Keddie
-
Hi jmsheps, similar questions were addressed in a thread in the "DSLR Bistro" section (for questions on gear), which is where I've moved this thread as well.
-
Olga, if you're sad about having gotten through the Levels Standard curriculum, you can always upgrade to Deluxe and get 1:1 mentoring from Damien to really cement all of the Levels class for you.
-
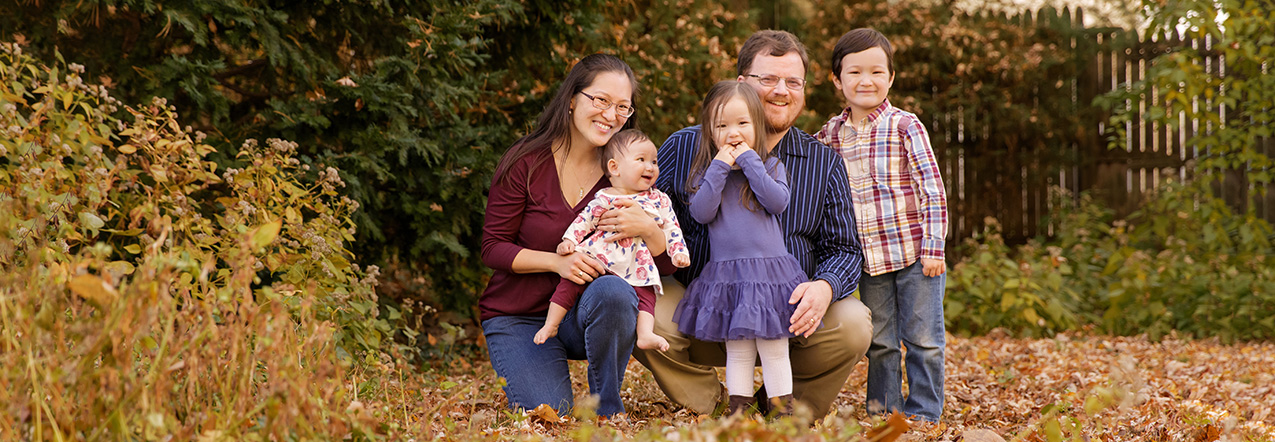
Just to clarify -- is this actually a DoF issue? As in, are the husband and wife on different focal planes? If one is more in focus than the other, this is probably a tosser.
-

strange color when exporting from LR to PS
Christina Keddie replied to nery's topic in Lightroom questions or problems
Just checking in, @nery -- are you all set now? -
Nidhi, you should end up with a square if you've followed Damien's instructions step by step. (Did you see the link above?)
-
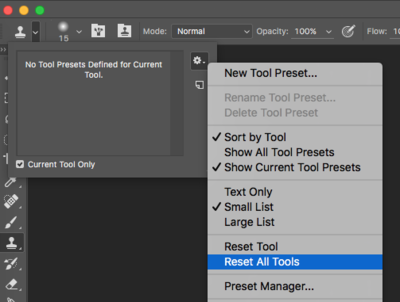
Next thing I'd try would be to reset your tools. It's here in PS CC, and I think in most other recent versions of PS:
-
Basic question: you've tried increasing your clone brush size, right? What do you mean by "not working at all" -- what happens when you try? And again, any pixel layers above your background layer?
-
Fill this out for us, please? It may be a computer health issue, or you may just need to reset your tools.
-
(PS: you must always have your document profile indicator turned on, to make sure you don't have bigger problems with your color space. And you should always do your cloning work, along with all other pixel edits, below your adjustment layers, not on top.)
-
And you've restarted your computer, I trust?
-
You don't have any pixel layers tucked into those two groups above your clone layer, do you?
-
Also, check to make sure it's not your PTM actions that are introducing that banding in this file... Whatever is introducing it should be addressed.
-
If you're 100% sure sRGB was embedded in these exact files (your doc profile indicator is on and shows sRGB for these exact files), and you're still seeing a color differential between PS and FB, make sure you have your web browser set correctly: http://www.damiensymonds.net/2012/01/web-browsers-and-facebook.html
-
It's still troubling to me that you couldn't see it in PS but could on FB. That sounds like a color space problem or a saving problem of some sort. Can you absolutely confirm that this file has been saved with sRGB embedded?
-
Recovering Detail
Christina Keddie replied to KassieLayman's topic in Miscellaneous questions or problems
Make sure it's been scanned in like this: http://www.damiensymonds.net/scanning-guidelines-for-old-photo-restoration.html And post a crop of the teeth, without the person's eyes, if you're worried -- I'm not aware of any law in any country that prohibits you from posting an non-identifiable image of someone else, for educational purposes. -
We'll need to see a sampling of the photos you're working on. Thanks!
- 1 reply
-
- 1
-

-
Is it a true black and white? Open it in PS, have your Info panel open, and run your cursor around the image (especially in the spots where you're seeing color tints elsewhere) -- are the R, G, and B values equal to each other everywhere you check?
-
In your raw processing: http://www.damiensymonds.net/2010/07/raw-noise-removal.html And note that it's noise REMOVAL, not simply reduction. http://www.damiensymonds.net/2015/10/noise-reduction-and-sharpening-leap-of.html
- 1 reply
-
- 1
-
-
Utterly confused!
Christina Keddie replied to TonySalas's topic in Monitor calibration questions or problems
Your prints are coming back dark BECAUSE your display is at its brightest. If you've got the brightness all the way up, you're editing thinking that you've got a super bright image (as displayed on your screen) and making the image commensurately darker. The lab then prints the file as it *actually* is, which is much darker than what you've got on your screen. Have you read *all* of Damien's instructions for calibration? Including the troubleshooting steps? You have not successfully calibrated unless and until your screen matches your prints. -
I'm so sorry for your loss. By "original raw file," do you mean a file that was actually shot in raw? Because it might help if you could process it much more flatly (upping the shadows, etc.) and then starting your PS work from that basis.
-
RAW
Christina Keddie replied to KelseyLynn's topic in Photoshop / Elements / Bridge / ACR questions or problems
This article walks you through your options. (And while we're at it, since your computer reset -- make sure to go through this troubleshooter, step by step, to correct all your color space settings!) -
strange color when exporting from LR to PS
Christina Keddie replied to nery's topic in Lightroom questions or problems
Hi nery, can you explain a bit more? You're seeing this strange green color on the image in PS, or in other programs? It sounds more like you've got a color space problem than anything else. Please go through all of these steps to make sure your LR is set up correctly. -
Extracting a background from hair
Christina Keddie replied to Nancy Jones's topic in Questions about tutorials and articles
Thank you! (He's done a lot of background replacement tutorials involving hair, you see -- so next time you post a question about one of his tutorials, it would be super helpful if you include the specific link!) For that first levels layer, you'd do whatever makes it easiest to mask it to be just around the hair. So it depends on your photo -- if there's more of the photo that should be masked off than masked on, then yes, you'd invert the mask and start with it black so you have less you need to mask. And vice versa: if there's more of the photo should should be masked on than masked off, you would start with the white mask and paint black to get the rest masked off. In most cases, I would imagine it would be easiest to start by inverting the mask. But it really depends. -
Extracting a background from hair
Christina Keddie replied to Nancy Jones's topic in Questions about tutorials and articles
Can you click on the URL bar at the top of the browser window where you're seeing this tutorial and copy and paste that link here, please? -
Extracting a background from hair
Christina Keddie replied to Nancy Jones's topic in Questions about tutorials and articles
Which of Damien's background replacement tutorials are you following?
