Brian
-
Posts
4,137 -
Joined
-
Last visited
-
Days Won
55
Everything posted by Brian
-
Nope. It's just more to keep track of. If you did go the really big HD route, just have a "Business" and "Personal Folders setup, then go from there. It's the same as having two partitions. If you want redundancy, you are looking at some form of RAID. Which is either RAID 1, RAID 5/6, or RAID 10. More on this later. Yep. That is a slippery slope. "Oh I will just buy another NAS..." then it turns into another one, then another one, then another one. I have a friend who is a photographer. She has at least 18 external hard drives in her closet! She runs out of room and it's another EHD purchased. It drives me nuts, but you can only lead a horse to water, can't make them drink. Typically with the 2-Bay NAS, having the ability to setup a 2nd external enclosure isn't an option. OK, let's dive into your original post, shall we? No. Just don't. NAS units require a better HD than your typical cheap ones found in external drives. These drives usually run cooler and are meant to be on 24/7/365. Do not be tempted to get cheap HDs, RAID1, like all computer backup systems, isn't fool-proof. If you are determined to get a cheaper drive that isn't meant for a NAS, at least invest in higher quality drives, such as a Western Digital Caviar Black Drive. (Be sure to get the Caviar Black line and not the Blue or Green Drives.) "But I've never had a problem and have always used cheap drives..." I hear it all the time. Usually at some point I hear the phrase, "...why didn't I listen to you?" or "Why didn't I spend the money..." I also hate Seagate Hard drives. I don't seem to have good luck from them, and even had a couple SMOKE on me over the years. Some time back, Seagate bought Maxtor and their hard drives were cheap, and failed ALL THE TIME. So I often wonder if these inexpensive hard drives are just rebranded Maxtor Drives. Hmmm.... Of course this is the Internet, and there will be hoards of people telling me that I'm wrong and Seagate Hard Drives are #Amazeballz. Anyway, my remarks stand. So what drives do I recommend? At the bare minimum, the WD Caviar Black Line that I linked to above. For a NAS Unit, I'd purchase a WD Gold 12TB Enterprise Class Hard Disk Drives. Yep, I'd buy those over the older WD RED Drives, which are also meant for NAS units but seem to have a high failure rate and firmware issues. The Gold Drives are an improved model; of course at a much higher price point. Docking stations make me nervous. If you plan on just making an external HD out of them...fine, but then you are back to having 18 external hard drives like a friend of mine. LOL! Think bigger. Stop with the 2-Drive NAS units. You are going to keep outgrowing them. You really need at least a 4-Bay unit, which supports and external unit for added capacity. Currently, I'm looking at a Synology 4 bay NAS DiskStation DS918+ (Diskless) for $549.99. (There goes your $500 budget.) Why? Personally, all the stuff you can do with it and as I mentioned before, I want to create my own home-based "Netflix." So all of the "thinking" the NAS has to do in order for that to happen, you need horse power. Now if you are just storing photos, then something like the Synology DS418Play, might be a better fit. (I'm even considering this model and am on the fence.) In my humble opinion, a model like the DS918+ is more future proof. Better CPU, more cache options and it allows you to use a expansion unit to add more drives. Then again, if you are just dumping photos to it and want redundancy, then your price-point will be less. In either case, opt for a 4 bay model at the minimum. As for your existing RAID / NAS HDs, Synology makes it easy to migrate your hard drives to a new NAS without the loss of data. That's a whole other world and another topic. You will need a large budget to do video well. Probably a computer that supports RAID 0 that you would use as a cache drive. Actually, if you really want to get into video, you are looking at purchasing a Macintosh in the future. Give this video a watch to see what I mean. Now for the bottom line and some additional info. What if you don't have the budget to spend $3000 on a NAS unit? What do you do? I would make sure your firmware is the most current, and the software that runs the NAS is also current and purchase two larger HDs. Like two 12TB WD Gold Models. You really need 12TB going forward. Otherwise, we are going to have this conversation again in a year. Or get a 4 Bay NAS unit, put the existing HDs from your NAS into it and purchase two smaller HDs and have two RAID 1 units. Ultimately, if you are looking for the maximum amount of storage AND have some redundancy, you are looking at setting up a RAID10 or a RAID 1+0. Why that RAID and how many drives will I need? You will need a MINIMUM of four identical drives to get this setup and have it work well. Mix-matching HDs with a RAID10 is not good. Here is how it works... Let's say you just inherited a large some of money or that scratch-off lottery ticket was a winner and you have a large budget. We will start with 12TB drives: 12 TB + 12 TB | Configured as a RAID0 = 24TB >>----- Which is then Mirrored / RAID1 -----> 12 TB + 12 TB | Configured as a RAID0 = 24TB Mirrored. 24TB is A LOT of photographs. If you need even more storage, you just purchase a Synology External Enclosure, buy more drives and keep going. So RAID 10 is RAID 1+0 or RAID 0 + 1, depending on how you look at it. With RAID0, two hard drives act in unison and become one really big hard drive. Then the RAID1, which is mirroring comes into play. The RAID 0 / One big HD is Mirrored to another RAID 0. Make sense? Long term, I think this is what you are after. Now you don't need 12TB drives. You could go for a quantity of four 4TB drives, which will be 8TB Mirrored. Of course, you could scrap all of this and just get a External 12TB G-Drive and be done with it.
-
The good news is that I’ve been looking to build a home media server using plex, so I have been researching NAS stuff. So I will pick this thread up later tonight.
-
I’m going to have to look at this thread when I get home. LOL! Here is the quick and dirty advice: Your $500 budget is way too low if you want to continue with a NAS. It should be between $2000-$3000. Yes, you need a larger NAS and I don’t think the two-bay units hook to an external unit, though I could be wrong and will check this later. You could get a single external 12TB G-Drive ThunderBolt Drive for about $650 but you lose redundancy with a single drive. I wouldn’t bother with Drives that are less than 8TB for your situation. https://www.bhphotovideo.com/c/product/1360172-REG
-

How Important is an M.2 Hard Drive?
Brian replied to Jen5064's topic in The Windows & PC Hardware Forum
How important? Depends on if your Motherboard has a slot for it. Personally, I prefer a 1TB for a main drive. After partitioning / formatting the main drive, then Windows 10 taking a chunk, you really don't have a lot to play with in terms of space with a 512GB HD. I don't care how fast a M.2 Drive is, it won't do you a damn bit of good if it's full. I configured a Dell 8930 Tower. Here are my choices: 9th Generation Intel® Core™ i7-9700K 8-Core Processor (12M Cache, up to 4.9 GHz) Windows 10 Home 64bit English (If you plan on connecting this computer to your work, upgrade to Windows 10 Pro.) 16GB, DDR4, 2666MHz 1TB M.2 PCIe SSD x4 NVIDIA® GeForce® GTX 1060 with 6GB GDDR5 Graphics Memory Tray Load BDRE Drive (Reads and Writes to Blu-Ray disks) - Why get the Blu-Ray Drive? If you ever think about creating a Home Media Server and want to import your Blu-Ray DVDs, you'll need something to read them. Otherwise, you can stick with the standard DVD for $50 less. You can add a second hard drive yourself at a later time, and install a high-quality one. I love Western Digital Caviar Black Drives. -
What I would do 1st, is create another Administrator Account and log in to get things setup. This way, if something bad happens, you can get into your Mac. Then follow these directions: https://support.apple.com/en-us/HT201609
-
Here is an idea... How about downloading the D500 manual and give it a read? It’s free and you’ll know what you are getting into before forking out any cash. I’ve played with D500 and it’s a nice camera. I will warn you though, once you upgrade to a larger body with advanced features and get used to it, the lower-end bodies will feel like toys. https://downloadcenter.nikonimglib.com/en/products/323/D500.html
-
Starting with iOS 11, when you enable two-factor authentication, it's permanent and can NOT be turned off. A phone call to Apple is in your future. The CIA has difficulty getting into Apple's products, a guy like me has no chance to help you. LOL!!
-
Actually, a D500 isn't as scary as it would seem. It's nice having an external button for all your main choices and not having to dig into a menu. The tough part is going through the manual and setting each of the camera settings but once you get it setup, it's quite easy to operate. My vote is either a D7500 or D500 and personally, I'm leaning towards a D500.
-
-20 on all of your lenses? That is not normal. Hmm...I'd say your D7000 needs tweaking from Nikon. I could see a -2 or even a -5...but -20? That's way too far out of tolerances. Now for even more bad news. The D7000 is discontinued, and I even think the D7200 is as well. The next step is to determine which new body you are going to purchase. Plan on going FX or sticking with DX? The D7500 is the current model that replaces your D7000. I just can't justify spending $300 or so to have a D7000 fixed since camera bodies only last for about 3-4 years or so. Six years is a good run for a camera body as today's camera's are computers that think they are cameras. So let's talk lenses...which ones do you have?
-
As far as memory capacity, 512GB HD is pushing it, I’d rather have a 1TB Main Drive at a minimum, for both laptops and desktop computers. RAM? 16GB is the minimum that you’d want going forward, 32GB is a better choice and what I prefer. Today’s 16GB/32GB is yesterday’s 4GB/8GB. Just like 16MB/32MB back in the late 1990’s.
-
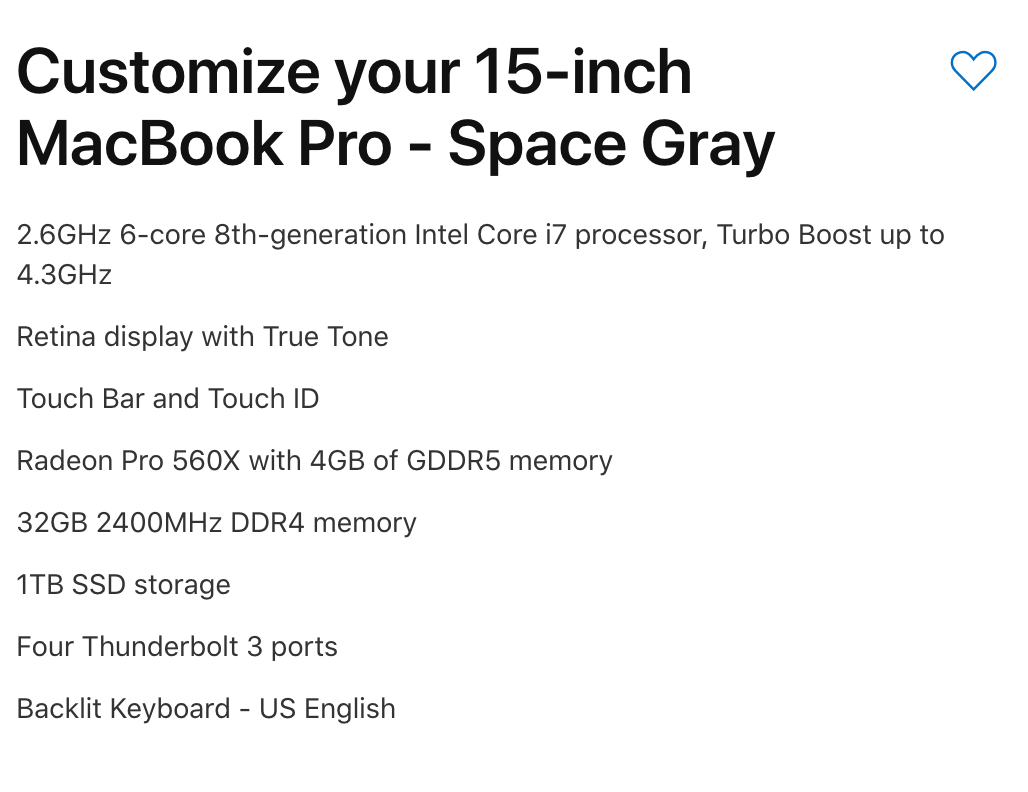
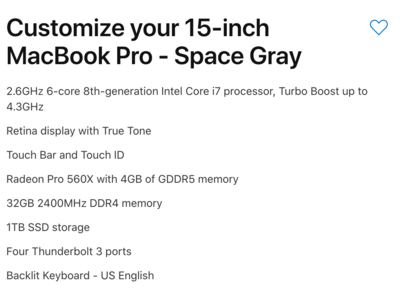
A Mac Laptop for decent photo editing? Up your budget by $1000. Take the most expensive MBP, increase the HD and RAM at the time of purchase. I can not recommend a Mac Laptop in good conscience due to their high cost. I second the notion of a Asus ROG Laptop. Why? Laptops being manufactured today aren’t built like they once were. Your $500 laptops last 12-18 months, the $1000-ish Laptops last about 3 years or so, and the fancy MBP last about 4-5 years. So in essence, you are “renting” your laptop from Apple @ $1000 per year. Of course, your mileage may vary and it’s your money. Here are the specs that I would choose with a MBP:
-
Honestly? I don't think it's your technique as it's just a crappy lens. You might think it's due to your hands shaking; I think it just doesn't focus correctly. All of the folks who had issues with the original Canon 24-70 have not complained / had issues with the Version II. What would I do? Buy the new Canon 24-70 Version II lens while it's on sale.
-
Oh, I feel your pain. The Canon 24-70 Version I lens is a piece of junk. Normally, I'm a OEM Snob...but that original Canon 24-70 f/2.8L is just garbage. I know several photographers in real-life and online who can not trust their 24-70 lenses on a gig. Heck, there is a camera store in New Jersey that would make you take home a lens for a weekend to try it out because they got tired of the returns. According to them, 4 out of 5 original Canon 24-70 lenses where defective. You can not trust the used market either, because Photographers dump that lens. That said, there are a few good copies, so if someone reading this has one and it's fine...don't worry too much about it. The good news? They fixed all of the issues with the "Version II" lens and it's on sale!! Personally, I'd get the Canon EF 24-70mm f/2.8L II USM Lens. What do you shoot? Moving kids or more stationary subjects? You might find that using a tripod will help. Also what shutter speeds are you normally at and what body are you shooting with? Because the more MegaPixels a camera has, the less forgiving it is and the better your technique needs to be. Even with IS.
-
How to back up external hard drive
Brian replied to seepea's topic in The Windows & PC Hardware Forum
Try Microsoft Sync Toy: https://www.microsoft.com/en-us/download/details.aspx?id=15155 As long as your Drive Letters do not change, it should work. -
I’m glad you found a monitor and I totally get what you are saying, after shooting with a Nikon D3s and Nikon D3s, other camera bodies feel like toys. I’m thinking of putting that Eizo on my wishlist. Thanks for the head’s up.
-
You could upgrade the RAM, though as Damien pointed out, he has 16GB and the speed is normal. The main problem is today’s camera sensors. Gone are the days of 10MP and 12MP sensors. The more MP you increase, the harder your computer has to work. Just think how much horsepower you’ll need for a camera that is 36, 45 or 50MP I’ve read that the next batch of sensors are going even higher So the real answer to solve your problem? Purchase a much higher performance laptop or better yet, a desktop computer. You could purchase a gaming laptop to help cut down the time, though that will be more expensive. My advice: Upgrade the RAM to 16GB if you can, though that might only help things slightly You are going to have to live with this problem and that’s the main issue with laptops...upgradability.
-
Oh good. If it happens with another card, or keeps happening, the slot in your computer might be a suspect. Let’s start with the card first.
-
Yep. Probably a bad card. That said, how are you trying to download the images from your cards? With a card reader or are you trying to use your camera? It's really in your best interest to purchase a card reader.
-
If you want to connect a new 2018 MBP to a Monitory via a HDMI cable, you'll need one of these. Enjoy your purchase!
-
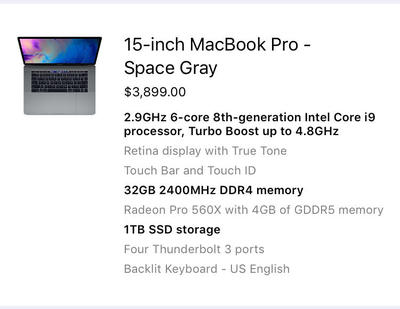
Yeah, these new MBPs are basically sealed units and the RAM is soldered to the board. Which sucks. 32GB isn't bad to have though. I have 40GB in my maxed out 27" iMac and it works really well. What I'm not sure about is how well the new video cards that come with a MBP work with Photoshop. That's why I didn't upgrade the video, I know the Radeon Pro 560X works just fine with PS.
-
You have 8GB of RAM! That's one thing that isn't helping things. I'd purchase a RAM 16GB kit (two 8GB sticks) to take you from 8GB to 24GB. How for the Internal HD. How much is your total capacity? How much is free? Same thing goes for your externals. Are they really full? If so, I'd unhook them from your Mac and see if the performance improves.
-
For starters, if you are just editing still photographs and not doing anything with video, you don't need a iMac Pro. In fact, Adobe Photoshop will run slower than if you were to run it on a tricked-out 27" iMac. It has to do with the CPU chip and other items in the Mac Pro...Photoshop doesn't take advantage of them. Now, if you were editing video, then that's a whole other ballgame. If you are set on a Macbook Pro, then start with the $2799 15" Model. Even though it pains me to say this, since Apple solders the RAM to the motherboard with the current MBP Models, be sure to upgrade the RAM to 32GB!! YOU CAN NOT UPGRADE THE RAM YOURSELF AFTER THE FACT! Yes, Apple's RAM is severely overpriced, but you have no choice. While you are at it, upgrade the HD to a 1TB SSD Drive. Your price before Tax / Shipping and AppleCare is $3599. You don't need to spend the money on a i9 CPU now, unless you want to Max things out and spend another $300. It's only money, right? Photoshop is just starting to take advantage of the architecture that makes a i7 and i9 so fast, but from the benchmarks that I've seen, there isn't a HUGE difference between a Intel i7 and i9 but give it time. I'm sure PS CC 20-Whatever will utilize faster CPUs in the future. As for a Monitor, Damien has a Eizo. They are excellent monitors but really overpriced for what they are. There are lots of decent 27" IPS-based Screens for way less money and you really want a USB-C display to use with a 2018 MBP. I tend to recommend Dell Monitors, since they tend to be easy to calibrate. The Dell S2718D caught my eye. It's a IPS screen and will charge your new MBP while you are using the display. Just a note, it won't charge as fast as the power supply that came with the MBP. (47W from the Display vs 87W from the MBP Power Supply.) BENQ displays, I've delt with them at customer sites and they always seem to die. HP and Dell Displays last forever. In the past, BENQ displays were extremely difficult to calibrate so they normally do not get on my recommended list. That said, this could have changed, though for me, I tend to like and stick with Dell and HP monitors. Oh, I'm moving this thread to the Macintosh Users Group.
-
How old is your Mac? What specs does it have? RAM, HD capacity, etc. I think Apple has stopped authorizing old Operating Systems, so you are kinda stuck with it and can’t go back to Sierra / High Sierra or Yosemite I have noticed with my 2009 iMac, that it’s very sluggish with High Sierra, though that computer is being retired. I’m about to format it and redo everything hoping to get some performance back; though I’m not 100% sure if it will work. That said, a complete format and re-install has been successful for me in the past. I have a feeling this procedure will be in your future too. So lets start with the specs and age.
-
Dual Core with more Ram vs Quad Core with less Ram?
Brian replied to lbg27's topic in The Macintosh User Group
Thumb Drives are so easy to lose. That SSD Drive is meant to walk around with, the big loop allows you to hang off a backpack. It has my attention. Without any consistent Ethernet, you are going to have to live off an external HD. If you do go smaller with an internal drive, do not go any smaller than 500GB. -
Dual Core with more Ram vs Quad Core with less Ram?
Brian replied to lbg27's topic in The Macintosh User Group
If you don’t always have internet you probably should invest in one of these: SanDisk 1TB Extreme Portable External SSD - USB-C, USB 3.1 - SDSSDE60-1T00-G25