Brian
-
Posts
4,137 -
Joined
-
Last visited
-
Days Won
55
Everything posted by Brian
-
The Benq model looks interesting. What concerns me is all of the things you can do with it, all those bells and whistles and auto-brightness, etc. You want consistency; you want your prints to match your screen. In addition, all that fancy stuff gets in the way of calibration devices, and will more than likely require you to purchase the latest and greatest like a SpyderElite unit to work with that fancy display. Walking into a computer store and buying something. That's so 20th Century. LOL! That's not how it's done these days.
-
SKIP that display you linked to. It's for gaming, not photo editing. You need a IPS display and one that isn't glossy. As for your monitor, it's toast. Find a recycling center that takes computer equipment. You might have to wait a week, or try Amazon.
-
 I don't like using flash-based media for a device that has a finite read/write limit. Cache files go on a traditional HD. I'm an old stubborn dog who is reluctant to change. If you have an old HD laying around, try it for the PS scratch disk only. See how it works.
 -
That's weird. I was able to customize things like upgrade/downgrade the video card, if I wanted MS Office or not. If you are really looking to customize and build your own computer, the Dell XPS Line probably isn't what you are after. The hardware recommendations still stand and don't think building a super-rig that will be awesome for games will make PS faster. It won't. @Jason - Any recommendations?
-
I still like the Dell XPS series for what it is. I bought my Fiancé one for Christmas 2015 and it's worked really well for what she does. Here seems to be the latest and greatest Dell XPS 8920 line. The Dell for $949 or $1027.99 (That's on a 24-hr flash sale) would be my choices. Recommendations / Specs really haven't changed. Intel i5 or i7 CPU 8GB RAM at a Minimum. 16GB or more preferred A separate and dedicated video card with its own video memory. 2GB or 4GB is fine. 4GB+ Preferred 1TB HD at a Minimum. Hard Drive, you can never have enough capacity. There isn't THAT much of a performance boost between an i5 and i7 when it comes to Adobe Photoshop. In order for the i7 CPU to really shine and perform at its peak, the software programming needs to be optimized to take advantage of the i7's architecture that makes it so fast. Photoshop and Lightroom are not those programs. In my humble opinion, you are only looking at a 7% performance gain with a i7 over a i5 when it comes to PS. It's better to have more RAM, a super-fast beefy video card with at least 4GB Video Memory and a large HD for the Scratch Disk to stretch out on than worrying about should you get an i5 or a i7. I'd just get an i7 these days just because...I like buying things once and be done with it. I also am thinking on getting into video, in which case a i7 would be a requirement.
-
You are onto something there. The next step is to see if your SSD drive and M.2 Stick Drive need any firmware updates. The reason that I say this is I had a computer once that I was playing around with, installing Windows Server 2008 R2, etc. It just had a 256GB SSD Drive. Everything would install fine except that it would completely crash, get a BSOD etc., ONLY when I promoted it to a Domain Controller. It would work fine until I ran the DC Promo Wizard. Heck, it even got 90% of the way through the wizard and then BOOM!! BSOD, reformat and reload the whole flipping thing. I went round and round and then tried installing the firmware update as a last-ditch effort and guess what? I was able to finally fully promote it to a Domain Controller after updating the firmware. So the moral of the story is, stay on top of Firmware updates when it comes to a SSD drives and other flash-based media. I would try that next. Second thing, I would never use a SSD Drive or any device that is Flash Media based for the Adobe Scratch Disk unless I absolutely had to. It is highly recommended by me to use a traditional 7200 RPM SATA Drive for that. Even a RAID 0 with a couple of 7200 RPM Sata Drives would be better. 1TB or 2TB is fine. Unless you are doing huge panoramas, in which case 4TB or more is recommended. I like Western Digital Caviar Black SATA Drives.
-
Apple has taken Mavericks behind the barn and shot it dead. They stopped signing off on it. Sierra is the only thing in your future. PS CC needs at least 10.6.8 to run the basic PS CC, not the newer PS CC 2015.5 or current versions like that. Since you nuked your computer, and it's a fresh install, how about updating to Sierra? Seriously. Since you are just starting things over, it won't be as painful to reformat the HD and redo everything if you have to. I'd be interested in seeing how things go. Macs (and iPhones / iPads) don't always upgrade nicely, sometimes it takes you doing a fresh install to get things working. Also, do you have CleanMyMac from MacPaw? If not, I'd highly recommend getting the latest version and running it. There is a ton of crap that the Mac OS installs on default.
-
I'm sure you are also going to ask what Hard Drives I recommend. I like G-Drives myself. This WD HD unit also caught my eye. I would set it up in a RAID 1 Configuration (HD Mirroring) and that will give you 6TB storage space. The 12TB rating is for a RAID 0 setup, and RAID 0 is NOT MEANT for long-term backup storage.
-
Before buying anything, write down a directory / organizational tree on a piece of paper. Think things through and make some sort of flowchart. Throwing money at this problem isn't going to solve much; believe me, I'm very good at spending people's money. Start with one folder, just one folder...don't get overwhelmed with all the folders, and copy images from your main hard drive to a EHD. Then when you are sure the images are intact, delete them from the main / internal HD. I've learned the hard way that it's not good practice to cut/move files, always copy, then verify, then delete. If something goes wrong during the data transfer when you "Cut & Paste," your file might go "Poof" and it's lost forever. I've personally experienced this and it wasn't fun telling my customer that his un-replaceable file was gone. (His files were corrupted and nobody knew it.) Anyway, I'm digressing... There is no easy way to do this, you are going to have to CULL-CULL-CULL. Nobody can do it for you, unless they have been working as your assistant for years and know what you are after. Be ruthless. You do not need 75 photos of your lunch taken at a restaurant from 4 years ago. Use the rating system within Photo Mechanic. Anything 4 or 5 starts, keep. 3 stars is a maybe. 2 or less...delete them. Take things in small chunks, one folder at a time. Breathe. This is a lot like cleaning out an old garage or attic filled with JUNK. How to install Photo Mechanic: https://www.youtube.com/watch?v=Ycvx3D8M21w
-
I'd buy either one big EHD or two EHD and split them into categories. If you shoot professionally, have a main folder called "Personal" and one called "Client." From there create folders with the year and then project names OR project names / type of photography and then by year and then by month. You could also have a contest folder, it's really up to you. Instead of sending your whole Mac out to get organized, how about purchasing a program called Photo Mechanic. It's an awesome program that allows you to quickly cull and view images, much faster than trying to use the Mac Finder. The program allows you to set ratings/color codes to the files that you like, then you can tell the program to hide all the non-color-coded images and then you can move those images from one folder to another within Photo Mechanic. It's pretty powerful. Nikon has a free version, if you shoot Nikon, called ViewNX. Nikon's software is buggy and has its quirks, but it's free. Honestly, I'm going to get Photo Mechanic myself in the near future. Here is someone demonstrating on how they use Photo Mechanic:
-
A walking back to my car shot:
-
In your sample photo, it looks like he was at f/16 or f/22. How do I know? Look at the street/ parking lot lights. See the rays from the "starburst?" You get that effect starting with f/16 but f/22 will yield the best results. For example I took this shot using f/22:
-
A Tripod is required. Or put your camera on something steady, like a stone wall. Not a wall that's on a bridge with cars moving. You want zero camera shake. Set your camera to the base ISO, typically this is either 100 or 200. Set your aperture to f/8 - f/11, depending on lighting conditions. An aperture of f/11 - f/16, or possibly f/22 might be needed, though I would start with f/8. Set focus on something midway in the distance and then turn off auto focus. Cameras often will hunt for focus, so you might need a flashlight to help your camera to autofocus. Set your shutter speed to 30 seconds or use bulb mode if you have it and a shutter release cable. The longer the shutter is open, the greater the effect. (More light is let in.) If you do not have a remote shutter cable, set the camera for a 10 second delay before it triggers the shutter. Play around with shutter speed, try 20 seconds or 10 seconds. Study the differences. For the best results, hunt for an area that will provide interest. A scene that has a fore-ground, middle-ground, and then back-ground will give you the strongest composition. Don't be afraid to use leading lines or the light streaks could provide this. Play with angles, walk around. Often the best shots that I take are when I'm walking back to my car and see something interesting. This type of shot is pretty straightforward, once you figure out the recipe. Believe it or not, this type of photography is how you get the silky waterfall shots or even shots of the Milky Way.
-
VA is the new kid on the block. It's supposed to be a combination of TN (Twisted Nematic) and IPS (In Plane Switching.) You get a better viewing angle than a standard TN display and better blacks. It's geared towards more gamers and first-person shooters. VA really doesn't reproduce colors that well, though it's better than a TN display but not as good as a IPS panel. If you are editing photos (or video) it's better to get a true IPS display. I would not purchase a TN display or VA for editing photos. Edit: VA Display Panels might be labeled as MVA or PVA.
-
@Renski00: It looks like this thread hasn't gotten the attention that I was looking for. One of the websites that I follow is run by a gentleman named Thom Hogan. When I have questions, that's who I go to. Anyway, he just wrote an article about the Canon 6D Mark II: http://www.dslrbodies.com/newsviews/what-to-make-of-the-canon.html From the article: So according to Thom, the "Mark II" is just a general update to the 6D Mark I. It's still an entry-level FX body and for some, that's all they need. As for which one of the two, it depends on what you are shooting. Long Term, going full frame might be a better bet, as the manufacturers seem to be investing more effort into that line. (I'm looking at you Nikon! Yes, I know you just released the D500 and D7200, but what about DX lens refreshes? I'm not talking about the plastic kit-lenses either, but I'm digressing.") Anyway it seems for the last couple of years the manufacturers have been pushing full frame. It's almost as if they are saying, "Full Frame = Good / Professional" "Crop = Bad / Amateur," because in reality, they haven't had anything major/earth shattering in the crop camera dept for awhile, so they have been pushing full frame. As to which one? It depends on what you shoot. Landscapes? Birds in Flight? Weddings? Portraits? Planning on doing this professionally or as a hobbyist? That's what you should be asking yourself, WHAT do you plan on using the camera for? Because today's camera bodies, whether they are crop or full frame...ALL of them take great photos. It just boils down to the features you are looking for. (Focusing Systems, High ISO, Dynamic Range, Weather-Sealing, etc. etc.)
-
@Renski00 wants to know, 7D Mark II or 6D Mark II?
-
I think I'm going to push this thread to the land of misfits for others to chime in.
-
It's called JBOD. Which stands for Just a Bunch Of Disks. Seriously. It works similar as a camera would with two slots, when HD #1 fills up, it starts using HD #2, then #3 and #4. If one of those HDs fail, say like number 2, you can't get to HDs 3 & 4. I do not recommend using JBOD mode. The only people that I know that do that are technical geeks that just do it...because they can. Unless that HD unit has a mode that treats four hard drives separately, and I really-really think that it doesn't, then you possibly could. Personally, I have never seen and enclosure that was meant for a RAID treat 4 hard drives as individual EHDS. I mean, what's the point? You buy that enclosure for it to be a RAID unit, and the only other mode would be JBOD, which again, I do not recommend for your "typical" end-user. That's the main issue. You are looking for a bullet-proof system and unfortunately, it does not exist. ANYTHING man-made can fail. Failed Hard Drives are the number one thing I replace when it comes to servers. Followed by faulty Tape Drive units, and then Power Supplies. I can't tell you how many hard drives I've replaced in the last 25 years being a tech. It's in the thousands, perhaps 10,000 or more. That's why you have a backup of your RAID. Typically, it's either to a Tape Drive, or to a backup appliance / cloud service, which is what my fancy $30,000+ servers my customers do. We have backups of the RAID and then backups of the backups. One is kept off-site at all times. The only thing that RAID is supposed to do, is give you more fault tolerance when something fails. So if a drive dies, you can keep going. Unfortunately, it seems that your Software RAID isn't as robust as one would like. If it worked as it should, that HD would have failed, you should have still been able to access your data, then replace the HD, and have that HD rebuilt / added to the RAID and gone about your day with little to no down-time. I'm thinking you just purchased something that just doesn't live up to expectations; so rather than blaming RAID for your issues, you should be blaming the manufacturer for selling crappy stuff. Again, what I would do is create a new RAID5. Use All four drives in that unit, you'll need 3 at a minimum and if you can set the 4th as what's called a hot spare...DO IT!!. What a hot spare does is what the name implies. When the RAID controller software detects an issue with one of the drives, it automatically builds that 4th drive into the RAID setup and then disables the faulty drive. Then you replace the faulty drive and that becomes the new Hot Spare. After getting your RAID 5 setup, get two larger HDs, like two 8TB USB 3.0 units or even 16TB units and backup nightly / weekly backups. Be sure to keep one EHD off-site. You could rotate the HDs nightly, which is the safest route, or do a weekly rotation. Your call.
-
Won't import from camera - wheel just spins
Brian replied to Meetmow's topic in Lightroom questions or problems
I agree with Damien. I highly recommend using a card reader. Don't use your camera to transfer images. I know it seems easy and it's tempting, but when things go wrong it's a real PITA to get things working again. Permission fixes, there isn't one simple method. I've gone round-and-round for hours trying to fix them. Other times I takes an hour or so. Either way I can't recommend and easy and simple fix. Oh I recommend about 75% or so for the maximum usage on any HD, internal or external. So on a 500GB drive, try not to go below 100GB full. -
I'm thinking the OS upgrade isn't playing nice with your 2011 laptop. The problem is, you might have to nuke the HD and reinstall everything in order to get your speed back. This is a tough one, if you have a Genius Bar nearby, schedule an appointment. Oh, if the RAM you installed is from a 3rd party, Apple will blame everything on that RAM stick, so you might want to remove it before heading to Apple. That said, it's a laptop from 2011. Laptops, even fancy ones from Apple, die after 3-4 years on the average. I also suspect, though this is my opinion, is that OS Updates / iOS updates slow down older models to drive you crazy on purpose. I've had iPhones get upgraded, only to become slow as molasses after doing so. Funny how the iPhone worked just fine before the update. Bottom Line: A new laptop might be in your future.
-
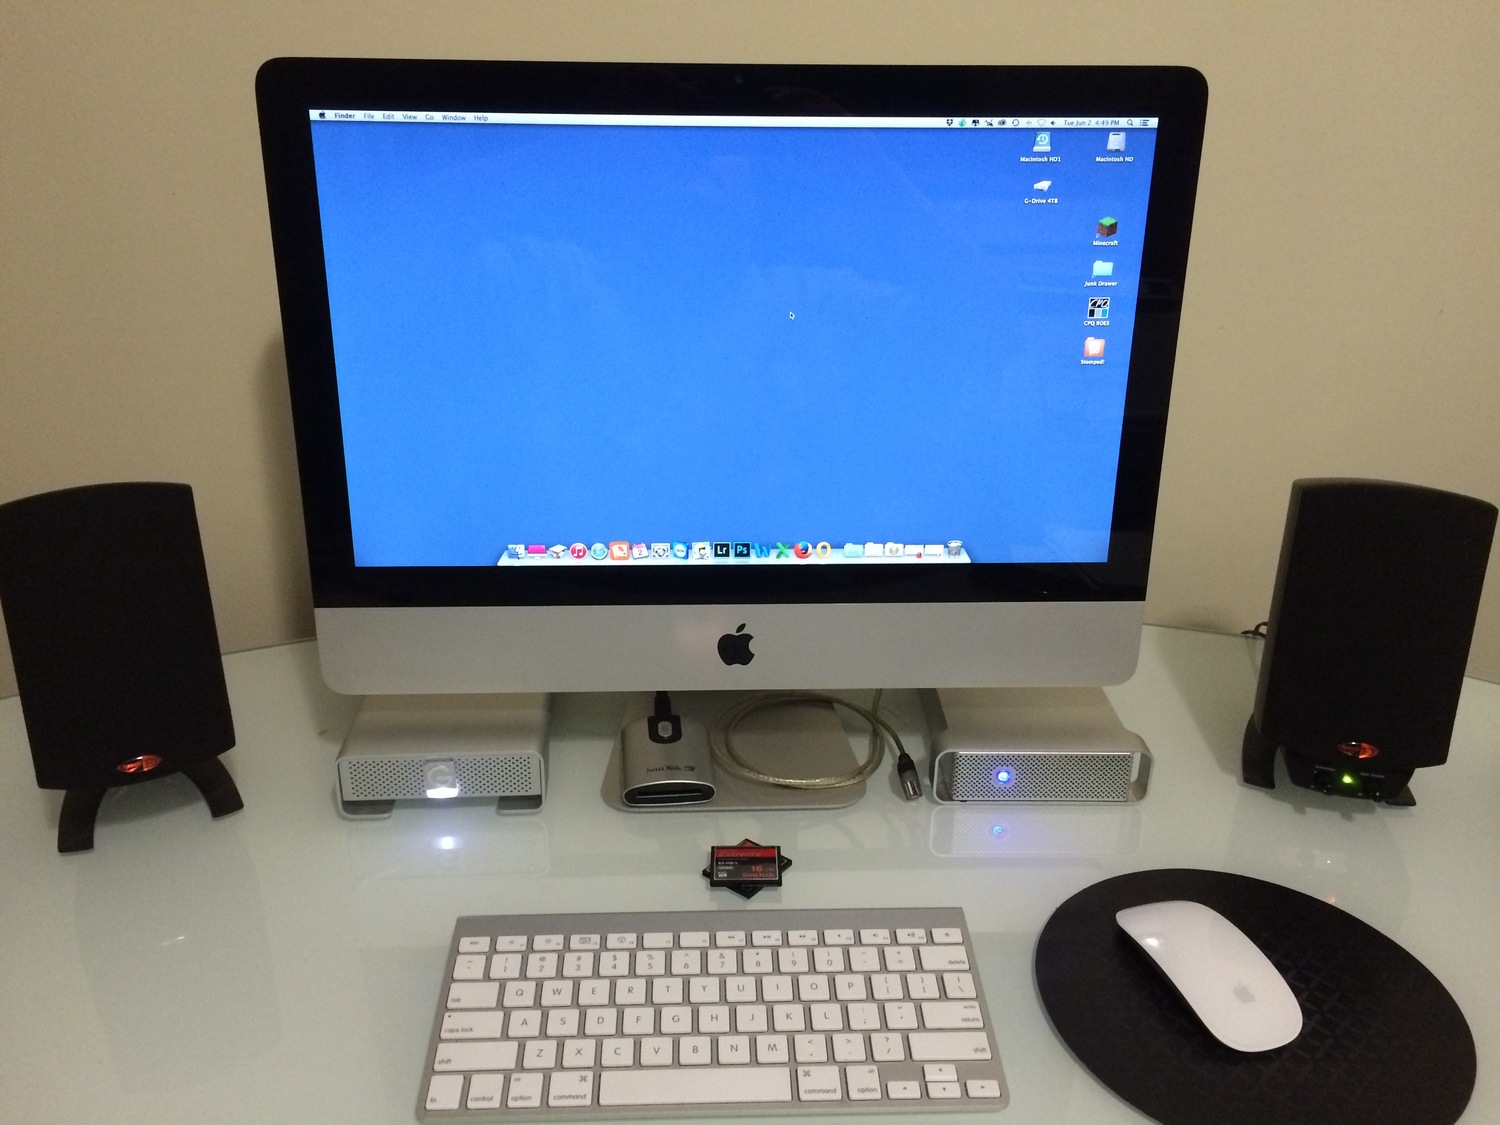
I think Apple stopped signing off on El Capitan. You can downgrade from High Sierra to Sierra, but not Sierra to El Capitan. Those instructions are from Sept. 2016 and Apple is notorious with cutting things off about a month after their current OS is released. Basically, they give the early adopters a chance to downgrade if they need to. For the rest of us who wait a month or two to upgrade, we are S-O-L. Honestly, I wouldn't mess with your OS. Using PS CC 2015.5 should be much less of a hassle. Things could go downhill really quick. Oh, one more thing. How much CRAP (Files & Folders, etc.) is on your Mac Desktop? The reason is the more junk you have cluttering your Mac Desktop, the slower the thing runs. The reason is Macs treat things on the Desktop as open files, for lack of a better term. So if you have 1000 raw files and .psd files for the Smith-Jones Wedding, and 300 files from the Miller's Photo Session at the park, that's over 1300 "Open Windows." The quickest way to speed up your Mac, regardless if it's a Laptop or Desktop, is to clear off the desktop. This is what my Mac looks like when I stop being lazy. Often it's filled with crap, but then again, I don't complain when it's slow because it's due to a cluttered Mac Desktop.

-
The Spyder Software doesn't take up that much room, so it shouldn't matter in the grand scheme of things. As for software installation, it varies. Sometimes it's labeled as "Custom / Customized," other times it's "Advanced" or a similar term.
-
OS Sierra is also new. PS 2017 may have issues with it. That's why I'm still on Mavericks! LOL!!
-
You should still have PS CC 2015 installed. Adobe typically doesn't overwrite new versions and leaves the old version alone. (Which also takes up space.) Open PS CC 2015 and see if the speed comes back. It's possible that the PS CC 2017 download was somewhat corrupted or it's buggy / doesn't like your laptop. The other thing that comes to mind is in PS Memory Settings. Set the Graphics Processor usage to "Basic" and restart PS.
-
THERE IS YOUR PROBLEM!! Damien is correct. Start moving things over to a EHD. You need an additional 50GB freed up. There is no room for the PS Scratch Disk and your laptop has to work harder during editing/culling. I really don't recommend a HD being more than 80% full, and 75% is a good target to keep as it gives you a little wiggle-room between 75% and 80%. So at 240GB, try not to go below 80GB free, and you'd want to be at 100GB free at all times for better performance.