Brian
-
Posts
4,137 -
Joined
-
Last visited
-
Days Won
55
Everything posted by Brian
-
Just the partition. You pay more for having it pre-formatted for a Mac, which by the way, you can do yourself for free and it takes less than 5 min. Also the HD inside might be slightly different, but the main thing is the the partition and format for the Mac. Bottom Line: Save yourself the extra $30, buy the Windows edition and reformat it. There isn't anything special or magical, it's just the manufacturers know that the Mac Users are used to paying more, and are banking on this. Fun, eh?
-

Glitchy PS
Brian replied to Ashley's topic in Photoshop / Elements / Bridge / ACR questions or problems
@Damien Symonds: My record: 8.95GB free out of 120GB on a Windows Server C Drive. When you scale things up, this one is pretty damn close. -
Glitchy PS
Brian replied to Ashley's topic in Photoshop / Elements / Bridge / ACR questions or problems
The reason why it's so full: Windows 10. You see, Microsoft is going to stay at "Windows 10" for quite some time. There won't be a Windows 11 or 12. There is Windows 10 - Anniversary Edition, plus a few editions in between and the next one will be Windows 10 - Creators Edition, which will be released in a few weeks. Basically, without getting too geeky, these major updates re-install the whole friggin' Windows and put your old version in a Windows.old directory on the HD. Combine that with the other update patches and system recovery points, AND your Windows Swap File (pagefile.sys) and Adobe Scratch Disk and you can run out of room pretty quickly. Especially if you are the type to "next-next-next...ok.nextnextnext...ok...finish" when installing stuff. It's getting to the point where people either need to have 4TB C Drives or must learn to pay attention. The days of, "I don't know nothin' about computers" needs to come to an end. If you don't want to install any software, you can right-click on the C Drive and select "Properties." From there you should see a button called Disk Cleanup. Click it and choose all the check boxes and run it. Warning: this will delete the backup files for windows updates plus other things, so if you need to uninstall a Windows Update, you won't be able to. If you need to go back to your old version of Windows, you won't be able to. That said, you probably have no need to do this at this point so it really doesn't matter. I'm more concerned about that HD only having a 106GB left. That's not good. At all. -
Why some but not all are lost on card??
Brian replied to JessicaSalazar's topic in The Macintosh User Group
I've even seen bad USB cables and flaky USB ports cause issues. So it could be: 1. Slot in Camera 2. Bad Card 3. Card Reader 4. USB Cable 5. Bad USB Port 6. Transfer Software Those items are not in order. Honestly, I never use special software to copy images, I always use a card reader and manually copy over images from a CF card to my HD. Then those cards are pulled out of rotation until the images are delivered to the client. Multiple cards too expensive? Can't pull them from out of rotataion? Don't want to hear it. Lawsuits are expensive. Unhappy clients and bad word of mouth is expensive. If you are charging people money, you need to cover your arse and spend the money on quality cards. Period. -
Why some but not all are lost on card??
Brian replied to JessicaSalazar's topic in The Macintosh User Group
Your card reader could be the culprit. It's plausible. I've recommended both Sandisk and Lexar Readers in the past. Here is the Sandisk: http://www.bhphotovideo.com/c/product/810152-REG -
Why some but not all are lost on card??
Brian replied to JessicaSalazar's topic in The Macintosh User Group
As far as software recovery, Sandisk uses the ORIGINAL SOFTWARE that was used for image recovery. In addition, it's Sandisk that owns the rights (and came up with the idea) for CF media. Lexar has to license it. So Sandisk is using the original stuff. As for which is better? Personally, I've never used Lexar; friends of mine have, but not me. They seem to have more failures, but then again this could be just a personal experience and not a hard & fast rule. But to answer your question: Sandisk Extreme for me, and their software recovery. -
Why some but not all are lost on card??
Brian replied to JessicaSalazar's topic in The Macintosh User Group
I personally like the Sandisk Extreme line of cards. I will write the month and year on the back and cycle them out around 18 months or so, depending on the cards usage. Here is the 16GB 2-Pack that I recently purchased and am thinking about getting a few more, possibly the 32GB version. It seems that the cards I used to buy are no longer available. -
Why some but not all are lost on card??
Brian replied to JessicaSalazar's topic in The Macintosh User Group
The SD slot in the 5D Mark III sucks Monkey-Ballz. So it's the SD slot in the camera body I have issues with, not SD cards themselves. Though I would NEVER purchase and use a "Ultra" card. You NEVER cheap out on your media, whether it's a CF Card, SD card or another interface. Spend the extra $10-$20. -
New PC laptop spec requirements
Brian replied to Anne Adlington's topic in The Windows & PC Hardware Forum
You picked a good one. Enjoy your purchase. -
New PC laptop spec requirements
Brian replied to Anne Adlington's topic in The Windows & PC Hardware Forum
Oh, I forgot to mention: AVOID AMD CPU CHIPS ON LAPTOPS. They aren't as efficient and usually run hot. Intel's laptop CPUs run circles around AMD these days. Now if this was a desktop, that's a different story. -
There are multiple options with your links. RAID0 - This type of technology is great for when you need a FAST Drive, such as when editing video. RAID0 takes the data blocks and divides them in half. One half goes to one drive, the other goes to the 2nd drive, but the two disks act as one large HD. As I've stated, the upside to this is SPEED. A RAID0 running on 7200RPM Hard Drives is much faster overall than using a single hard drive. There is no difference in speed when using SSD drives, the performance gains are only when you are using traditional hard drives with spinning platters. Major Downside to RAID0 - If one hard drive fails, the whole thing fails, meaning you lose everything. Benefits to RAID0, two 500GB Hard Drives become a single TB, so you get a "boost" in storage capacity, and of course speed. RAID1 - Drive Mirroring. This will cut your total advertised storage space by 1/2. So that 8TB HD will becom a 4TB Hard Drive, with around 3.6GB available for usage after formatting, give or take a little. The benefit to RAID1 is when you right to one drive, it automatically copies to the other drive in real time. Benefits: If one hard drive fails, you still have your files on the other hard drive. Downsides: If you screw up and accidentally delete a file, a RAID1 will not save you, because when that file is deleted on one hard drive, it's automatically deleted on the second hard drive. In addition, if the data is corrupted on one hard drive, it's going to be corrupted on the 2nd hard drive. RAID1 is preferred for today's home-user looking for a bit of redunancy in real-time, but it has it's limitations. JBOD - Stands for "Just a Bunch Of Disks." I do NOT recommend using this mode for anything critical. It's almost as bad as using RAID0 for backups. Basically, for lack of a better term, hard drives are "Daisy-Chained." Both Hard Drives are linked together and when Hard Drive A fills up to capacity, things start writing to Hard Drive B and C and so forth. The reason people use this method is they are in a bind and need extra space quickly and have a Hard Drive laying around. The downside to this is stability, this JBOD method is really meant for the days of hard drives being small, like 10MB or 20MB or even 40MB. (That's megabytes, not gigabytes or terabytes) Today's drives are so much larger and cheaper than their 1980's counterparts, so JBOD really isn't needed these days. In fact, the only people that use this method that I personally know of are techie-guys like myself that use JBOD just to do it or "Just because..." with no real reason. A JBOD setup is fun for Nerds. LOL!! So back to the two drives you linked to. Both are fine. The 8TB Drive will turn into a 4TB before formatting, and a 12TB drive will turn into 6TB when using RAID1. The downside is that it's one unit and if you really are paranoid about keeping data, it's best to purchase two units and keep one off-site in case of fire, floods, earthquakes, etc. Oh, floods don't always come from the creek next to your yard, they can come from a busted water-pipe that fills a room, etc. So that's the biggest thing that I can see with those models. As for which one? The silver aluminum case one. A fast 7200RPM drive tends to generate a lot of heat, and I like having the extra heat dispersion. Heat Dispersion makes fast Hard Drives last longer.
-
How do I set my Nikon D7100 to Kelvins 5600?
Brian replied to ElijahDiaz's topic in Photo Gear & Equipment
Two ways to do it. You can go through the Shooting Menu (Camera Icon) and select "White Balance." Once in the White Balance Menu, arrow down from "Auto" to where it says "K Choose Color Temp" then right arrow over until you get to the range that you want. Nikon doesn't have a "5600K" setting, but has one that is close, 5560K. The second way is to hold the WB on the back of the camera, rotate the rear dial and look at the top LCD. You want to change it from Auto to K and then rotate the front dial to get the value that you want. Are you shooting with lights, like Alien Bees? -
If you have a Thunderbolt port, I'd get this version instead.
-
Why some but not all are lost on card??
Brian replied to JessicaSalazar's topic in The Macintosh User Group
Current 5D Mark III Firmware Version: 1.3.4 -
Why some but not all are lost on card??
Brian replied to JessicaSalazar's topic in The Macintosh User Group
That SD slot in the 5DM3...I'm not a big fan of. I usually tell people to avoid using it like the Plague. In addition, while I use Sandisk media, I NEVER use the "Ultra" line and prefer the "Extreme" line. The difference is one is consumer grade (ultra) and then other is professional grade. (Extreme). If you use both slots with a 5DM3, the writing time slows down to 30Mb/s, so expect longer times when the buffer is dumping stuff to the cards. -
Why some but not all are lost on card??
Brian replied to JessicaSalazar's topic in The Macintosh User Group
I'd like to see if this problem happens with 16GB cards. -
Why some but not all are lost on card??
Brian replied to JessicaSalazar's topic in The Macintosh User Group
Make sure your camera's firmware is up to date. Some camera's have issues with 32GB or larger cards. -
I like G Drives: http://www.bhphotovideo.com/c/product/1013785-REG
-
Bridge CC - photo downloader freezes?
Brian replied to Katie_inthepilbara's topic in The Windows & PC Hardware Forum
16.6GB Free... Ugh. Danger Will Robinson!! DANGER!!! It is good computer practice for a HD to never go above 75% full. So in your case, we need to get around 40GB from 16.GB free. So I'd shoot for clearing up around 25GB or so. Why? Your HD is in danger of corruption, or at the very least in my humble opinion, in the red-zone. It sounds like you have a small SSD drive (probably around 128GB) and you have dumped everything to this drive, such as programs, downloads / files, photos, whatever. Most folks fall into this trap, they are so used to clicking, nextnext,...next...next...OK...Next, etc. "Sure program that copies my images!!! Please go ahead and dump them in the default location, which is on the C: drive!!" A SSD Drive, no matter how fast it is, won't do you any good if it's full and you need to have one that is at least 500GB in order to do the "nextnextnext...ok...next-next-next....finish" method. You must be super anal on what is installed on a small hard drive, like a 128GB drive, which is microscopic my today's standards.!!! Do you happen to have a D: Drive? Hopefully you do, because we NEED to get critical files and other data copied to another drive or at least a Thumb Drive. You have much bigger problems than photos not transferring correctly. Is this by any chance a laptop computer? What is the make / model is this computer? Do you have any money in the budget for upgrades? -
Why some but not all are lost on card??
Brian replied to JessicaSalazar's topic in The Macintosh User Group
What camera model and what make / model is your SD card? What's weird is that this is an intermittent problem. Do you have more than one SD card? I know, silly question, but I must ask. -
Why some but not all are lost on card??
Brian replied to JessicaSalazar's topic in The Macintosh User Group
This is why you don't delete in-camera: Taking care of your memory cards is the first thing. Don’t delete in the camera. If you’re out shooting and you have a problem with a card, take it out, set it aside, put a new card and continue to shoot. If you run out of room, don’t delete on the camera because typically on a clean card when you’re recording your writing is all sequential. If you start going through the card and deleting this file, deleting that file, then you fragment the card. So when you go to shoot again and you’ve got a little area free and another one over here and another one over here, as the camera is recording the camera’s going to put parts in different places. If you then do have a problem with that card, recovering it is even harder. Because if there is no file system left, the individual file data may no longer be sequential. -
Why some but not all are lost on card??
Brian replied to JessicaSalazar's topic in The Macintosh User Group
Give this article a read: http://www.dslrbodies.com/newsviews/the-data-recovery-interview.html -
Why some but not all are lost on card??
Brian replied to JessicaSalazar's topic in The Macintosh User Group
Are you deleting images on a normal basis on your camera? If you are, that's the #1 way to get into trouble. I know, "...but I've been deleting images on my camera for years and have never had a problem!!" Always format your cards in-camera before a gig and never delete in camera. New way of thinking. -
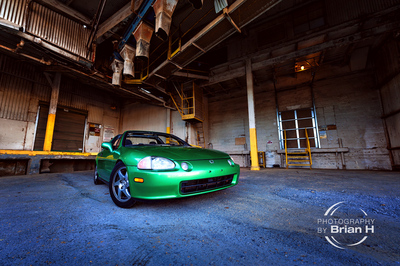
My Son wanted me to take a few photos of his Honda Del Sol before he started tinkering with it. You can see the distortion in these photos as I was at 14mm and only a few feet away.

-
This photo is one of my favorites from the Bar Harbor trip. Taken at Sand Beach in Acadia National Park, waiting for the stars.