Brian
-
Posts
4,137 -
Joined
-
Last visited
-
Days Won
55
Everything posted by Brian
-

Best Practices for LR Export
Brian replied to Elizabeth G's topic in Lightroom questions or problems
FYI: 80% in LR is equal to "10" in PS. 100% in LR is equal to "12" in PS. Adobe's ratings are based on a 1 --> 12 method. "11" in PS would be "90%" in LR, "9" would be "70%," and so on. -
You are headed to Prime Land and I don't think you will ever be 100% happy with a 24-70. A 35mm is probably the lens you are after, and from the looks of things, a Sigma 35mm ART. The 24-70 is great if you want to run-and-gun, like I do during weddings. Mine is pretty sharp and am quite happy with it. You could do things with a 35, 50 and 85. That's typically the focal lengths that you use the majority of the time when it comes to photographing people. Something wide, something long and something in the middle. Bottom Line: Return it.
-
Here's the thing, the Nikon 24-70 is not #amazeballz sharp, and is at its weakest at both 24mm and 70mm. This is normal, and I'm sure within Nikon's tolerances. Remember, it's a zoom, not a prime. Doing what I call the "Measurebator Tests" will just frustrate you. Virtually ALL digital photographs need some sort of sharpening. See: Damien's Sharpening Class. What I would do is take your camera and new lens for a workout. Photograph things of all types, near and far. Pixel-Peep. Rinse and Repeat. Figure out which focal range works best, and which ones need a bit more finesse on your part. Figure out how far away your subject is so that the lens performs at its best. Use a tape measure and figure this out. The reason I say this, is say you put AF Fine Tune at +17, what happens when you are at 56mm? Or 35mm? Or 42mm? Or 60mm? You are going to have out-of-focus photos, then the next stop I will see you in is the Focus Checks Section on AD, banging your head against the wall. Life is difficult as it is. If you find the lens doesn't perform to your expectations after pixel-peeping, then I'd return it and try to purchase a brand new 24-70. Even then I feel that that AF Fine Tune software will find something wrong. In addition, your D750 Auto Focus system needs to be ABSOLUTELY PERFECT in order for those tests to be accurate. Actually, your camera & lens needs to be in a lab, under controlled conditions to really be calibrated together, not on a dining room table. LOL! I've seem a few photographers who have send ALL of their gear to Nikon to have it calibrated together and guess what? They still were not happy when they got it back. Most lenses like the 24-70 and 17-55 (The DX version of the 24-70,) are at their best when the subject is within 5 and 15 feet from you. If you are really looking for TACK SHARP photos, skip zooms and get primes. I'd say get the new Nikon 105mm f/1.4E, the Nikon 58mm f/1.4G and the Nikon 35mm f/1.4G or the Nikon 24mm f/1.4G. Whatever you do, skip the AF-S 50mm f/1.4G, that lens is a piece of sh*t. Of course, going this route is going to be very expensive compared to your used 24-70. I really think you need to skip all this calibration stuff and GO OUT AND SHOOT. Again, @24mm and @70mm the Nikon 24-70 isn't at it's best. Many zoom lenses suffer the same fate, but I think you will find is that it's not that bad.
-
Creating/updating backup of photo files
Brian replied to Kim Haugen's topic in The Windows & PC Hardware Forum
8GB Thumb Drive 5-Pack from Amazon 16GB Thumb Drive 5-Pack from Amazon Another 16GB Thumb Drive 5-Pack from Amazon -
I sense a trend... Take a look at the thread that is next to yours. This member has a 256GB SSD HD which is nearly full and now has issues...
-
Creating/updating backup of photo files
Brian replied to Kim Haugen's topic in The Windows & PC Hardware Forum
There's your problem. 256GB SSD. You see, the SSD C: drive is only meant for the operating system. No programs, no data files. What has happened, is when you have installed software and updates, you have done the traditional "next-next-next...ok...nextnextnext...finish" method of installing without giving any thought to WHAT was being installed and WHERE. So I'll bet you have a full 256GB SSD C: drive and a empty 2TB I: drive. (Just re-read your comments and this is the case.) This is the exact reason that I jump up and down about small SSD hard drives and why I always recommend having a 1TB for their primary drive. How to fix? You have a real mess on your hands. Honestly, I'd upgrade the 256GB Drive to a 1TB model. This is the one that I would get. The only way to free up space is to start un-installing software and re-install it on your I: drive. In the long run, you still need a bigger main drive. 256GB is microscopic by today's software requirements and you'll run into this problem again. Oh and YES!!!! CREATE THE RECOVERY MEDIA!!! Duh!!!!! LOL!! What do you think I'm gonna say? If that Dell crashes and you don't have the media to do a restore, how do you think you are going to get back up and running? You don't have any friggin' install disks, you never created them. LOL!! So your 1st thing to do, before doing ANYTHING else, is to create the recovery media. What you need to do, right now is get a couple of 8GB Thumb Drives and maybe a couple of 16GB Thumb Drives. I like Sandisk. They are like $5 now so there is no excuse. Run the Dell create media utility and use the Thumb drives. The process takes about 20 minutes which will save you hours and weeks of headaches. It should tell you what size Thumb Drive it's looking for. After you create the Thumb Drives, I want you to get a Zip-Loc Freezer Bag, the kind that you can use a Sharpie Marker to label what's inside and write DELL XPS 8700 Recovery Media. Put the Thumb Drive in the Zip-Loc bag and put it somewhere safe. -
:::: FACEPALM :::: I love when salespeople try to sell stuff. LOL!! Here is the thing with SSD, I don't care how fast and fancy it is, A FULL SSD drive won't do you a damn bit of good, no matter how you slice it. The best systems have a SSD C: Drive that has the Windows OS, and a second HD, usually a 4TB 7200RPM drive for the programs and data. Again, you are back to doing custom installs on everything, and not going "nextnextnextnext...ok...next...finish." So while a 500GB SSD Drive would probably work, it's still a 500GB drive before formatting. Don't think for a minute that you have 500GBs to play with. More along the lines of 465GB (give or take) THEN minus what Windows 7 or Windows 10 takes for itself, plus all the updates and patches that will need to be downloaded, so let's say you are around 380GB when it's all said and done. Now you go installing software and drivers and such, and space starts becoming a premium. What the reality is, manufacturers have bought a bunch of SSD drives. They are the "COOL" thing to have and run much faster. It's easy to sell...I mean, WHY would you not get one, right? They are so fast and consume less power and don't have any moving parts!! Umm...yeah. They are still small capacity-wise, but are getting much better. 1TB drives exist, Crucial makes them, among others. Oh, here is another sneaky thing with SSD, if you go accidentally deleting files and are looking to recover said files, it's near impossible to do on a SSD drive, due to the way it spreads the data across the memory chips inside. While I like the idea of SSD and would use one for my Operating System, I would definitely have a 2nd traditional HD that has all my programs and data. Though I might put programs on the SSD Drive. The PS scratch disk and Windows Swap File would be on the traditional HD, hands down. If you do get a system with a SSD Drive, make sure it is AT LEAST 500GB. The bigger the better. See if there is an option to add a 2nd HD, or add one yourself, it's not that hard to do and takes about 15-20 min. Seriously.
-
workflow/backups & failed drive question
Brian replied to laural's topic in The Macintosh User Group
Thank YOU!! -
Mainstream Windows 7 Support has already ended. January 14, 2020...Microsoft will take it behind the proverbial barn and shoot it dead. So you have about 3 years left, not 5. As far as PC specs... i5 or i7 CPU 8GB RAM / 16GB Preferred 1TB HD at the min / 4TB preferred A separate non-integrated Video Card that has its own dedicated video memory. 2GB or more is fine. That said, this would be something that I would do the "up-sell" on and get the faster option when configuring things. Windows 10 or Windows 7 64-bit. 64-bit is required Do not purchase a 32-bit Windows OS. There is only about a 5% - 7% performance boost with an i7 when it comes to Adobe Photoshop. The reason is PS is not coded to take advantage of the architecture that makes the i7 CPU faster. Adobe is relying on video card memory and performance to make their software run faster, it's not based on the CPU chip anymore. So a big beefy video card with a power supply that has enough "Umph" to support it is almost as important as CPU speed.
-
workflow/backups & failed drive question
Brian replied to laural's topic in The Macintosh User Group
Yep that's the drive I'm talking about. Here is the newer model of the WD Caviar Black Drive. The primary difference between the Red and the Black is the Red is meant for 24/7 operation and to be in RAID/NAS environments but has higher failure rates. The WD Caviar Black has better performance (7200RPM Drives vs 5400RPM), generates a little more heat, and is louder. (Duh! It's a 7200RPM drive.) Are you planning on running your NAS 24/7? If so, I don't want to give you bad advice. Even though I HIGHLY recommend the WD Caviar Black Drives, I'm the type that would shut off his NAS when not using the computer. So maybe a RED drive is in your future? This is a tough call. I really like those WD Black Drives. Yes, both kinds will work in a NAS. Here is a WD NAS that has WD Caviar Black Drives and is on my short-list. Notice the really big fan on the back? That's to compensate for the heat produced by the faster drives. (Yes, there IS A DIFFERENCE between a 5400RPM drive and a 7200RPM drive.) For the UPS, for what is on the battery/surge-side, 550VA is fine. I have a 550VA UPS and cable modem / switch mounted on a backboard in my basement. I went a little crazy and ran Cat 6 wires all through my house, I hate WiFi. LOL!! Don't worry about the stuff that is plugged into the surge-only side for the rating stuff. Oh, UPS batteries last about 5 years on the average, and you could find a local replacement, Batteries + Bulbs carry them, or an equivalent battery store (Interstate Batteries Store come to mind.) That said, I've found that the Genuine OEM APC Batteries tend to last longer than generics, but cost more. APC and Amazon sell them. Or the type of filesystem that Amazon is using is different, making the file sizes different. Just like Microsoft says 1024MB is 1GB and the HD manufactures say 1000MB is 1GB. Amazon could also be doing a lossless compression type of thing, which is very plausible. Let it run for another 24 hours. If it's still stuck and it's the drive that is dying...I would pull the power. LOL!! If there is no way to stop the test, you have no choice. It's already broke. As far as hot-swap, unless the unit specifically stated it on the box, believe me...they will make a big deal about being hot-swap, I wouldn't risk it. Shut it down and swap out the drives. I've driven through Lewisburg, seems like a nice town. I live just outside of Harrisburg. PS: Using RAID1 will cut your usable space in 1/2. A 8TB NAS unit will become a 4TB when using RAID1. So you might want to look at a 6TB drive or 8TB drive. -
Talk about mumbo-jumbo. From what I can translate, it looks ok. Windows 7 is getting harder and harder to be installed on machines. Microsoft has stopped issuing licensees to manufacturers and all that's left is Win 10 licenses and those units are downgraded to Windows 7. When you create the installation / recovery media, it will be Windows 10. So sooner or later, you are going to have to deal with Windows 10. So says Microsoft. Honestly, it's not a Windows 10 and Windows 7 communication problem. It's people who do not know how to properly setup a Workgroup environment and give proper permissions to shared folders, plus creating usernames in the proper local classification groups.
-
Creating/updating backup of photo files
Brian replied to Kim Haugen's topic in The Windows & PC Hardware Forum
Oh, what will happen when you fill up a HD? Bad things, like data corruption or a complete crash, in which case you'll need to reformat and reload everything...plus do the updates for windows and other programs. It's a huge time-suck and a real pain in the ass, especially if you don't have the license keys to install / unlock stuff. Oh, have you ever created the backup media? Computers and Laptops these days do not come with recovery disks or thumbdrives, you need to create those things yourself when you get the computer. Most, if not all store-bought computers have screens that pop-up nagging you to create the recovery/install media, and most people ignore it. Then their HD fills up and crashes, and then a frantic post begging for help is made... I'd like to avoid this scenario. So if you haven't already, purchase a couple of 16GB Thumb Drives, they run about $5 now so there is no excuse. Then take a look in your programs menu and look for a folder with the manufacturer's name. There should be something obvious in that folder, for example, "Create Recovery Media..." or something along those lines. If you upgraded to Windows 10, you'll need to create a USB Stick that has the Win 10 media. Microsoft has a tool and it's pretty straightforward to use. So what OS are you on now? -
Creating/updating backup of photo files
Brian replied to Kim Haugen's topic in The Windows & PC Hardware Forum
That is VERY BAD! I'm assuming this is some sort of laptop? It sounds like your C: drive is around 250GB and after formatting and partitioning, you are left with around 215GB. A 250GB HD is MICROSCOPIC by today's standards. You really do not want to go less than 500GB for a primary drive, with 1TB preferred. If you aren't careful, manufactures will sneak in a small C: drive to clear inventory and those small C: drives are meant for the operating system only. All programs and files should be installed on a separate larger D: drive, and not the C: Drive. Unfortunately, people are so used to clicking "next...next...ok...nextnextnext...ok...finish" when installing programs. With a small C: Drive and Larger D: Drive setup, you will need to do a custom install on all software. That's when you tell it to install on the D: drive. The rule of thumb that I use is to have at least 25% free of your total usable space for any hard drive, whether that be an internal or external drive. Using my method, you should have around 50GB free, not 8.75GB. At 8.75, that's barely enough room for Windows to function, let alone other programs. I'm sure your computer has been complaining about the lack of space. So what is hogging up space on the C: drive? We need to clear out about 50GB worth of stuff. -
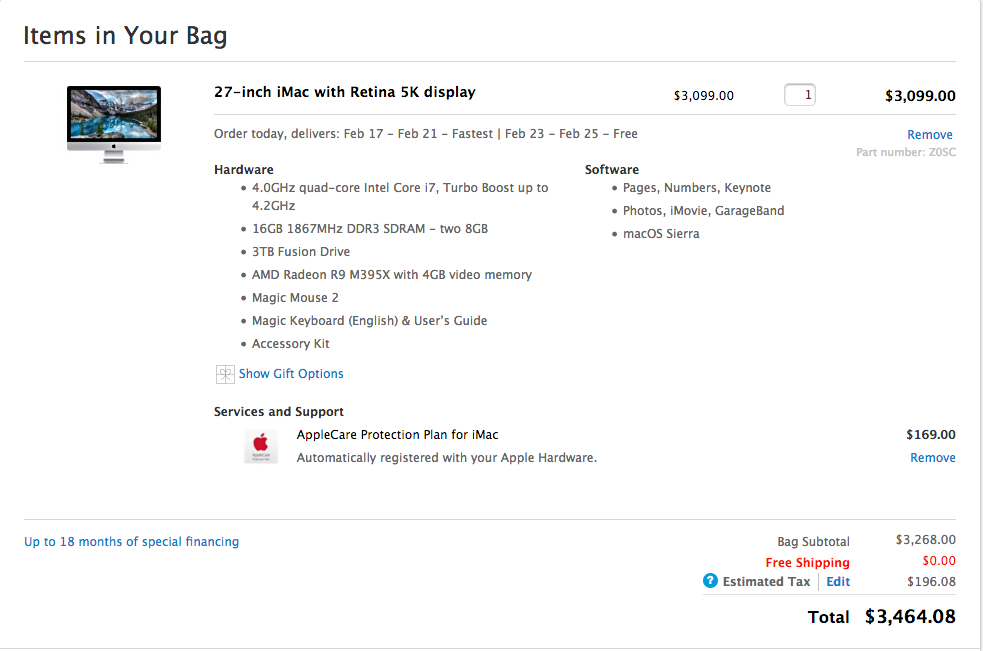
In case you are wondering, if I were to buy a iMac, this is what I would purchase: Start with the most expensive 27" iMac and upgrade just about everything. As you can see, it's not much different from your configuration. 16GB RAM, 3TB HD, 4GB Video, etc.
-
It could be the extra RAM. You could try re-seating all of the RAM chips or put the Crucial Sticks in the first two slots (where the Apple RAM is) and then put the Apple RAM in the slots that the Crucial sticks are. Most of the crashes, especially with Adobe stem from Apple video drivers and Adobe software not playing well together. It could also be a hard drive issue or a motherboard issue. Also, how full is the internal HD? Does it crash when external HDs are attached? How full are the EHDs? As far as the tech specs, your current iMac is fine. Seriously. A new Mac isn't going to give you a jaw-dropping performance boost, though it might seem a little faster. Before taking the plunge, I'd swap the RAM around or just install the Crucial Sticks and see if it still crashes. If it does, put in the Apple RAM. If it still crashes, I would take it in to a Genius Bar and have them run a diagnostic. If it's the motherboard, and it's out of warranty, then we can talk new iMac. I just would hate for you to throw away money if you don't need to.
-
workflow/backups & failed drive question
Brian replied to laural's topic in The Macintosh User Group
Oh Boy!! A juicy question!! Here is the thing with RAID 0, it's FAST and allows you to maximize space. Two 4TB drives will give you one big 8TB drive, etc. The downside to RAID 0, is that if one drive fails, the whole thing goes Kablooey. RAID 1 is different, as one drive is automatically mirrored to a 2nd hard drive. It's great for redundancy, but the downside is if a file gets corrupted or deleted on one HD, it automatically becomes corrupted / deleted on the other drive. I'm sure you are aware of this and I'm not insulting your intelligence. LOL! I do have a point. That point is...you are somewhere in between RAID0 and RAID1. Which probably works just fine...when it works. If something were to crash and you sent out your HD for extreme data recovery, it might be harder to get things back on a proprietary system. In short, you are at the mercy of the proprietary software working perfectly, which may not be the case 100% of the time. The old-school tech in me doesn't trust manufacture's software and would always recommend a traditional RAID1 for file storage. If someone was editing video and needed a large HD to store the cache file(s), then RAID0 is the way to go for that scenario. So should you switch to a true RAID1? That's your call. Me personally...I would. That said, a traditional RAID works best if you have identical HDs, with identical firmware. That HD seems to be on back-order for about 4 weeks...and I wouldn't hold my breath either. I'm sure doing a data-dump on the working drive would be fine, but as you stated, no redundancy AND if both drives are of equal age and usage, you might be playing a game of roulette. Power surges and other power related issues kill hard drives, AND UPS batteries. I would test the UPS now and see how long it lasts, but use something like a lamp or clock-radio to test things. Simply un-plug the UPS and see how long it runs. If it dies right away or within a minute, it's time for a new UPS battery. Also, things wear out and you might want to invest in a new UPS. The trick with a UPS is to balance the load with the Volt Amp Rating on the box. A hard drive RAID unit and maybe a cable/dsl modem / router, you could probably get away with a 450VA model. Maybe 350VA. If you have something like a 1000VA, that's overkill and if you have too little draw on the UPS, it kills the battery. If you have too much draw on the UPS, it kills the battery. You are after the Goldie-Locks Zone, right in the middle. If it were me, I wouldn't push things. In fact, I would invest in something like a 8TB EHD, backup the NAS via a Data-Dump to a folder called "Synology EHD Unit." Have a backup for the backup, even though you have Cloud Service. Then do a data-dump from your MacBook and iPhone to their own folders. I just saw this deal on Amazon, it's a way to backup your iPhone. You simply hook up the SD Reader to the Lightning Port, then use a SD card to transfer your files. Easy-Peasy. I'm a big fan of Western Digital Caviar BLACK Hard Drives and really don't like the WD Red Drives. I've seen too many people bitching about the high-failure rates. I get that they are meant to run 24/7 and be in a NAS environment, but something about them just turns me off. (I'm sure it's people bitching about them, asking WD why they fail so much and having things fall of deaf ears...) Any way, as far as hard drive capacity, a good rule-of-thumb is to NOT go over 75% full. Whether it's an internal HD, EHD or NAS. Especially if you have a Mac...performance takes a big hit once you cross 65% full, and gets much worse when you go over 75% full. If your MBP is 95% or more full, you are in danger of file corruption and are in un-charted territory. Things might run fine for awhile, and then...Kablooey...it all goes to hell. OS, files, software, etc. So try to keep at least 25% free at all times, preferably more. Bottom Line what I would do: I'd replace the 2TB WD Red Drives with at least 4TB identical hard drives or go larger, maybe a couple of 6TB EHDs. I'd purchase a 8TB EHD to ultimately backup the NAS, which would then be kept off-site. (The Data Dumps from the NAS, MBP and iPhone is just to get you through.) Cloud Service is fine, just as long as it doesn't delete things when you delete stuff locally on your computer. You'd be surprised on just how many Cloud Services do this, you upload all your stuff, then delete things on your local HD, only to find out that after 30 days, the files on the Cloud will be deleted as well. (To save them space, how nice...) So always read the fine-print on the terms and conditions. There might be some sort of sync-clause that grants them permission to delete your stuff after a period of time, after it's deleted locally on your HD. However you access your files and if it works for you, it's fine. If you have the .psd files, there is NO NEED to keep JPEGS. If you ever had to re-create a JPEG, just do it from the .psd. 1:1 Previews across the network is going to be slow. Period. So having a Local Drive manage things while editing is a good thing. You could even setup a RAID0 for this purpose, as I've stated above, RAID0 is FAST and would be perfect to be used as a "Working Drive," then have the files moved to a RAID1 for storage. I would definitely invest in a set of CAT 6 Ethernet Cables on all devices and make sure your switch / computer is at 1GB (or faster at this point.) Cat 5e will "do" 1GB, but CAT 6 Ethernet is meant for Gigabit Ethernet. Of course, there are many other bottlenecks that you will have to deal with, like working on a friggin' laptop with a full HD, and the speed of the NAS itself and how it transmits data. Yes, leave your computer alone when transferring large amounts of data, you are fine in that dept. They only thing that concerns me is if each file size is 4GB or larger. 99.999999% of the time, this isn't an issue, but for those who edit video, it could be. I use CAT 6 Ethernet Cables from Monoprice.com. Oh, you want to store your HDs in a consistent temp / humidity environment. NOT THE GARAGE. Even though they aren't being used, there are soldered components that expand and contract during hot and cold periods. That HD that hasn't been turned on in three years which sat in the garage may not fire up if you try it. In fact, one of your assignments is to go through ALL of those drives in the garage and see if they work. You might have a nasty surprise. Or you might get lucky. It could go either way. Hopefully you can follow my answer. I kinda rambled on. If I think of anything else, I will add to this thread, but I suspect you are gonna be busy these next few weeks. -
Point taken. A quick Yen to US Dollar converter failed me. LOL.
-
I really need to create a new one. In fact, I'm thinking about creating a new section that has various threads in Ask Brian on WTB. For now, SKIP THE 21.5" iMacs. They can not be upgraded after the fact (well easily,) and don't have the best / fastest components under the hood. I would start at the $1799 27" iMac or get the $1999 iMac and upgrade things. Brian's iMac that he will buy in 2018 will be around $3200 or so. Apple wants you to go-big-or-go-home.
-
Ok, I was right, Nikon is hurting. They just announced a 53 Billion Yen loss, which equals around 46-47 Billion US Dollars. Major restructuring is happening and I feel that price drops are ahead. Hopefully Nikon will have product releases that people actually want because Nikon needs cash, like now. That said, I think a greater emphasis will be placed on high-profit items, which probably won't please the masses. So I would keep saving and be on the lookout over the next few months for deals.
-
WD my book 2TB- turns out to be refurb
Brian replied to Cindy's topic in The Windows & PC Hardware Forum
As long as you have redundancy in your backup strategy, you will be fine. It's the folks who buy a inexpensive HD and keep ALL their images on it without some sort of extreme data recovery plan, are the ones we need to be concerned about. People are more worried about having too many images on one CF card, rather than paying attention to the fact that 10,000+ images are on a cheap EHD that was on sale. -
WD my book 2TB- turns out to be refurb
Brian replied to Cindy's topic in The Windows & PC Hardware Forum
I'd just get the credit and keep it. All hard drives are "good" until they stop working. LOL!! You might get lucky or it could die next month, it's really hard to say. "New" these days does not guarantee "better." Things these days are made so cheaply, that it's all junk...Made in China. I get asked by my customers and end-users almost on a daily basis, "...So can I get a NEW one?" or "Gonna get me a NEW ONE?" (when referring to a printer or other piece of equipment,) thinking that things will be better if it's new. For a month or two, yes. But then three months from now it will start breaking down even more-so because things are made so cheaply and the plastic isn't that high of a quality. With it being a "refurb" could mean a couple of things. There could have been something wrong with the drive, the interface PCB that has the USB ports, or the controller board on the HD. It's hard to say. It could have also been a return of some kind that didn't have anything wrong with it, but the drive couldn't be sold as new. So for your situation, I'd say keep it. It's probably a $79 special off of Amazon, right? What does Brian avoid and says over and over to avoid? Typically those $79 specials. -
Left Click the Start / Windows Icon on the taskbar. Just start typing this phrase, "show or hide common icons on the destkop" It should appear in the list before you finish typing. Click it in the list, it should be below the word, "Settings" Click the Restore Default button Click Apply if available, otherwise click OK.
-
The Thunderbolt Drive has both Thunderbolt and USB 3.0 ports. The difference is data transfer speed. Thunderbolt is faster, though USB 3.0 is no slouch either. In addition, G-Drives are Mac formatted, you just plug them in and go. For capacity's sake, I wouldn't go anything less than 4TB, especially if you take lots and lots of photos.
-
Alright, you have a Thunderbolt Port. Take a look at this drive. Yes, it's a bit pricey, but there is a 4TB model for $329. http://www.bhphotovideo.com/c/product/1090478-REG
-
What year/model is your iMac?