Damien Symonds
-
Posts
212,212 -
Joined
-
Last visited
-
Days Won
3,497
Everything posted by Damien Symonds
-

Action not working
Damien Symonds replied to a topic in Photoshop / Elements / Bridge / ACR questions or problems
Once you change it once, it should stick. Always remember to glance down at that link, though, in case it switches itself back. -
Action not working
Damien Symonds replied to a topic in Photoshop / Elements / Bridge / ACR questions or problems
The same way you loaded the first time, of course. Usually just double-clicking. -
Yep, that's fine, go ahead and email them.
-
KJ Photography look
Damien Symonds replied to Jennifer Casalegno's topic in How to achieve a certain look or effect
She's pulling your leg. Most of those photos have a wall behind the subjects, or at least trees. The ones that don't, look at the angle of the shadows - the sun is partially off to one side. More importantly, look at the catchlights in their eyes - there's definitely a light source in front of them. Reflector or flash, I don't know. @Brian and @Kim will have more wisdom about this. -
KJ Photography look
Damien Symonds replied to Jennifer Casalegno's topic in How to achieve a certain look or effect
No, you DEFINITELY can't use backlit photos for this look. -
KJ Photography look
Damien Symonds replied to Jennifer Casalegno's topic in How to achieve a certain look or effect
Could you narrow it down to a particular post, rather than the entire blog? -
The "Profile" has always been in ACR, just never in the first tab before. https://www.damiensymonds.net/2012/02/camera-calibration-tab-in-acr.html Dehaze, like the other three sliders in that section, must be used with extreme caution or not at all. I don't know about Color Smoothness, sorry. In short, nothing has changed. Keep editing, and FOR HEAVEN'S SAKE POST SOME PHOTOS FOR ME.
-
First things first, remember that ever upgrade resets the colour space to Adobe RGB. Make sure you click on the link at the bottom to fix it to sRGB again. What looks different about the interface, compared to what you remember?
-
Could you post the photo files you're viewing?
-
How much bigger and bolder do I need to make it?
-
What? Just do them!
-
Alternatively, you could try a light blue Solid Color layer on either "Multiply" or "Linear Burn" mode.
-
I absolutely agree. I would be very wary of a combo device. In my experience, any technology that boasts "2 in 1" means you're only getting about half the quality of each thing.
-
-
In what program? It MUST be Photoshop or Bridge. Other programs are not colour-managed.
-
Well, how about a Hue/Saturation layer at 50% opacity, with "Colorize" checked, and about +220/+70/0?
-
New thread please.
-
So you can't grab the window by the corner and drag it bigger?
-
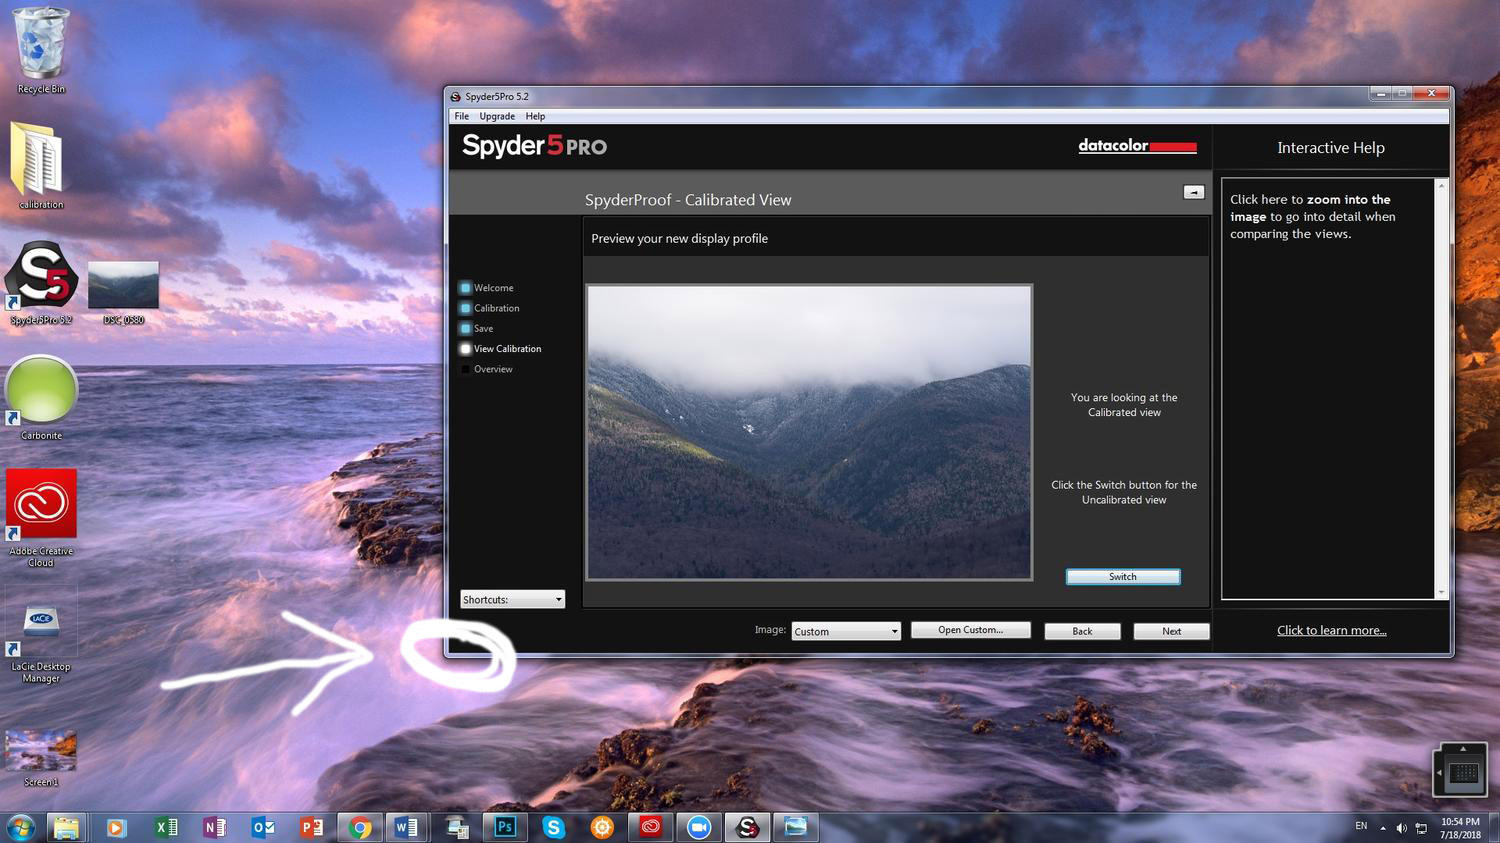
Whoa. Please don't compare the calibrated with uncalibrated. That doesn't matter a bit. Only compare the calibrated setting with your prints. That's all that matters. Yeah, you really have to fix that. May I see a screenshot of your whole screen?
-
Ok, in what way does it not look right? The better you describe it to me, the more I can help.
-
You're a cruel person, @GraceCJG. I'm dying of curiosity here! How did the calibration go?
-
A setting of 15 to get a reading of 91 sounds perfect! Very very common numbers.
-
Yes, although I hope we won't have to go too far down that path.
-
I'm really worried about you messing with the screen's contrast setting. That should remain at the factory default setting.
-
No, don't wait. Please calibrate now. If you wait until nightfall to calibrate, you won't be able to check the result until tomorrow.