Leaderboard
Popular Content
Showing content with the highest reputation since 01/19/2016 in all areas
-
These are the site-wide rules that you need to agree to in order to join as a member. I have pinned them here in case you wish to revisit them at any time. Please take a moment to review these rules. Please remember that we are not responsible for any messages posted. We do not vouch for or warrant the accuracy, completeness or usefulness of any post, and are not responsible for the contents of any post. The messages express the views of the author of the message, not necessarily the views of this website. Any user who feels that a posted message is objectionable is encouraged to contact us immediately by using the "report post" link on the relevant post. We have the ability to remove objectionable messages and we will make every effort to do so, within a reasonable time frame, if we determine that removal is necessary. You agree, through your use of this service, that you will not use this website to post any material which is knowingly false and/or defamatory, inaccurate, abusive, vulgar, hateful, harassing, obscene, profane, sexually oriented, threatening, invasive of a person's privacy, or otherwise violative of any law. You agree not to post any promotional material or advertising for commercial purposes or personal financial gain. You agree not to advertise used goods or seek to purchase used goods from other Members. You agree not to post any copyrighted material unless the copyright is owned by you or by this website. You acknowledge that the forum moderators have the right to delete, edit, move or lock any post or thread that breaks any of these terms and rules, and generally manage the structure of the information on the Forums as they see fit. Our software uses cookies to distinguish you from other users of our website. This helps us to provide you with a personalized experience when you browse this site. There are additional guidelines in certain sections of this site that you are required to comply with.60 points
-
This forum is my raison d'être. The kinds of questions that you can never google for, no matter how many key words you try. I'm a very skilled editor, and I hope I can help you with your troublesome pixels. One question per post, please. If you have more than one question to ask, please ask them in separate posts. No posting for constructive criticism: This is not the place to post a general question like "how does this look?" My team and I will routinely delete these kinds of posts. Only post if you have a specific question. It's vital, in all workflows, that raw processing is completely done before any Photoshop work commences. So if your question pertains to a Photoshop edit, please make sure you have done your raw processing first. Make sure you provide enough information for me to help you: Remember to include your image in your post (Yes, people do forget this!) It may be useful to include the straight-out-of-raw (SOOR) image as well If there is a specific part of the photo you need help with, upload a closeup of that area. Instructions on how to do that are on my site here. Lastly, there will inevitably be questions which I must decline to answer because they coincide directly with my classes. These will generally be questions regarding clean processing. I give away a lot of information, time and expertise for free, but I am also trying to make a living and support my family. Thank you for your understanding. Over time, I will add links here to recent threads that might interest you. I recommend visiting this post at least once a month, to see what's been happening lately.32 points
-
25 points
-
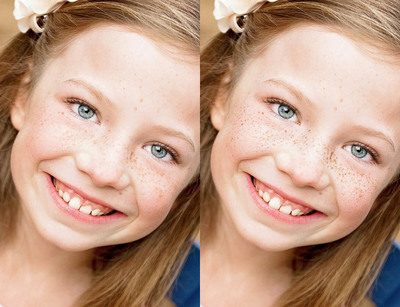
There are several methods. Here's one I'm fond of: Duplicate the Background layer Go to Filter>Other>High Pass. Begin with the Radius at 0, and slowly take it up and find the sweet spot where the freckles are being exaggerated the most (the whole image will be grey at this point). As you play with the slider, you'll see that if you go too low, the freckles won't be getting their maximum punch, but if you go too high, the freckles won't be getting any additional punch, all you'll be doing is exaggerating other things. Find that sweet spot. After pressing OK to perform the High Pass filter, change the layer's blend mode to "Hard Light". Finally, add a mask to the layer and mask it to the freckled part of the face only. By the way, if you want an even stronger result, you can duplicate that High Pass layer. Heck, I suppose you could duplicate it as many times as you want, but it would start to look a bit weird. Oh, also by the way, you can use "Overlay" blend mode for a slightly gentler result than Hard Light gives. Here's my play with the above method:21 points
-
ACR: Adobe camera raw (the raw processing plug-in that comes with Photoshop and Elements) CA: Chromatic aberration: a type of distortion in which there is a failure of a lens to focus all colors to the same convergence point. "The purple fringe" CC: 1. (Adobe) Creative Cloud or 2. Constructive criticism CMYK: Cyan/Magenta/Yellow/Black (the colours of ink from which all other colours are printed) (K is black because B was already taken for Blue. Also it used to be called the "key" colour.) CR2: Canon raw format CS6(/5/4/3/2/etc): Creative Suite 6. Strictly speaking, this refers to the whole Adobe suite (InDesign, Illustrator, etc). But mostly, in this group, when we say "CS6", we're just talking about Photoshop. DNG: Digital Negative (a generic raw file format) DOF: Depth of field DPP: Digital Photo Professional (Canon's raw processing software) DR: Dynamic Range ETTL: Expose to the left ETTL (flash): Evaluative-Through The Lens (auto) ETTR: Expose to the right HDR: High Dynamic Range JPEG: Joint Photographic Experts Group (named after the organisation who made it - compressed file format; the most common image format in the world) LR: Lightroom NEF: Nikon raw format NR: Noise Reduction / Removal OOC/SOOC: Out Of Camera / Straight out of Camera (as in straight out of camera with no processing) (Only applies to jpegs. Cannot, by its nature, refer to raw files, which always need at least some processing in order to be viewed). OOF: Out of focus PP: Post-processing PS: Photoshop PSD: Photoshop Document (the all-encompassing file format - layers, channels, high-bit, etc) PSE: Photoshop Elements RGB: Red/Green/Blue (the colours of light from which all other colours are made) (The three colour channels which make up all digital images) SOOC: Straight out of camera SOOR: Straight out of raw - a file that has only clean raw edits done, no Photoshop work as yet sRGB: standard RGB colour space, used on monitors, printers and web browsers. SS: shutter speed TIFF: Tagged Image File Format (similar format to PSD, but not specific to Adobe) WB: White balance15 points
-
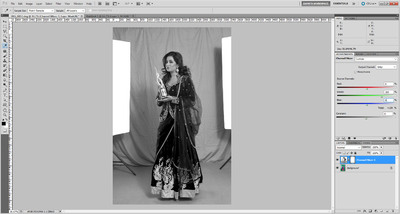
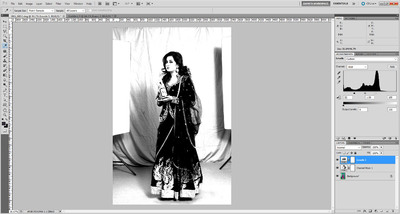
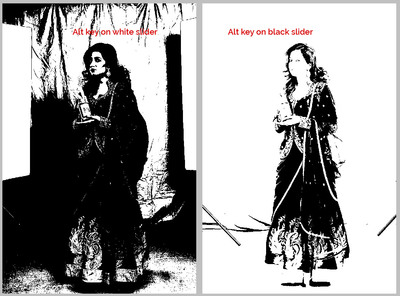
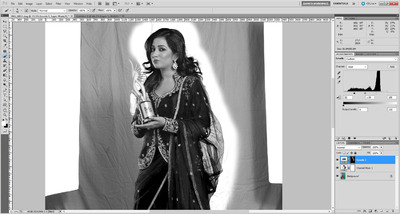
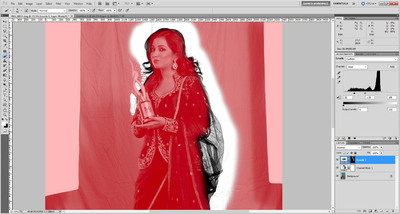
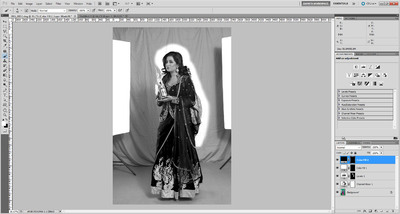
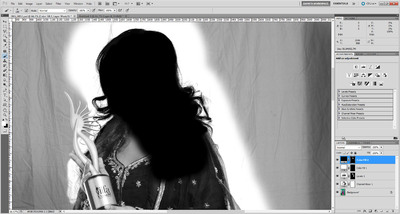
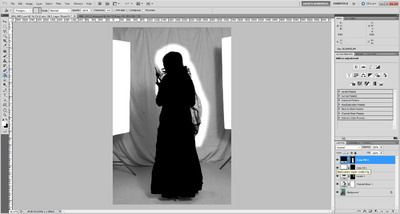
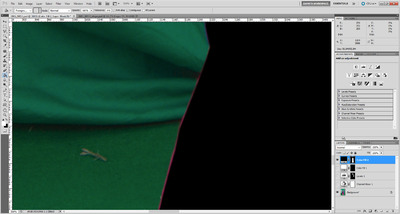
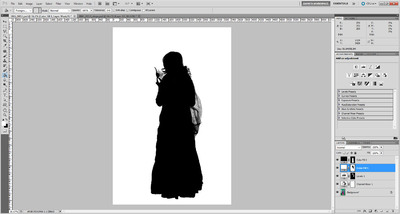
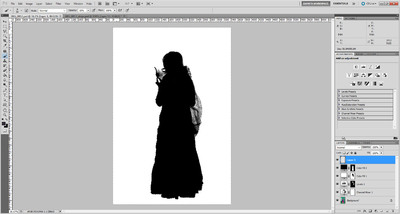
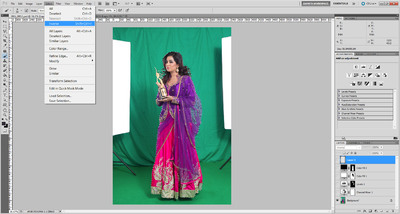
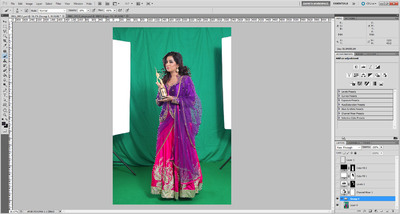
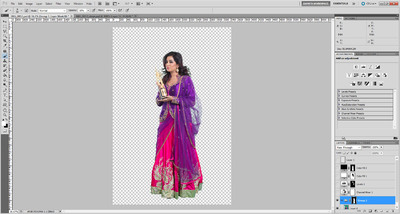
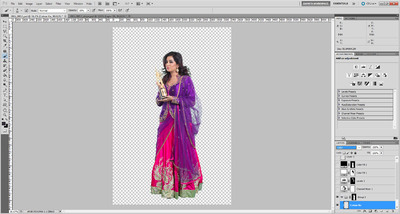
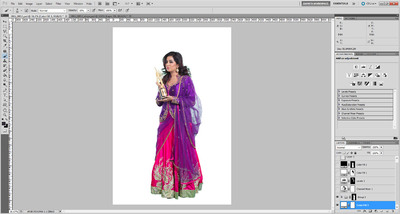
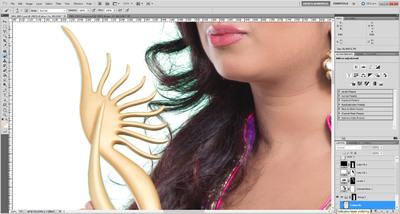
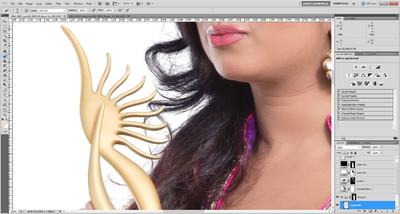
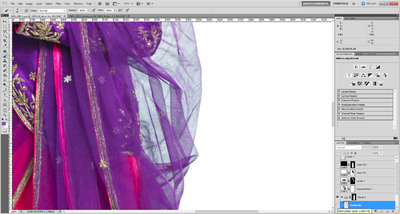
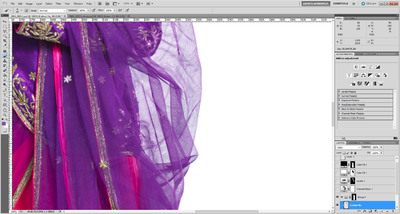
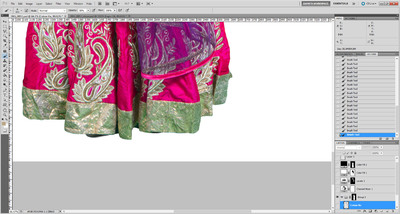
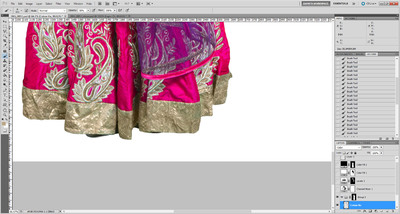
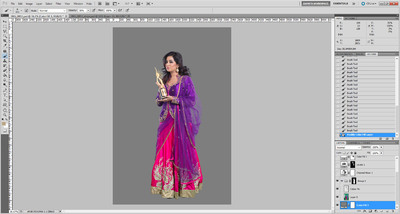
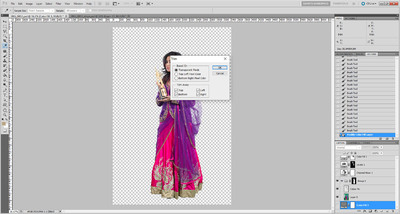
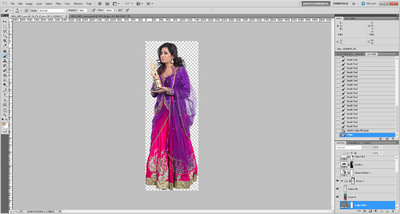
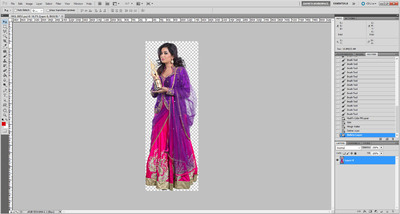
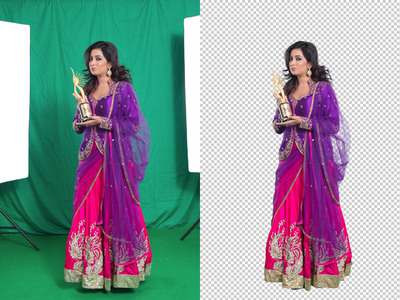
Ok, here goes ... (Note: This method only works in Photoshop. If you had Elements, you'd be outta luck.) 1. Add a Channel Mixer layer and check the Monochrome box, and enter 0/100/0: 2. Add a Levels layer and bring the white slider in as far as you can to make the background pure white, but not lose too much hair detail. This is a delicate balancing act. It's a good idea to hold down the Alt key while sliding the slider, so you can have a good view of what's clipping. Then do the same with the black slider, to fill in as much hair detail as you can, but not so far that you fill in unwanted detail too. 3. Invert the mask on that layer, then paint it only around the edges where it's needed - the hair and the veil in this case. No need to be very precise with this painting step. Here's the mask view so you can see a bit more clearly: 4. Add a white Solid Color layer, then a black Solid Color layer. Invert the mask on both layers so they're hidden: 5. On the black layer, start painting to completely and carefully obscure the subject where she needs to be completely preserved. Leave the wisps of hair to be wispy, of course. I started with her head: It's not a bad idea to turn all the other layers off sometimes, while doing this, so you're painting black over the original colour photo. That's what I did while going around that tricky trophy thing she's holding: To save your sanity, for heaven's sake make sure you use this method around the dress and other simple edges. Eventually, the subject will be completely black: I want to say that it's not vital to be accurate. In fact, it's better if you allow a tiny bit of room inside the edge of the subject. See how I've left a thin line of dress visible here? 6. Then paint on the mask of the white Solid Color layer, to make the whole background perfectly white. This should be very quick, because around the hair it's already white, so no precision necessary, and around the dress, you can paint straight underneath the black layer you already did before. 7. Add a new blank layer (this might not be necessary in all versions, but this step can be a bit buggy, so do it anyway.) 8. Ctrl Alt Shift 2 (Mac: Cmd Opt Shift 2) to make a luminosity selection (gives you marching ants all around the white areas): 9. Turn off all the layers except for the Background layer. (You should still have the marching ants active). Go to the Select Menu and choose "Inverse". This will make the marching ants go around the subject, not the background: 10. Double-click the Background layer to turn it into "Layer 0", then immediately Ctrl G to put it into a layer group (remember, you should still have the marching ants while you do this): 11. Click the mask button in the Layers panel to add a mask to the group. The marching ants will disappear, and so will the background: 12. In the layer group, above Layer 0, add a new blank layer and call it "Colour Fix", and change its blend mode to "Color": 13. Temporarily close the layer group by clicking its little arrow. Then add another white Solid Color layer and move it to the very bottom of the layer stack, below the group: 14. Then open the group again, and return to the "Colour Fix" layer you just made. This layer will serve the same purpose as it does for fixing Chromatic Aberration. When you zoom in, you'll see traces of green everywhere: So you sample various nearby colours, and start painting over that green, like this: Even the veil still has a hint of green tinge to it: So you sample some purple colour and paint with low opacity to get rid of it: The bottom is the worst - look at that awful green cast! Sample and paint gently over it: 15. Finally, it should be done. All the edges should be their correct colour. You should be feeling proud of yourself right now The last thing to do is change the bottom white layer to medium grey, and check the edges again to make sure everything's ok: 16. Then you can turn that bottom layer off, to see the photo in its transparent glory. Then finally, go to the Image menu and choose Trim, and trim away the transparent pixels: Leaving you with this: Save that PSD for yourself. That's your master file if you need to come back to it. 17. Finally, click on Layer 0, then go to the Layer menu and choose "Merge Visible". Then delete all the layers which are turned off, leaving you with this: Save that as a different PSD file, that's the one you'll send to your client. Hope this helps.15 points
-
This is a tough one. Switching can be expensive, for obvious reasons. In my humble opinion, I would recommend a 5D Mark III body. The Mark IV is nice, but it's not an earth-shattering upgrade from the Mark III. It's more of a "natural progression" upgrade. Now, I will say, Nikon cameras tend to have a better focusing system in their lower-end bodies, so I can understand wanting to switch. So let's break a few things down with the Nikon equivalents of what you currently own: Sigma Art Nikon Version: $899 Nikon AF-S 85mm f/1.8G: $476.95 Nikon 24-120 f/4 VR: $1096.95 Nikon 70-200 f/2.8E FL VR: $2796.95 - The reason for this lens, is that the new 70-200 behaves more like your Canon 70-200 f/2.8L. When Nikon rebuilt the 70-200 from the ground up to fix the vignetting issues at f/2.8 & 200mm, (with the VR I version,) they introduced "focus breathing," meaning you can't get as close to the subject as you used to. For the purists out there who like filling the frame, the Nikon 70-200 f/2.8 VR II lens at 200mm, performs more like a 135mm would, for lack of a better term. So while you can get the older 70-200 f/2.8G VR II lens for less money, I just want to make you aware of what you are getting into. You will need the newer and more expensive Nikon 70-200 to get similar results that you get with your Canon 70-200. So far the total in lenses is (Drumroll Pleeze...) $5269.85. That's JUST for the lenses. Now add the cost of a D750 at the normal price of $1996.95 and we are talking $7266.80, plus applicable tax & shipping. For that money, you can get a Canon EOS 1D X Mark II for less money than switching. In fact, it's right around for the cost of the Nikon lenses. The 1D X Mark II has a professional grade focusing system that is light-years ahead of your 6D. (...and people wonder why I hate recommending the Nikon D610 and Canon 6D bodies, as they are meant to be outgrown, but I digress...) Here is the thing, Nikon is hurting. Their QC has gone way down and the market isn't buying new cameras like they once were. It seems that the Clickin' Mom's Generation is looking for their "Forever Camera," or has finally realized on just how much a PITA it is to make a profit. No, I'm not being sexist, the biggest market driving sales for around the last decade have been female photographers and those "Cutesy Name Photography" businesses aren't buying cameras like they used to. For the guys, there really hasn't been a major update for us to give the "Tim the Toolman Grunt." So it's leveled off for the guys as well. The camera manufactures have finally taken notice and hopefully things will turn around. Stock-Holders need to be kept happy. I really think a couple of new FX bodies are going to be released in 2017, perhaps finally a true D700 replacement or more than likely a Nikon D810 update. That's why the D750 is so cheap. Even the D810. They are looking for revenue and to clear out stock. Nikon just doesn't put out sweet deals for nothing. Something is cooking up their sleeves. So I'd hate for you to switch, invest all that money, only to have Nikon release a better camera body than a D750, which would suit your needs better. The AF System in the D750 is much better than the D610, but not as good as the one in the D810. The AF system in the D810 is from the Nikon D4s. The D750's AF Points are clustered together in the center of the viewfinder, the D810's AF points are further spread apart. So before jumping ship, PLEASE FIND A D750 AND PHYSICALLY HOLD IT. Go through the menus and give it a test drive. See how it feels in your hands. Here is how Nikon has their lineup situated, FX (Full Frame) is on the left, DX (Crop) is on the right: D610 --> D3400 D750 --> D5300 D810 --> D7200 D5 --> D500 So as you can see, and this is what really irks me with Nikon, you have to pay to play. The D750 is a fine camera, but if you need more, even if it's just something as simple as a more robust AF system, you have to upgrade to the D810 with it's 36MP massive Raw files. Oh...want faster fps and a awesome focusing system? Sorry, we need to upgrade to the D5. Can't afford a D750? The D610 for you then!! Complete with all the lack of features. Now we have to take into consideration of what kind of money that you are going to get for your lenses. The Sigma, even though people RAVE on how great it is, it's still a 3rd party lens and you might get $700 for it, maybe even less. Like $600 or so. It's still a Sigma. The Canon 70-200 that you have? About $1600-$1700 used. Canon 85mm f/1.8? $300-ish. 24-105? Call it $800 or so. My estimate for your lenses is going to be $3000-$3500. That leaves you with a $1769 loss, and then you still have to purchase the body, in which the final cost would be around the $3800 mark, give or take. I'm being optimistic and using $3500 for your lenses, minus the cost of the Nikon equivalents, plus the price of a D750 at $1999. My numbers added up to $3768. Oh, I forgot about the Canon 6D. In excellent shape, you could get $1100 or so. If it has normal wear, around $1000. So the final number should be less than $3000. That said, a new 5D Mark III is $2249, which is about $500 less than the total amount of what it would cost you to switch. See where I'm coming from? In my humble opinion, I'd get a Canon 5D Mark III and rock the shit out of it.13 points
-
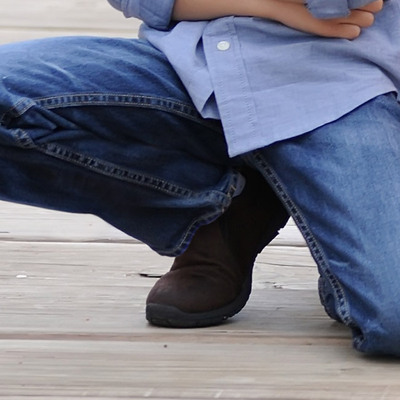
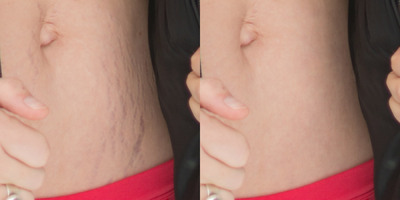
Download the PSD file First I copied the existing end of the jeans and moved them down. Then I used a chunk of the other photo you provided (twice, actually) to fill in the space. Along the way I also used some Hue/Saturation layers to darken stuff. Once I'd done all I could do with what I had, I used some cloning to fill in the remaining gaps.12 points
-
11 points
-
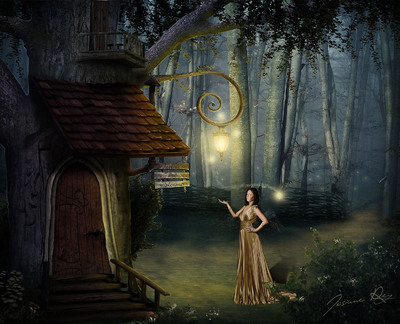
Thanks Damien, I really like where this went. I also didn't like how the dress just laid there all perfect like hard wood floor, so I took a grass brush and added some grass. Still got some learning to do but that is a whole lot closer. I am still shaking my head over that high pass. I am off to learn how to cut an Indian woman out of a green background. Thanks again.11 points
-
11 points
-
10 points
-
Perfect. So, what you need to do is set up your kettle in front of a black backdrop. As it boils, take various photos of the white steam against the black. Save them all to your "steam library". When editing them, make sure the black is perfectly black - 0/0/0 values. Then, it's easy enough to File>Place one of those files onto your photo, and immediately change its blend mode to "Screen". Then play with its rotation, size and opacity to your desire.9 points
-
9 points
-
9 points
-
Gosh I love this forum. I was just coming back here to type "Can you tell me whether you have Photoshop or Elements?" (old habits die hard) but I don't need to! It's right there in the sidebar! Woohoo!9 points
-
8 points
-
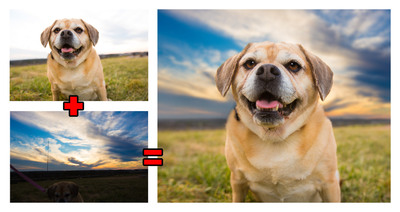
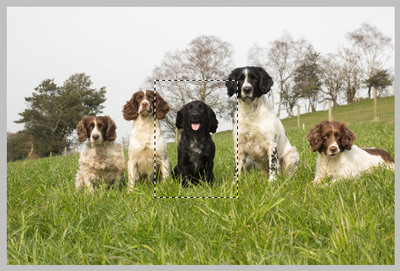
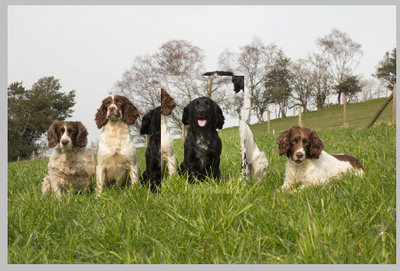
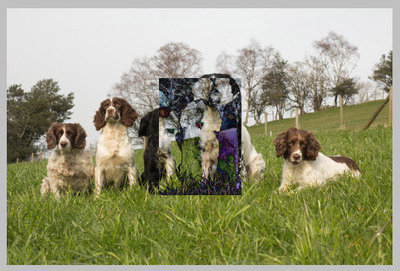
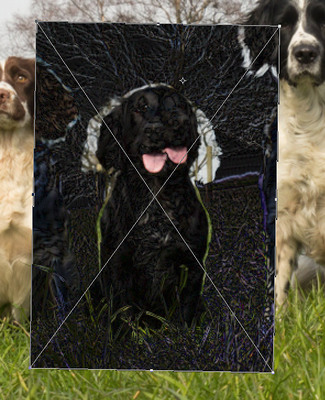
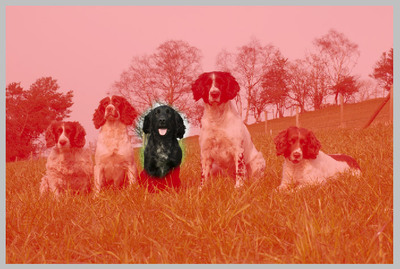
First, open the donor image and select a generous chunk around the dog: Then open the base image and paste the dog onto it: Immediately change the layer to a Smart Object, then change its blend mode to "Difference": Ctrl T to get the transform handles. Zoom in as far as needed, and line up the tree branches just above the dog's head as accurately as possible. Then Alt-click on them to set the middle point there, then rotate to line up the grass around the dog's legs also as accurately as possible. In my play, I also found I had to enlarge the dog a tiny bit. Once it's all lined up as accurately as you can, put the blend mode back to Normal, hide the dog completely with a black mask, then paint it in. (I've shown the mask in red view here):8 points
-
8 points
-
I really enjoy trying to analyse different types of post-processing, to figure out how it was done. If there's a style you want to emulate, share it so I can help you achieve it. Please observe these guidelines: Post links to other people's images. Don't upload photos that aren't your own - that's bad manners. Provide the link to an image with the desired effect, so that we can visit it. Don't link the file itself; link the page on which you found the photo, so that the photographer gets the credit and the traffic. Upload a photo of yours on which you'd like the style applied. Note that by posting your image, you are effectively giving me permission to download the image, so I can experiment with the edit and respond to your question. Make sure you choose an appropriate photo. The characteristics of the photo play a big role in the application of the style. For example: - If the photo you'd like to emulate was taken outdoors, don't post an indoor photo; - If the photo you'd like to copy has a bright background, don't post a photo with a dark background; - If the photo you'd like to copy has lots of background blur, make sure your photo has lots of background blur too; - and so on. I really can't emphasise this enough. If you are wanting to emulate somebody else's post-processing, but you can't find any photos in your library that emulate their photography, then the post-processing is a moot point, isn't it? Photographic skill is crucial. If your photo isn't suitable, I won't be able to help you with your request. Make sure you have clean-processed your image first. Don't post a straight-out-of-camera (SOOC) photo. Artistic styles are best applied after clean processing has been performed. I would not teach my gymnasts to somersault before they could roll safely; nor will I teach photographers to get artistic before they can competently edit cleanly. You can find more information about clean processing in my article here. Please scroll down this page, because you'll find dozens of styles I've already played with. You might find what you're looking for right here! Lastly, there will inevitably be questions which I must decline to answer because they coincide directly with my classes. These will generally be questions regarding clean processing. I give away a lot of information, time and expertise for free, but I am also trying to make a living and support my family. Thank you for your understanding.7 points
-
7 points
-
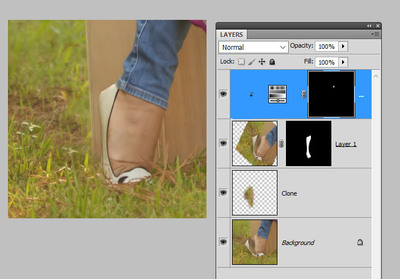
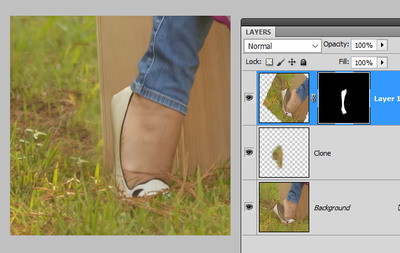
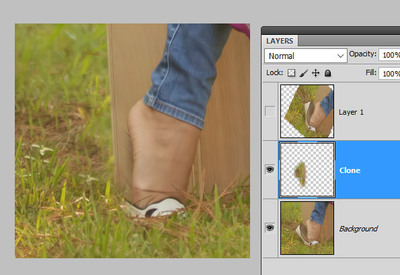
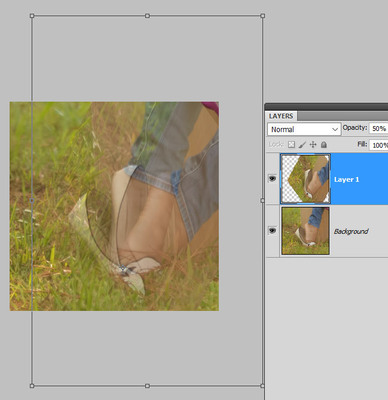
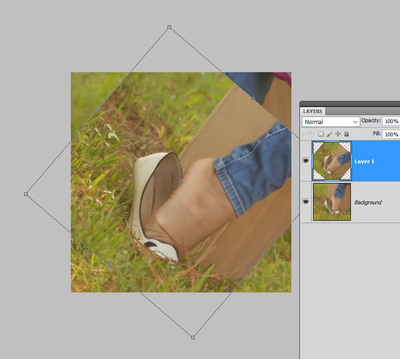
Well, I duplicated the background layer, and rotated it so the shoe was roughly vertical: I pressed Enter to commit that transformation, then lowered the opacity, and Ctrl T again to put it into place more carefully, including stretching it taller: I turned off that layer for a bit, and made a clone layer to get rid of the old shoe: Turned the new shoe layer back on, and masked it: Then used a Hue/Sat layer to add a tiny bit of darkening at the heel, where shadow was needed:7 points
-
Welcome to this site - a place where you can ask questions about image editing, and learn from other people's questions as well. Here are some tips to help you find your way around. Sections The sections are: Ask Damien - for questions and problems related to image editing (Photoshop, Adobe Bridge, Lightroom etc) Ask Brian - for questions about computers and camera gear Classes - only visible to students who have been admitted to classes Contact - to send a message to Damien and the team. Access Guest vs member access: As a guest, you can view the majority of site content, but some areas will not be visible and you will not be able to ask a question. You will also need membership to access classes on this site. Membership is free. An overview on the sign up process can be found here. About the site This is a Question & Answer website, where you can get one-on-one help with your image editing questions from Damien and his team. In most of the sections, you can post new questions, which will be answered by Damien or the team. Please feel free to read everybody else's threads, and reply if you have a directly related question; but if the thread triggers a different question in your mind, please start your own thread. How to do specific tasks Click on the links below to jump straight to further information on the topic. If you have a question not covered below, please reply to the Site functionality questions post. Looking around: On a mobile device: Setting up a home screen icon on your mobile device Viewing the site on a mobile device Searching the site on a mobile device On a computer: Viewing the site on a computer Searching the site on a computer Your member profile / details: Adding a profile photo Adding a cover photo How to change your email address or password How to change your computer software or equipment details How change your member name Keeping up with activity: Seeing all content since your last visit Seeing specific new content since your last visit Jumping straight to fresh/unread content on a thread How to follow a whole section How to set up notifications of replies on posts (including setting an automatic notification to get replies on all your posts) How to follow specific posts for replies Follow another member's activity Mark a section (or site) as Read Posting a question / creating a topic: Sections members can post on How to create a post / ask a question How to add one or more images to a post Deleting an image in a post (before you have submitted it) Repositioning an image in a post Replying on your post / using the Quote function How to use Multi-quote Editing your post after submitting it: After you submit your topic, the option to edit it is available for a brief window of time. Other: Enlarging an image in a post: Simply click or tap the image once and a larger version fills your screen. Click the X in the top right to close the enlarged view. This applies to all the images posted on threads, including the screenshots in this thread. Share a post (eg in an email or on Facebook) Signatures: These are not enabled by design, to make it easier to view content on computer screens and mobile devices. Private messaging: This is not enabled, but if you need to contact Damien and the team, you can create a post in the Contact section. If you have a question about how to use this site that has not been covered on this thread, please ask your question here.7 points
-
I just wanted to respond again for one to say thank you, and for two to let you and others know reading this, that the link software link worked for me. I was able to retrieve the files that I emptied out of my recycle bin. I was able to use the free version of the software. Thank you again.7 points
-
It's never a waste of time. I view every opportunity to remind people of the importance of in-camera achievements over post-processing achievements as a valuable use of time.7 points
-
7 points
-
7 points
-
Great! The first step to a better workflow is knowing how terrible Lightroom is. Usually it takes more effort on my part to convince people of that. So I'm glad you've already done the work for me. Your first step is to download and install Adobe Bridge, if you haven't already. It's among the programs you have with your CC subscription. Then, start by watching this video, and this one.7 points
-
7 points
-
I'd encourage you to read up on what contributes to the depth of your focal plane. There are a ton of free depth of field calculators online that will let you put in numbers and figure out how much of your photo will be within your focal plane (i.e., in focus). Three basic factors: - aperture (the wider your aperture, the shallower your focal plane) - focal length (the longer your focal length, the shallower your focal plane) - distance to subject (the closer you are to your subject, the shallower your focal plane) Here, you were at a fairly wide aperture (f/3.2), at a middle-normal focal length (50mm), and I'm guessing you were super close to your subject. That gave you a focal plane that was too shallow to have both eyes in focus. If after you took this photo you checked it on your LCD screen and zoomed in to check your focus, and noticed that your focal plane was too narrow for what you wanted to achieve, you'd have three options: narrow your aperture, use a wider focal length, or get farther away from your subject. Or recognize that your focal plane, however narrow or deep it is, is a "slice" of the scene in front of you that is perpendicular to your camera. In other words, if you want to use a super shallow DOF *and* get both eyes in focus, angle yourself such that both of your subject's eyes are the same distance from your camera, so they'll both fall within the focal plane.6 points
-
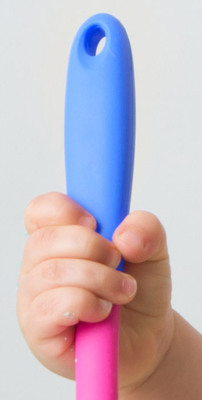
Excellent. Add a Channel Mixer layer, and enter these values: Red channel: 0, +100, 0 Green channel: 0, +35, +65 Blue channel: +100, 0, 0 Then mask on. Around the bulk of the handle, you shouldn't need to be precise - the CM layer shouldn't affect the wall colour. But around the fingers, you'll need to be VERY precise, of course. IMPORTANT: After masking around the fingers very carefully, then lower the brush opacity a lot, eg 5%, and paint gently onto the skin to replace the pink cast with blue cast. This step is really important. Here, I've done the top half to show you:6 points
-
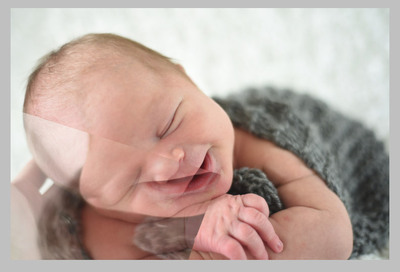
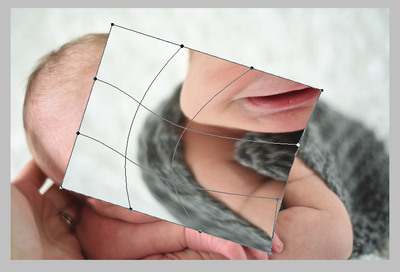
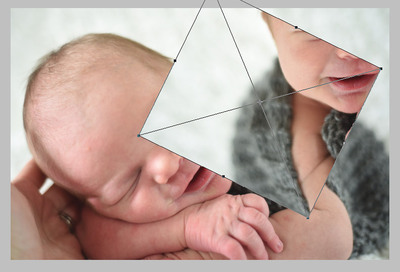
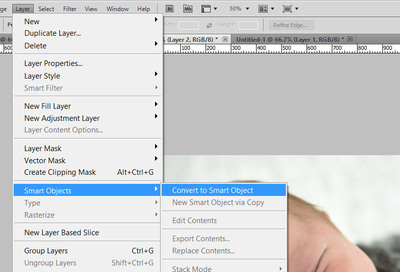
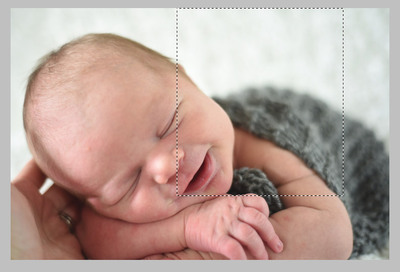
Ok, here goes ... First, I identified the piece of fabric that seemed most likely to work. I made a huge selection around it. It's always important to select more than you need in these cases: I hit Ctrl J (Cmd J for you) to put that section on its own layer. Then I immediately went to the Layer menu to make it a Smart Object: The way the light was falling, I figured I needed it to be the other way around, so I went to Edit>Transform>Flip Horizontal. Then Edit>Free Transform (Cmd T) so I could rotate it, so that the fabric was approximately at the angle I needed: But it wasn't curved enough. So I went to Edit>Transform>Warp. And I warped the hell out of it, so that the fabric curved around the line of the elbow in a plausible manner: Then I lowered the opacity of the layer by half, and moved it into position. (At this stage I might have also used Free Transform to shrink the whole thing a bit, as well. I can't quite remember, sorry.): Then I added a mask and masked it on: You can see from the above image that it was a bit too bright. See the bright patch of skin nearest the elbow? So I added a Hue/Sat layer and lowered the Lightness by roughly half. I clipped this layer to the fabric layer, then inverted its mask to black, and gently painted the darkness on until it matched plausibly: I hope this helps.6 points
-
The solution is so simple you'll fall off your chair. Just add a Channel Mixer adjustment layer and swap the Red and Blue channels ... Red 0, 0, +100 Blue +100, 0, 0 Then mask on to the ribbons. You won't even have to mask particularly precisely in most areas. Then, clip a Hue/Saturation layer to the Channel Mixer layer and manipulate Blues a little more if needed (eg darkening or whatever)6 points
-
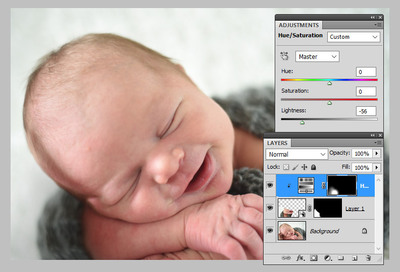
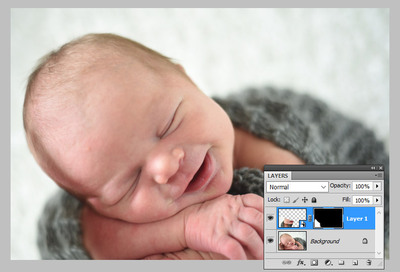
Hi Jenny, as Anna-Lena said, it would be handy to see your SOOR, if you don't mind. However, in general terms I can tell you that even though we think of jaundice as "yellow", in technical terms it's actually rather closer to green in colour. Therefore, you'll find great success using a magenta Photo Filter to combat it. Here is my quick play with the aforementioned magenta filter, and also a bit of dodging on a dodge and burn layer:6 points
-
I'm also wondering, are you using Apple's iPhoto or the new program called "Photos?" If so, I'll bet you that's where they are hiding. You see, those programs import photos automatically, unless you tell it not to, and stick them in a catalog. You never see the individual photos on the HD. It's just a big catalog file.6 points
-
Do you run multiple logins on this Mac? If so, photos might be taking up space in another profile. I would download and use this program, Disk Inventory X: http://www.derlien.com/ It gives you a graphical snapshot of your HD by color. The bigger the color-blob, the more space on the HD the files are taking up. You can click on the various colors and see exactly which file is in that location. Also, I would HIGHLY RECOMMEND purchasing a program called "CleanMyMac" and run it weekly. Here is a link with a coupon code applied: http://macpaw.com/store/cleanmymac?coupon=ACTIONOVER126 points
-
The following are PSD files that I've created over the years. They're a mixed bag - artistic kind of stuff that people have asked for occasionally. The purpose of these files is not to teach you any specific methods. It's to encourage you to PLAY PLAY PLAY. Truth is, I didn't have a clue what I was doing when I was creating some of these. I was just fiddling around to see what I could come up with. If you find yourself wondering "How did Damien choose the value of 228 for the green slider?" or whatever, I probably don't know. I was simply experimenting, and I hope you will do the same. Learn the way children learn - by playing. Two important notes: What works for one photo won't necessarily work for another. Don't expect to be able to copy the layers in these files and get the same result on another photo. Artistic editing must only be done after clean processing. Always get your base edit looking fabulous before dabbling with artistic styles. How this thread works: Make sure you're on your computer (these files won't work on mobile devices) Scroll down the page, and find an edit that interests you. Click on the PSD download link to save the file to your computer. Open the file in Photoshop or Photoshop Elements and examine the layers that I used. If there's something that you don't understand about the file, start a new thread right here in this forum and we'll discuss it. Two more notes: You'll probably notice that I'm not personally fond of some of these styles. Of course that doesn't matter, I'm always happy to help you explore whatever you want to explore. Sometimes, it won't be immediately obvious what each layer is doing. To see its effect, turn it on and off several times. To understand its adjustments, make sure you check its blend mode, and all of its sliders. For example, on a Levels layer, make sure you examine each of the individual Red, Green and Blue channels, as well as the main RGB channel.6 points
-
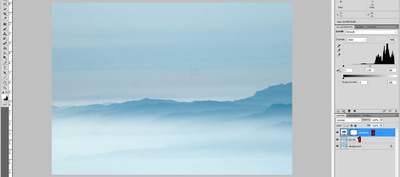
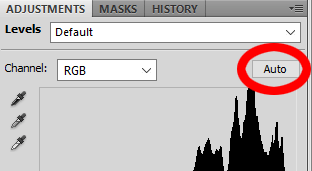
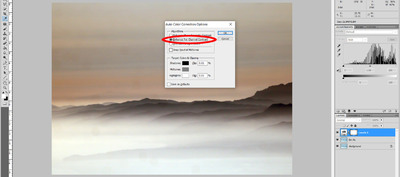
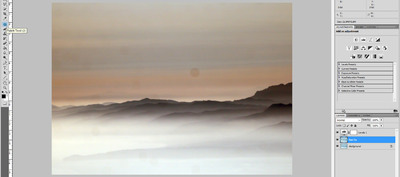
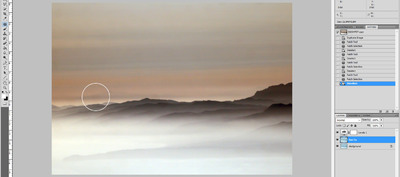
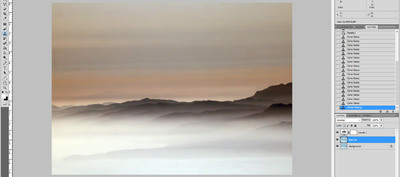
STEP 1: Do your raw processing. Don't forget the noise removal, this is VITALLY important. STEP 2 - THE LAYERS: First, duplicate the Background layer. If it suits you, rename it as I have done. We'll come back to that layer shortly. Next, add a Levels adjustment layer: STEP 3: Option-click on the "Auto" button in the Levels dialog: It will bring up this little window. Make sure it's set to "Enhance Per Channel Contrast". This will change the colour of the photo significantly, and make the contrast very aggressive: The changed colour and added contrast will help you see the dirt spots more clearly, in order to remove them more effectively. STEP 4: Return to the Dirt Fix layer and choose your Patch Tool: Since you said you haven't used it, I'm going to explain it fairly thoroughly here. First, you draw a little selection around a spot. Make sure you leave a little bit of room around it, but not too much: Then click in the middle of that area, and drag away to an area of very similar detail. In this case, I dragged to the right, and ever so slightly up. I watched the live preview inside the selected area, to make sure the cloud lined up properly: (It'll make sense once you try it.) When you release the mouse button, it will replace the dirt spot with good detail: Then you can hit Cmd D to deselect the area (get rid of the marching ants): Repeat that process for all the spots you can see. In this photo, I was able to use the Patch Tool to get rid of all the spots in the photo except this one: The reason that one didn't work was that it occurs in an area of too complex detail - that is, where a line of cloud intersects with a faint mountain outline. The Patch Tool in this area would have mushed that detail unacceptably. So ... STEP 5 - CLONING: Choose the Clone Tool, and check the settings. The "Sample" must be on "Current and Below" (at all times, not just for this photo), and for this one use 20% for opacity: Then gently clone out that last spot: FINISH: Once all the spots are gone, delete the Levels layer, and your photo is clear and ready for your usual editing procedure:5 points
-
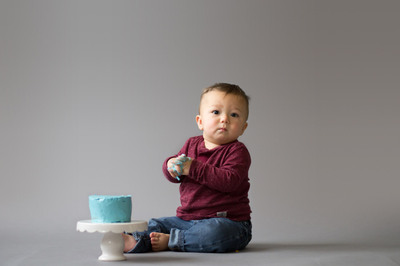
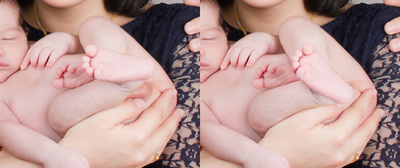
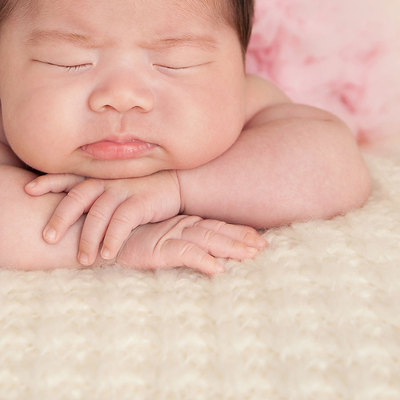
Yay, I'm glad you like it! The fix isn't technically complex, but will take a lot of time and patience. Don't expect to achieve it quickly. Download the PSD file First, a dodge and burn layer to even out the wrinkles in front a bit. Then a radial gradient layer. Mask it completely around the child. At this point, the child will seem like it's "floating", exactly as you said. After that, use a very low opacity black brush on the mask to gently reveal a bit of the blanket texture in front, as I did. Finally, the noise layer to prevent banding. If any of the above is unfamiliar to you, I beg you to consider my little Layers & Masks Class. It's very cheap, but will open up worlds of skills to you.5 points
-
5 points
-
5 points
-
5 points
-
5 points
-
5 points
-
5 points
-
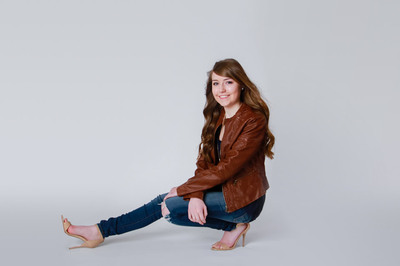
Hi Heather, I would do it with the Patch Tool, similar to eye bags. A little bit of cloning would be necessary too, near the hem of the pants. First, take them out altogether on a new layer: Then lower the opacity of that layer to a point that you think she'll like (this is 69%): And of course the beauty of it is, if she comes back and says she'd like them more or less visible, just return to your PSD file and tweak the layer opacity further.5 points
-
Hi Elana, I had to shift your posts around so that they were together and in the same spot. Damien is not currently taking on editing work, but he can try to help you learn how to fix these yourself.5 points
-
You'll probably need to find a link for Damien with the color "tiffany blue" because I don't think he's going to know what you're talking about.5 points
-
All of Damien's articles can be found at www.damiensymonds.net Any bookmarks you have to old articles should redirect to his new website.5 points
-
5 points


