

Damien Symonds
-
Posts
210,896 -
Joined
-
Last visited
-
Days Won
3,439
Everything posted by Damien Symonds
-
Hmmm ... 8GB is the bare minimum of RAM to run CC. You'll need to make sure you don't have any other programs open while you're running the Adobe programs. It would be a good idea to run the Scanner Tool at crucial.com and see if you can add more RAM. Brian always says that you should have at least 1/3rd hard drive space free, and you're a bit under that. Your drive is sufficiently big so it shouldn't matter, but don't let it get any more full. And you should definitely run CleanMyMac straight away, and every month hereafter. Also - VERY important - make sure you don't have ANYTHING on the desktop. No files, no folders. Desktop clutter slows a computer significantly, Brian says.
-
@oliveoh, please do this for me: https://www.damiensymonds.net/thread1.html
-
I realise it's not perfect, but it's the best I can offer, I'm afraid.
-
How did you go, @calliechinen?
-

I would love to learn this technique
Damien Symonds replied to fstoplife's topic in How to achieve a certain look or effect
@fstoplife, how did you go? Have you managed to find out what light setup she uses? -
You'd go for the 5000, I figure. But yeah, the brightness is really important too.
-
It's time to take a refresher on the Raw Class. It's been a LONG time since you took it, and a LOT has changed. https://ask.damiensymonds.net/topic/8494-raw-signup-1/
-
?
-
Great, I look forward to hearing.
-
I would love to learn this technique
Damien Symonds replied to fstoplife's topic in How to achieve a certain look or effect
That's right. Again, her light is smaller, higher and brighter than yours. -
I would love to learn this technique
Damien Symonds replied to fstoplife's topic in How to achieve a certain look or effect
I need you to take a look at the catchlights in her photos. See how they're smaller, brighter and higher than yours? She has specifically shot for this style. Whereas you have taken a lovely but "regular" photo. -
I would love to learn this technique
Damien Symonds replied to fstoplife's topic in How to achieve a certain look or effect
My understanding is that eyes are usually enlarged slightly during this kind of editing; so I hope you don't mind that I did that, and a little bit of facial sculpting. What do you think of this?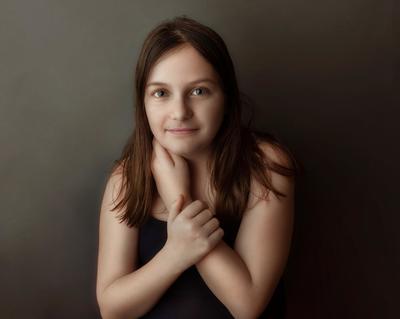
-
Gosh.
-
I would love to learn this technique
Damien Symonds replied to fstoplife's topic in How to achieve a certain look or effect
I hope I don't offend anyone by saying this, but I think race is important here. Can you choose a sample photo of somebody with a similar complexion to your subject? -
That neutral tones look
Damien Symonds replied to EB Photography's topic in How to achieve a certain look or effect
It's the "Download PSD" link earlier in the thread. -
That neutral tones look
Damien Symonds replied to EB Photography's topic in How to achieve a certain look or effect
Examine each of the layers to see what role it plays in the outcome. -
Oh my goodness. What degree of optimism is there for his rehabilitation?
-
How did you go?
-
@Melissalile, where are you?
-
I'm always very concerned about using lamps. Their light is so ... directional, you know? Just to check - have you read this? https://www.damiensymonds.net/2012/01/light-around-your-computer.html
-
Phew. As it happens, you got lucky this time, because we do need that duplicate layer. You need to apply some Gaussian Blur to it - just enough to get rid of the distinct fabric lines, eg around your hand. I think about 0.6 will do. Then mask that layer too.
-
Geez, you don't make a habit of this, do you? Don't double the size of your file for "no real purpose"!
-
There's a bit more we need to do. First, can you tell me what the "Background copy" layer is for?
-
May I see a screenshot of the Detail (noise) panel from ACR for this photo?
-
It's not black-and-white, don't you see? It's pant-colour.

