Damien Symonds
-
Posts
212,022 -
Joined
-
Last visited
-
Days Won
3,484
Everything posted by Damien Symonds
-
 You can't convert to a profile until you know what the profile is
 -
You have to hassle them and hassle them and hassle them until they DO provide specifics.
-
And? Did they tell you exactly which CMYK profile to use? Go back and save them again.
-
If they don't ask for CMYK, definitely don't provide it.
-
Have you read this before? Did the printer ask for CMYK? Was the first print run CMYK as well? NOOOOOOOOOOOOOOOOOOOOOOOOOOO!!!!!!!!!!!!!!!!!!!!!!!!!!!!!!!!!!!!!!!!!!!!!!!!!!!!!!!!!!!!!!! https://www.damiensymonds.net/2010/05/making-pdfs-from-photoshop.html
-
did not shoot wide enough - stretching a canvas
Damien Symonds replied to Diana's topic in Help with editing
No, do your liquify first. https://www.damiensymonds.net/2015/07/order-of-layers-for-complex-pixel-edits.html -
did not shoot wide enough - stretching a canvas
Damien Symonds replied to Diana's topic in Help with editing
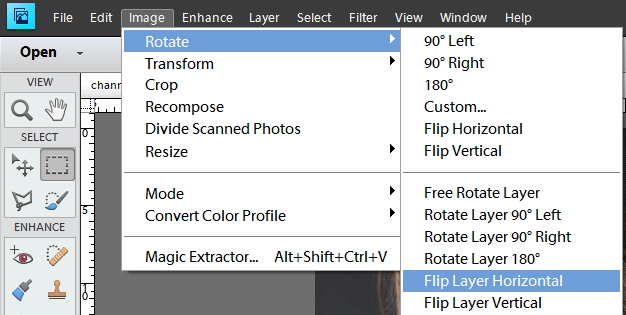
Oh, sorry, for Elements it's here: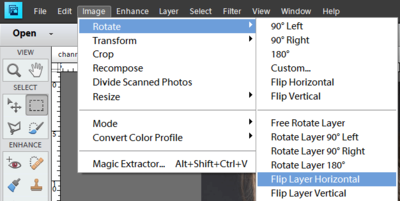
-
did not shoot wide enough - stretching a canvas
Damien Symonds replied to Diana's topic in Help with editing
This tricks everyone. No, you need to use Edit>Transform>Flip Horizontal. -
did not shoot wide enough - stretching a canvas
Damien Symonds replied to Diana's topic in Help with editing
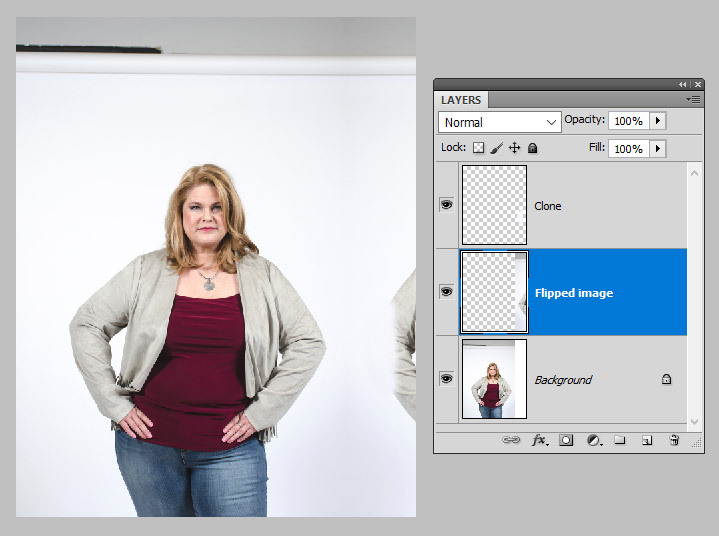
Ok, in that case, I think we can get away with the easiest option. Duplicate the Background layer Go to the Canvas Size dialog, and extend the size at that side Flip the new layer horizontally, then move it across so it lines up perfectly (zoom in greater than 100% view to ensure this) Add a new blank layer and clone out as much elbow as needed
-
No, sorry, both of these area dreadfully out of focus. Ditch it
-
did not shoot wide enough - stretching a canvas
Damien Symonds replied to Diana's topic in Help with editing
Hi Diana, yes, there are a few ways to approach it. Do you intend to do anything else to the background? Change its colour in any way, I mean? Presently it's slightly shaded white (ie very light grey) - will that be how it remains? -
Channel Mixer layer ... Red channel: 0, +80, +20, -9 Green channel: 0, +80, +20, -3 Blue channel: 0, +80, +20, +11
-
Can you post a close crop of the area so I can have a good look?
-
It was to prevent the High Pass layer from making colours too vivid.
-
Because I'm heading off soon, here's the PSD. Of course, if it doesn't meet your needs, we can discuss it further when I get back.
-
Ok, how about this?
-
Ok, so what about the SpyderTune step? Are you saying that doesn't work?
-
Whitening eyes
Damien Symonds replied to mlchristy's topic in Questions about tutorials and articles
Yes, Alt-drag them off. Why were you using them in the first place? -
Sorry, I can't give feedback on Levels work here, only in the Levels Class. However, I urge you to revisit your notes from the class, regarding the order in which you'd approach small areas like his head.
-
Prints different
Damien Symonds replied to Sarah Neese's topic in Monitor calibration questions or problems
Hmmm ... that's a pity, in a way. Well, I hope the reprints are fine. -
Whitening eyes
Damien Symonds replied to mlchristy's topic in Questions about tutorials and articles
What? Just click on the 216! -
Whitening eyes
Damien Symonds replied to mlchristy's topic in Questions about tutorials and articles
To each of the highlight numbers, of course. Exactly as in my tutorial. On the red channel which you screenshotted, add it to the 216. -
Prints different
Damien Symonds replied to Sarah Neese's topic in Monitor calibration questions or problems
I can't think of any other possible reason, to be honest. I'll be interested to know what they say. -
Prints different
Damien Symonds replied to Sarah Neese's topic in Monitor calibration questions or problems
Hi Sarah, I've moved this post into AD, since it's not a class question per se. This is very interesting. It's actually rather common, but usually the difference in print size is bigger than this. Usually 4x6s and 8x10s would be printed on the same machine at the lab. However, it seems like that might not be the case? If they were printed on different machines, and one of the machines was running a bit dodgy that day, it would be the most common explanation for this. Have you asked the lab about it? -
You're following my laptop directions for the laptop, right? You're not trying to use the same desktop instructions as for the external?