Damien Symonds
-
Posts
212,124 -
Joined
-
Last visited
-
Days Won
3,487
Everything posted by Damien Symonds
-
Great. Then you can go ahead and uninstall LR.
-
Hi Bev, do you have this turned on?
-
That's because you're not looking at it at 100%. Remember, Moire must ONLY be judged at 100%. All other views give you a false indication. https://www.damiensymonds.net/moire/
-
Nowhere. You've done it perfectly.
-
This Channel Mixer layer might work? R 0, +102, 0, -5 G 0, +100, 0, 0 B 0, +102, 0, +10
-
How did you go?
-
Thankfully she's looking fairly directly at the camera in all three photos, so it should be possible to copy and flip from the other side of her face in each case.
-

Rich and dark colors
Damien Symonds replied to Mariia Morello's topic in How to achieve a certain look or effect
Well, it would depend on your yellow flower photo, of course. -
Rich and dark colors
Damien Symonds replied to Mariia Morello's topic in How to achieve a certain look or effect
This is using CM.
-
Rich and dark colors
Damien Symonds replied to Mariia Morello's topic in How to achieve a certain look or effect
What you've learned in the Creativity Class should cover this okay? -
which Backlight to choose
Damien Symonds replied to EricG's topic in Monitor calibration questions or problems
Try Standard LED first. From what I can find out about the specs that should do it. However, if you get a funky result, try Wide LED. No, I don't believe so. -
Good.
-
hurdle
Damien Symonds replied to Yvonne Pethtal's topic in Monitor calibration questions or problems
No, not too dark at all. Just right.- 1 reply
-
- 1
-

-
No, a black mask, then paint with white.
-
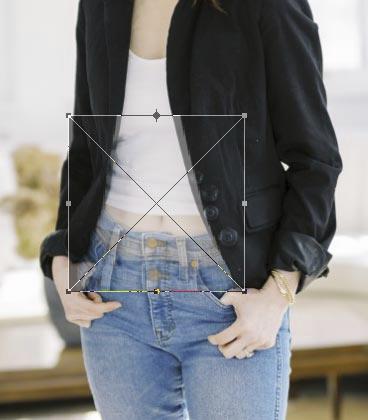
Oh, nothing to it. Just use your rectangle marquee tool to select your whole stomach area (up to your lower bust) and Ctrl J it onto its own layer. Then convert that new layer to a smart object, then reduce its opacity to 50% while you enlarge it enough to cover the bare patch. Then return to 100% opacity, and mask it in.

-
Interesting. Anyway, you can safely ignore those files as far as I know.
-
Are you using the very latest version of Photoshop? It was my understanding that updates had fixed this.
-
bridge shortcuts
Damien Symonds replied to Michael1's topic in Photoshop / Elements / Bridge / ACR questions or problems
I don't, sorry. Adobe doesn't seem to have given us that control, the way they've done in Photoshop. -
bridge shortcuts
Damien Symonds replied to Michael1's topic in Photoshop / Elements / Bridge / ACR questions or problems
It's not Ctrl O, it's Ctrl 0. The same as in Photoshop. -
Bridge and PS no longer connecting
Damien Symonds replied to Kellie W's topic in The Macintosh User Group
How about if you double-click the raw file in the Content panel, or press Cmd O? Does that make any difference to the overall problem? -
Brush not working
Damien Symonds replied to Reene's topic in Photoshop / Elements / Bridge / ACR questions or problems
Which method are you using to do this? -
Managing color space
Damien Symonds replied to Soul2530's topic in Monitor calibration questions or problems
Hi @Soul2530, I'm sorry to hear about your troubles. It's possible that your Spyder5 is too old for your new screens. Were you following my exact calibration directions here? https://www.damiensymonds.net/calibration-instructions/ -
Give this a try: https://www.damiensymonds.net/2015/08/fixing-tan-lines.html
-
FPS 1. 2, 3. CUSTOM
Damien Symonds replied to Reene's topic in Monitor calibration questions or problems
Holy crap, you should never have touched those. You'd better do a factory reset on your screen. -
FPS 1. 2, 3. CUSTOM
Damien Symonds replied to Reene's topic in Monitor calibration questions or problems
I need more information. May I see a photo of the available settings?