Damien Symonds
-
Posts
212,220 -
Joined
-
Last visited
-
Days Won
3,497
Everything posted by Damien Symonds
-
Right. Can you do it again, and take a careful look at the "ICC Profile" checkbox? I think yours might be unchecked.
-

Dell U2412M and Spyder4pro
Damien Symonds replied to Jennifer's topic in The Windows & PC Hardware Forum
Gosh, good question! How is the actual calibration? Is it still achieving a print match for you? -
That's ok, let's work it out together. When you save your files for the internet, do you use the "Save As" function, or "Save for web"?
-
CC on this overlay and baby image.
Damien Symonds replied to DAK's topic in How to achieve a certain look or effect
Yeah, this was definitely a job for a mask. Erasing was a terrible option. -
The second, I think.
-
Taking Pictures in a Pitch Black Room
Damien Symonds replied to allstraws's topic in Photo Gear & Equipment
This is a camera question rather than an editing one, so I'm going to move your post to Ask Brian. -
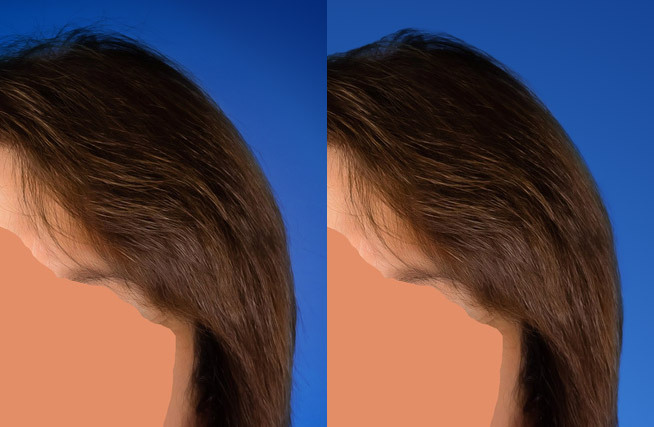
It will look weird to fill it in with more hair, but it will be insanely difficult to remove it. I'm not sure what to tell you. If you remove it, I think you'd need to find another photo of clear forehead to mask in there.
-
Download the PSD file Basically, I first added the gradient layer and made it the colours you'd shown me, and masked it but only very roughly, and not too close to the subject. I duplicated that layer, and changed the bottom one to Overlay mode, then made its mask completely white, then modified the gradient colours to make it match the top layer as closely as possible. This part was hard, I went back and forth quite a lot. Then I more carefully masked both layers. After this, it's up to you. On the top layer, you zoom way in and use a tiny brush, to mask out the hairs you don't want. I did a small section to show you:

-
Oh gee Cath, your file is untagged. Did you save it using Save As, or Save for web?
-
Monitor hooked up to laptop.
Damien Symonds replied to Lora's topic in Monitor calibration questions or problems
Very interesting. This is out of my league. Do you mind reporting back, to let me know how it goes? -
Download the PSD file
-
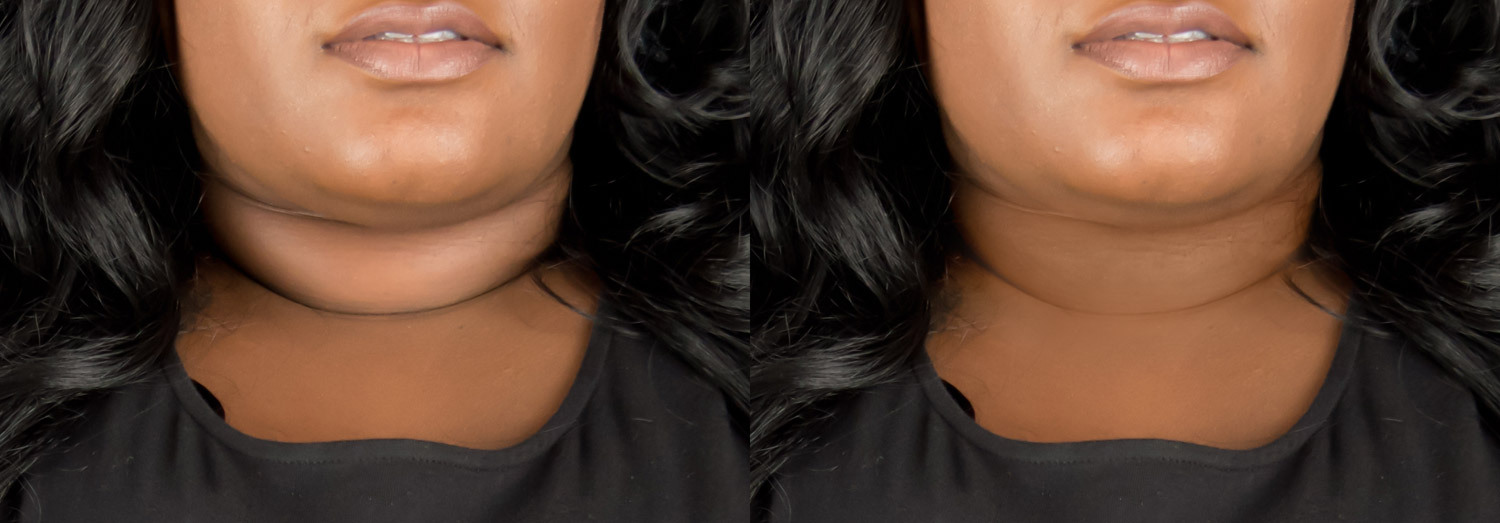
Well, first I used the Handyman Method to minimise it a bit, then some low-opacity cloning on top of that.
-
Download the PSD file
-
Well, it was done using this method. This one is also relevant. Give me a minute while I upload the PSD for you.
-
Also, right-click on a layer in the Layers Panel and choose a thumbnail size. Presently it's set to "No thumbnail".
-
CC on this overlay and baby image.
Damien Symonds replied to DAK's topic in How to achieve a certain look or effect
Oh yeah, that's terrific. Even better. It shouldn't have been necessary to mask at all, or at least not very much. Can you show me the texture file? -
Yes, that's fine.
-
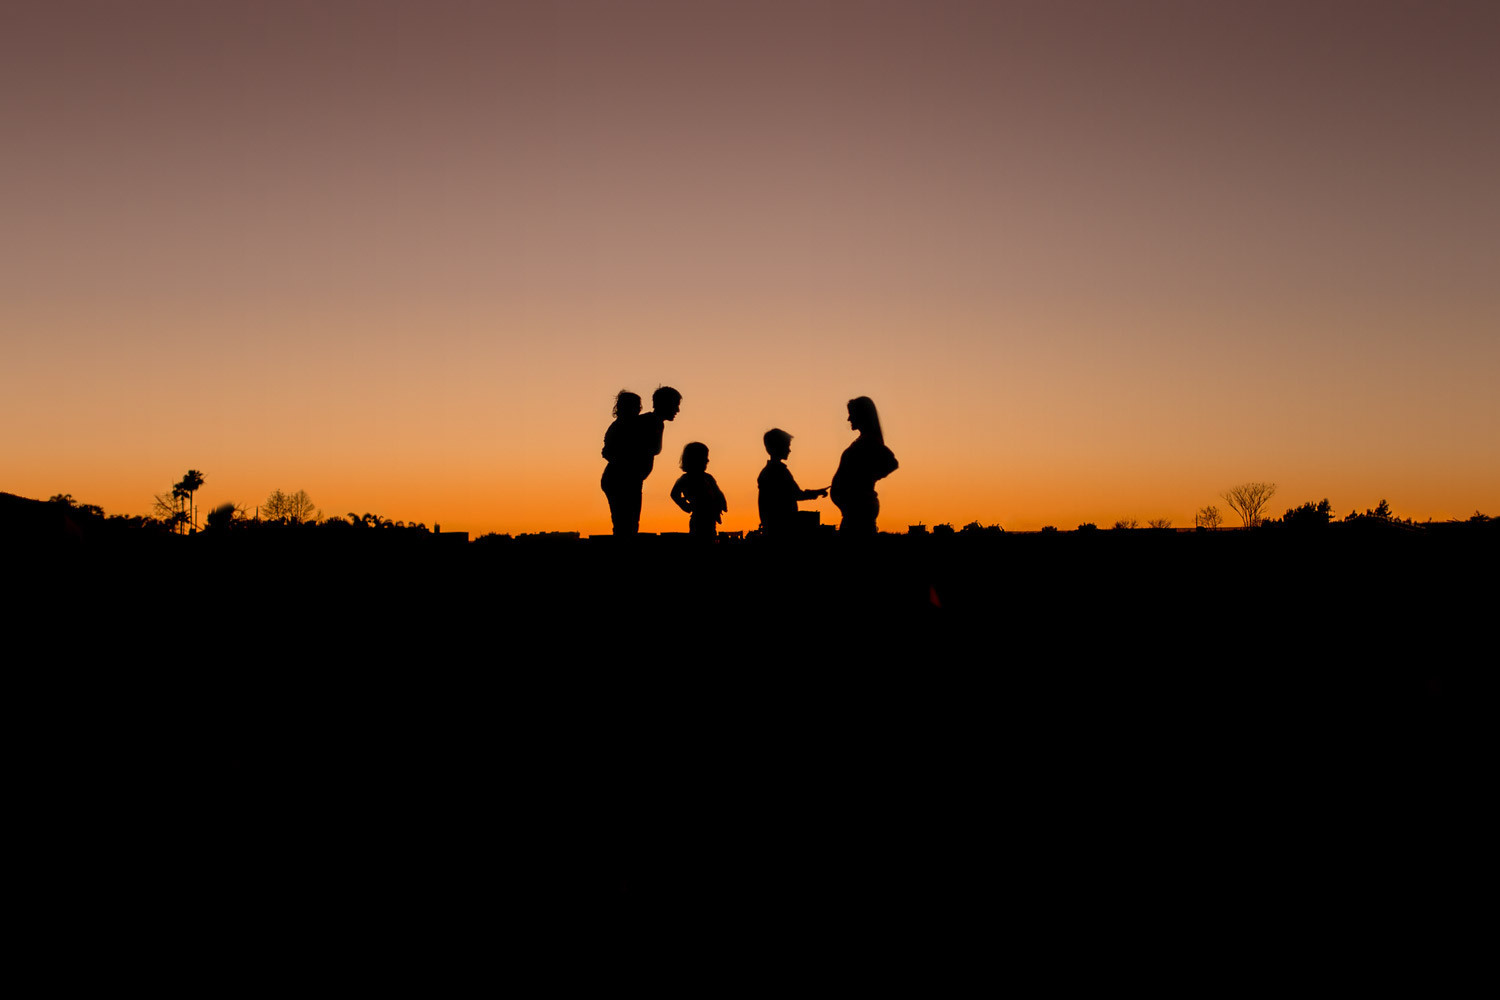
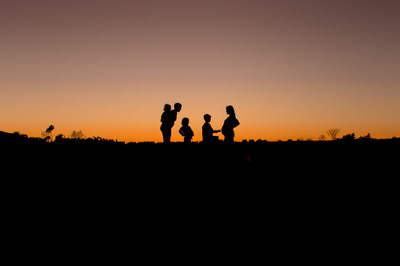
I've generally found that the safest way to handle this is to replace the sky altogether. This is a fake sky, what do you think?
-
Oh, this is SO difficult, isn't it?
-
I don't know, you haven't showed me the focus yet. http://www.damiensymonds.net/2013/09/grabbing-700x700px-100-crop.html
-
CC on this overlay and baby image.
Damien Symonds replied to DAK's topic in How to achieve a certain look or effect
No no no no no. Definitely no need for that. What blend mode did you choose for the texture layer? -
Oh gosh, this is tough. Do you think this would be satisfactory to her?
-
Aluminium would be the same as prints. For canvas, you can go bigger, but I wouldn't take a 5.2MP crop to 20x30.
-
http://www.damiensymonds.net/2014/03/how-aggressively-can-i-crop.html
-
Try this ... a Channel Mixer layer with "Monochrome" checked, with these values: 0/+50/0. Then change the blend mode to Soft Light. Then mask to the stomach.