Damien Symonds
-
Posts
211,983 -
Joined
-
Last visited
-
Days Won
3,481
Everything posted by Damien Symonds
-
Were you following these instructions exactly?
-

CC on this overlay and baby image.
Damien Symonds replied to DAK's topic in How to achieve a certain look or effect
I don't understand. What did you need to do with this area? -
New Eizo Frustration
Damien Symonds replied to erinpotter's topic in Monitor calibration questions or problems
It's got this little thing for calibration, right? http://www.eizoglobal.com/products/coloredge/cg247/CG247_built-in-sensor.jpg -
There is no secret or trick to this. You simply use this method, a lot of patience, and a tiny tiny brush. You literally have to cut one hair at a time.
-
No, a desktop screen you can plug into it.
-
Oh gee Ephee, you might have a much bigger problem here. Please do this immediately.
-
Hi gc, could you please go to your profile page and fix your email address? Thanks. This is happening because you have your Photoshop Color Settings ALL wrong. http://www.damiensymonds.net/2010/02/please-ignore-your-monitor-profile.html They need to be set to "North America General Purpose 2". http://www.damiensymonds.net/art_tscs000.html
-
Oh, tricky one. May I see the SOOR?
-
ACR Preset
Damien Symonds replied to Stephaniep's topic in Photoshop / Elements / Bridge / ACR questions or problems
No, sorry. You'll need to use 2012 with it. -
Something like this?
-
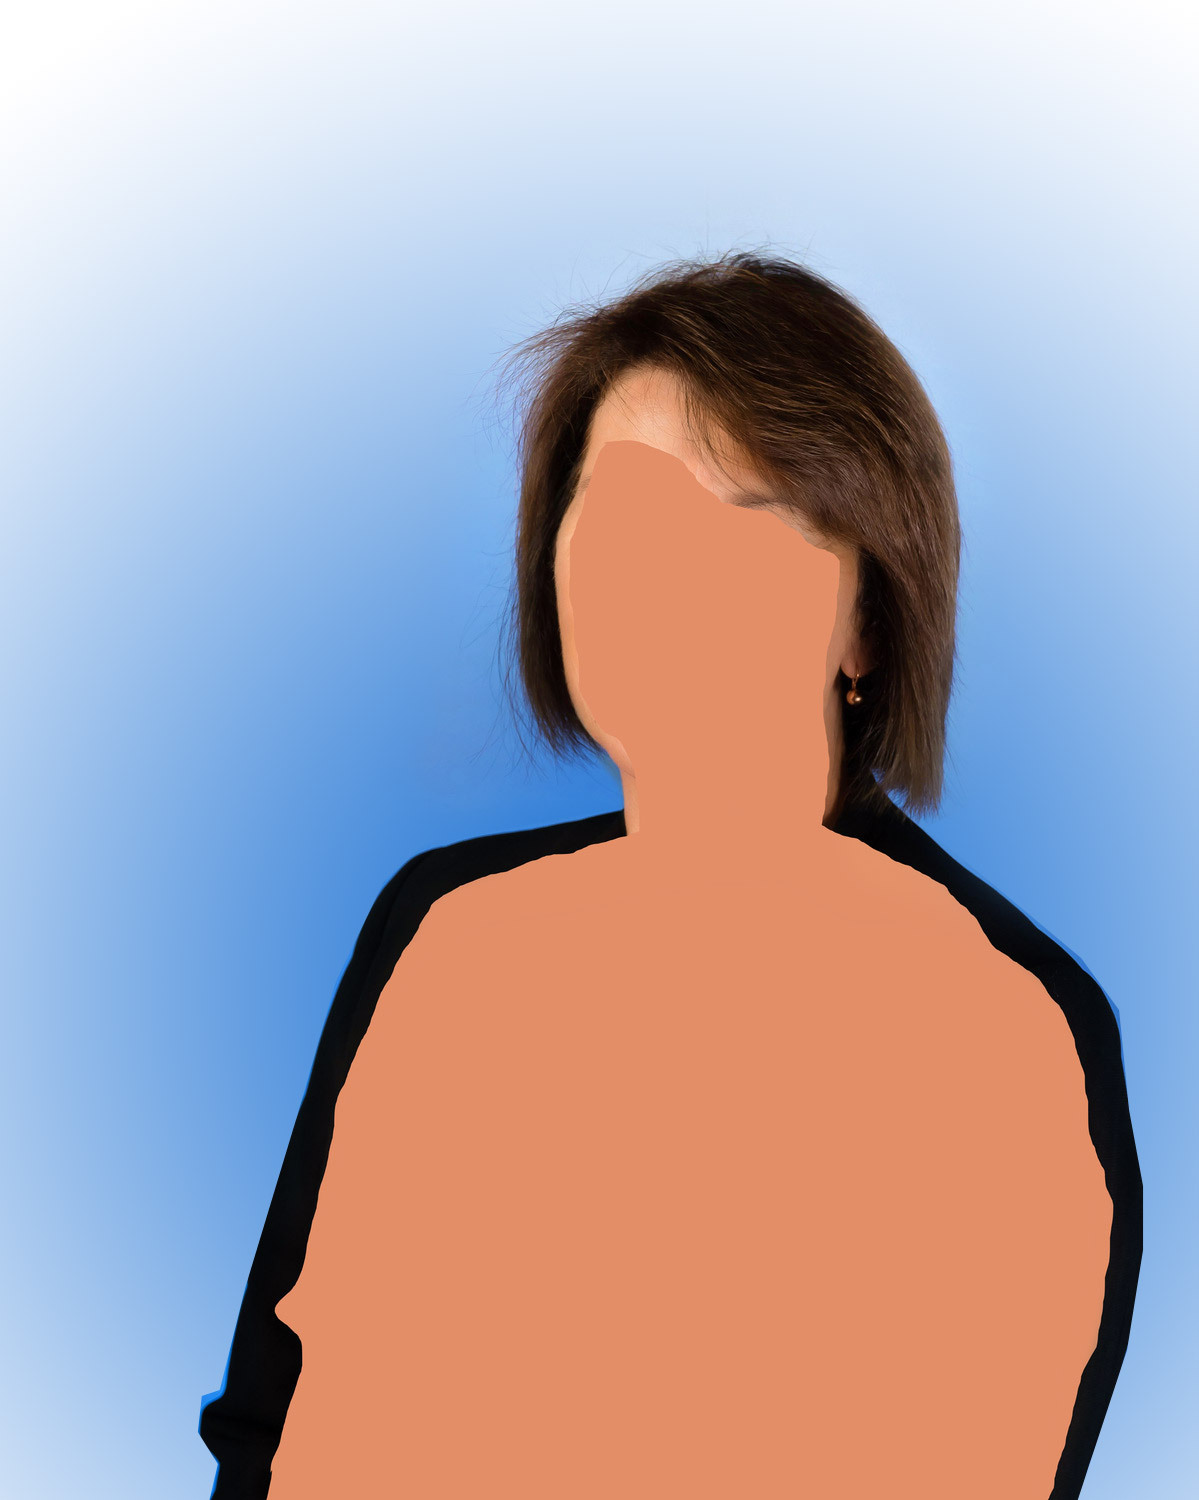
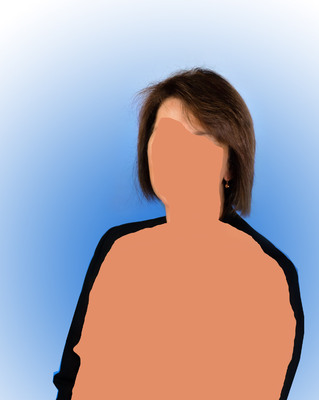
Your profile says you have a D800. Surely that's a 2:3 frame camera? Just to clarify, do you want to take away hair, or add more in?
-
CC on this overlay and baby image.
Damien Symonds replied to DAK's topic in How to achieve a certain look or effect
No, there isn't one. This isn't a site for CC, sorry. This is really really REALLY bad. You must never use the Eraser tool. Only use masks. -
Generally this means your tool isn't on "Normal" mode in the Options Bar.
-
Removing Noise from Raw
Damien Symonds replied to RachelHolden's topic in Questions about tutorials and articles
No, that's complete bollocks. You can very much ignore that advice. Basically, don't sharpen at all in raw. If you do add some sharpening, make sure it's such a small amount that it doesn't risk adding back the noise you just removed. Sharpening only happens during output - for print or web, at the very end of the workflow. -
Please help fixing uneven eyes with glasses
Damien Symonds replied to Jessica Anders's topic in Help with editing
I really think it helps. Good stuff. -
Calibration for CMYK
Damien Symonds replied to Aubrey's topic in Monitor calibration questions or problems
No, no different settings at all. In fact, I'd even strongly recommend taking in your pro lab prints, for verification. -
Thanks. And tell me about this blue-to-white gradient you're envisioning. Where would the blue and white be?
-
No, because sharpening can only happen after flattening.
-
Then I really will need to see the whole photo, not cropped. Background replacement would have to be done before hair trimming, I think.
-
You can do it in LR if you like, but only if you're happy to settle for mediocre quality. If you want genuine quality for your prints or web files, the sharpening step must be done in Photoshop.
-
Please help fixing uneven eyes with glasses
Damien Symonds replied to Jessica Anders's topic in Help with editing
Download the PSD file The top layer is a dodge and burn layer, of course. -
Please help fixing uneven eyes with glasses
Damien Symonds replied to Jessica Anders's topic in Help with editing
Yeah, tough one. This is the best I can manage: I cloned out the lines at the top of the inside of each frame, and liquified down the upper eyelid of her right (our left) eye. I can show you the PSD if you like it.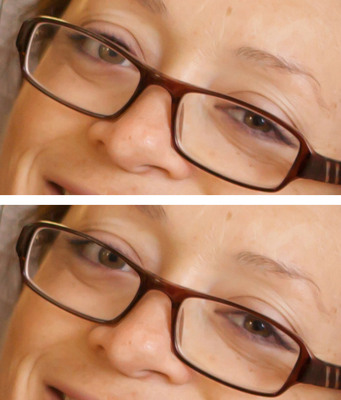
-
Are you happy with the background? You don't wish to change it?
-
Right. So, do you have another screen you can plug into it? I assure you there is no banding in these photos you're posting. This is a screen problem.
-
Then, when you're ready to output for print or web, re-open the file from LR to PS, and flatten and crop/resize and sharpen appropriately, then save as a jpeg.