Brian
-
Posts
4,137 -
Joined
-
Last visited
-
Days Won
55
Everything posted by Brian
-
The difference is the interface type. CF cards are much bigger physically and the connector interface is way different. They are both Flash Based Media.
-
Yes, this is a SD card. The RescuePro Deluxe Software will work just fine. That said, you need to use a card reader in order to have the best shot at recovery. Do not use your camera to access the card.
-
Oh, one other thing, while the modular concept is tempting, it has been tried before. Unfortunately, none of these companies are still in business. So while it sounds like a good idea, the modular concept won’t do you any good if the company doesn’t stick around.
-
If it doesn’t have a dedicated graphics GPU with dedicated video memory, I don’t care how modular it is, Photoshop CC will not like it. Seriously. If you want to waste money, I take donations, I will put it to good use and spend it for you. if you want modular without problems, build your own PC and let go of the “Laptop” way of thinking. Or get one from some place that builds them, like Digital Storm. I know, portable, don’t have space, I prefer a laptop… I’ve heard them all. Laptops you get a good 4 years on the average if you buy it right. They are practically all crap today with planned obsolescence build right into them. Even fancy $4200 MacBook Pro Laptops.
-
DO NOT USE THE 15-PIN VGA PORT (aka D-SUB Port) with today's fancy flat-screens!!! VGA is analog and has been around since 1987. It was only meant for TUBE Displays up to about 20" or so. DVI, HDMI and DisplayPort are DIGITAL Connections. Meaning, think of VGA like an old VHS Tape. HDMI or DisplayPort, the two most common ports on new monitors today, as Blu-Ray DVDs on a High Def TV. So yes, the port choice DOES make a difference. HDMI / DisplayPort have better Contrast, Colors and are much Sharper overall. I've also found Digital Monitor Ports to be a bit brighter as well, probably due to a power upgrade in addition to video signal. There is a BIG difference between an Analog Display Port and a Digital one. As for the Difference between HDMI or DisplayPort? It's a wash, but I find that 4K Displays like DisplayPort better. Also, you can get all sorts of adapters with DisplayPort. You can buy a Display Port to HDMI, DisplayPort to DVI or even DisplayPort to VGA (Not recommended, again...avoid VGA in 2021.) That port is so versatile and the one I would use on my computer.
-
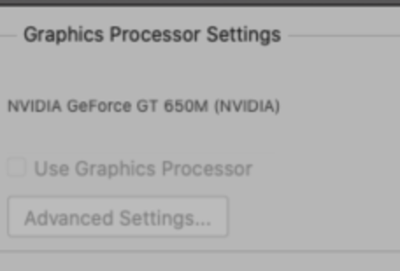
See this area right here? See how "Advanced Settings..." is greyed out? You are screwed. Again, you need a new iMac. Your Graphics Processor isn't powerful enough for the version of Photoshop you are running. Remember, your Mac is from Late 2012. THAT IS 9 WHOLE YEARS OLD!!! We are in "Late 2021." Most computers you get about 7 or so years out of technology-wise, before the Software overtakes the Hardware. You are at 9 years, so you have two years on top of what I'd expect for a useful life of a computer.
-
Right Click on the Folder and select "Get Info." You could also select the folder and hit Command Key + I.
-
It's a thing with the website. I knew what you meant. It's the C followed by a Colon that triggers it.
-
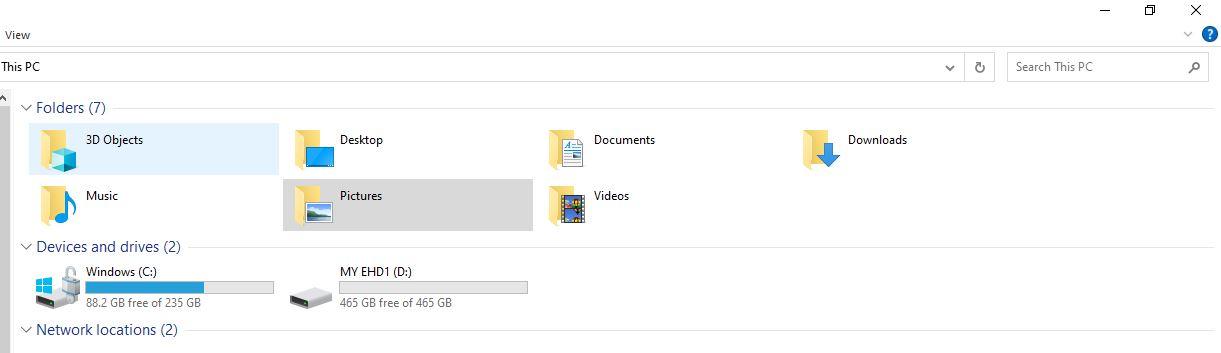
Yes. In fact, your goal is to get that 285GB Drive above 100GB free at the least. The more you can free up the better your computer will like it.
-
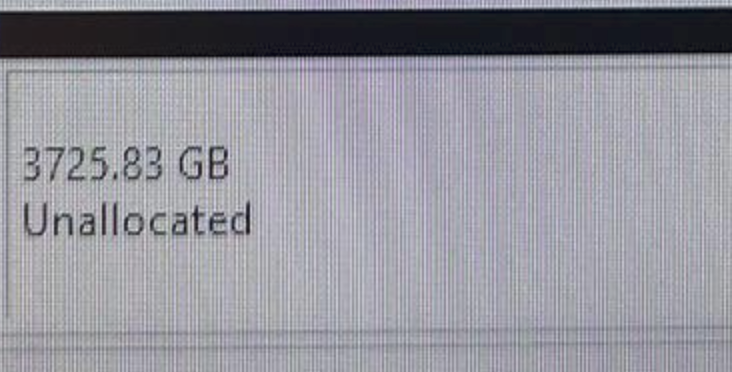
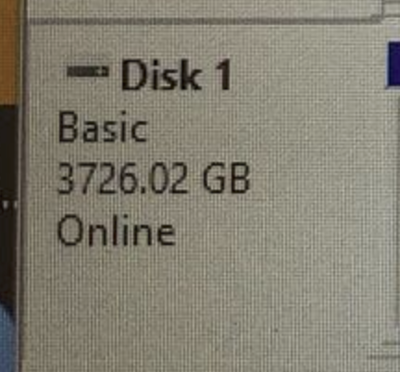
That's marketing. Hard Drive Manufacturers say that 1000GB is 1TB. Microsoft says 1024GB is 1TB. You will ALWAYS LOSE capacity when you partition/format. 3815GB is 4TB after being formatted. Surprise!!
-
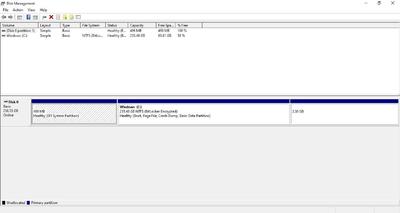
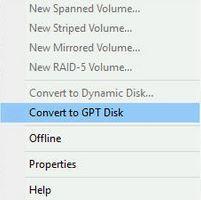
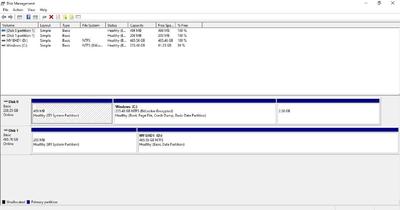
PHEW!!! That's MUCH better. OK, delete the 200MB Partition? I want to see nothing but a black bar all the way across. If you can't that's fine. Then I want you to Right Click Here: Look for "Convert to GPT Disk." But I'm thinking it will say, "Convert to MBR." IF it says "MBR," don't do anything, because it's already a GPT Disk, and then right click in this area and select "New Simple Volume" Then follow STEP 9 and beyond above. ^^^^^
-
Damien is correct, iMacs from 2015 to current, use GB-LED for your Display Technology Type.
-
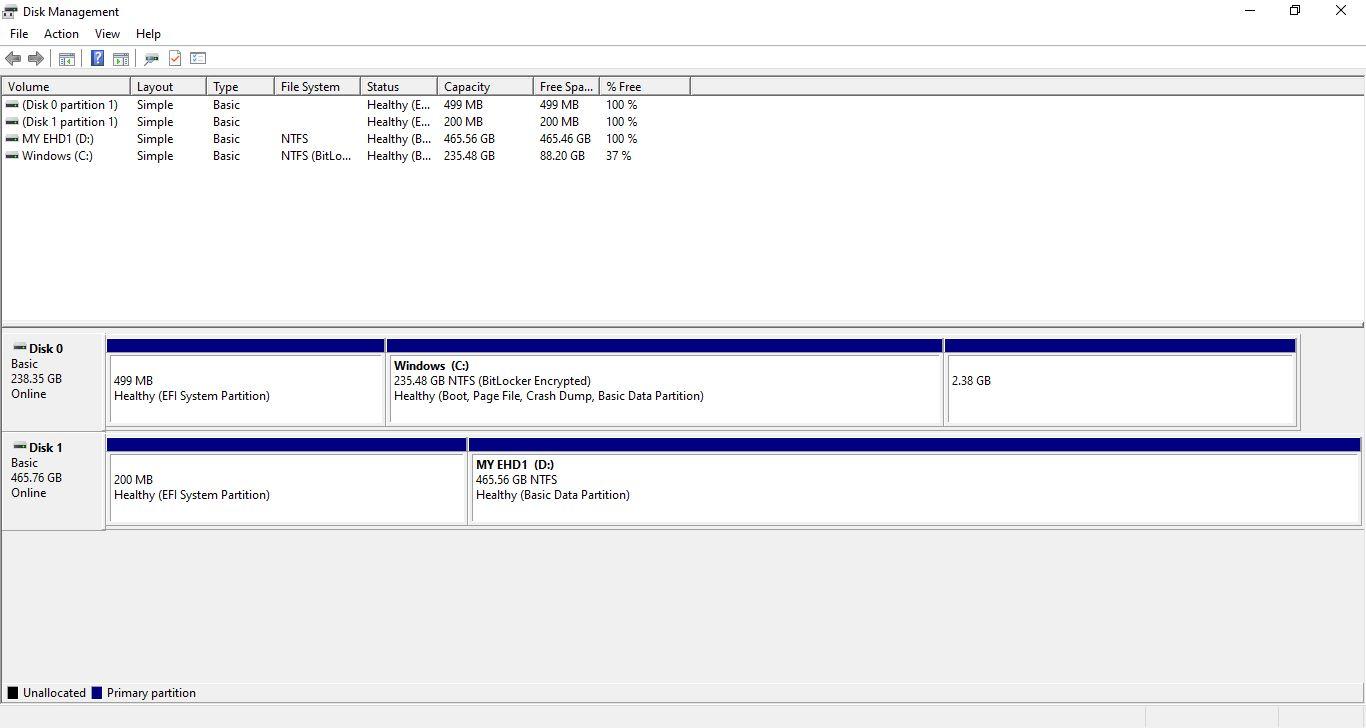
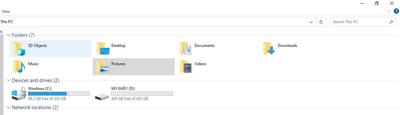
The only drive that is listed is your current internal one. Where is the new External Drive? I thought you purchased a new 4TB External HD and that it arrived. Correct? Connect the new External Sandisk to your computer, power it on if needed, and it should appear in the Disk Management Window. Post a screen-shot and we will continue.
-
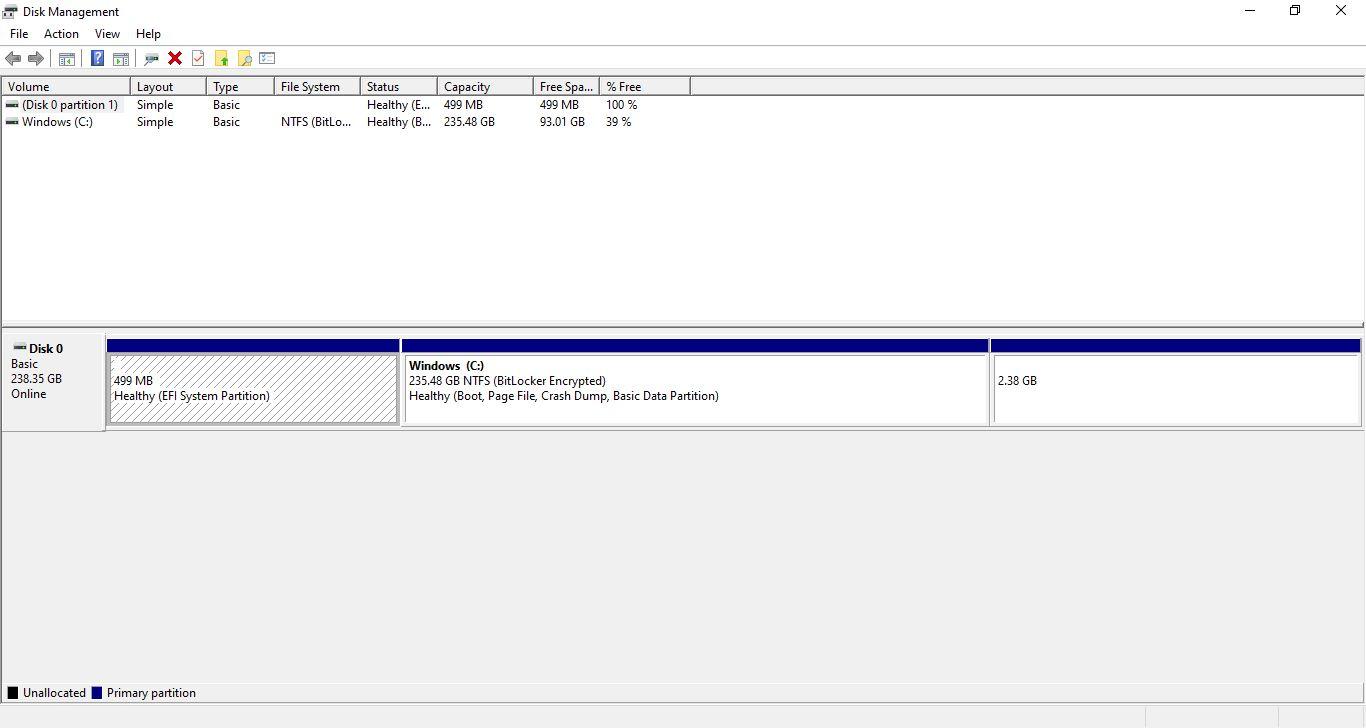
STOP!!! YOU ARE ON THE WRONG BLASTED HARD DRIVE!!! You are not following my directions!!! Where is the new 4TB Drive? It's not in the list!!!! You are about to Royally Screw Up your computer!!!! You don't go from 2TB to 4TB, you select a new hard drive. You can not make a 4TB Drive out of an existing 2TB Drive.
-
I need a screenshot of your Disk Utilities Window. All of the partitions on the new drive need to be gone. Right-click on the existing partitions and select delete. We need the drive to be completely blank.
-
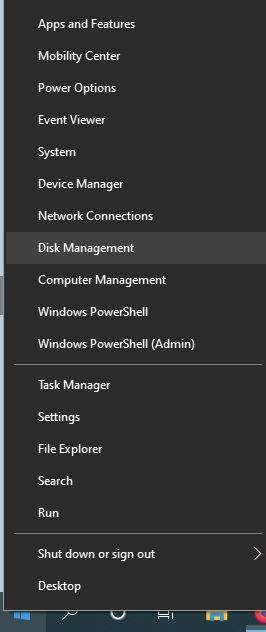
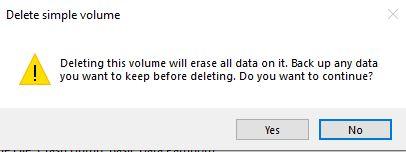
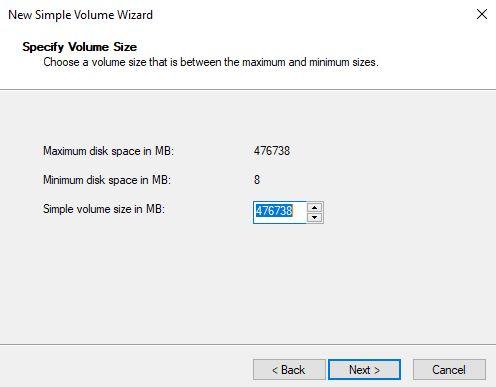
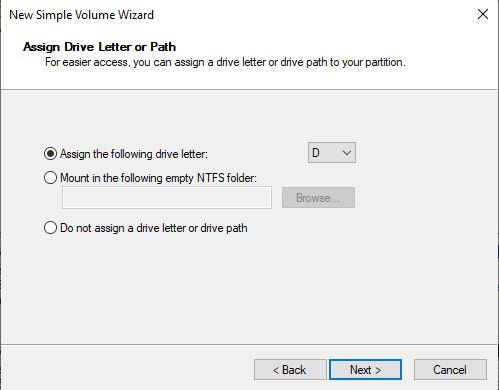
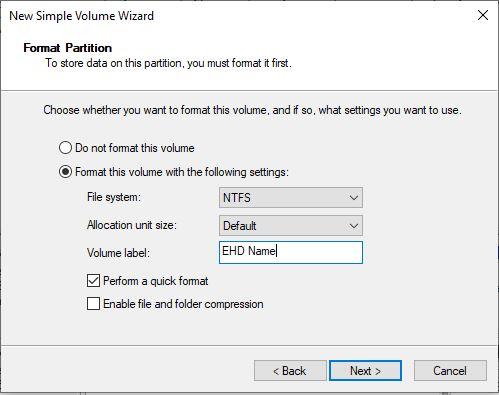
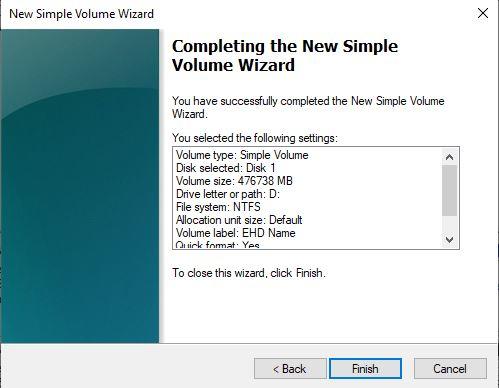
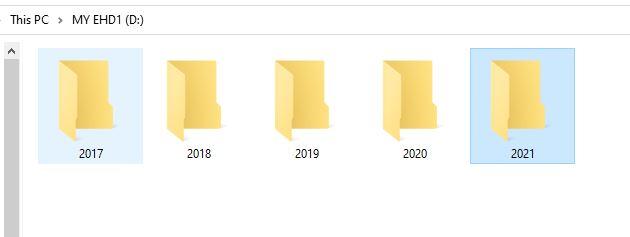
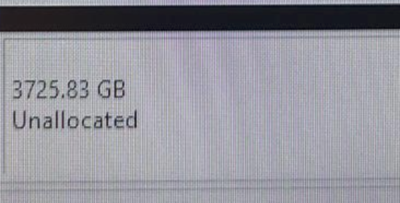
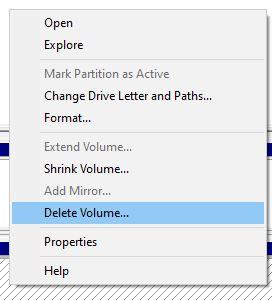
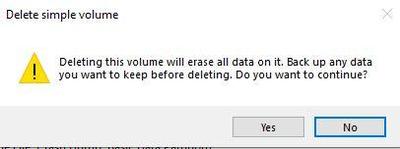
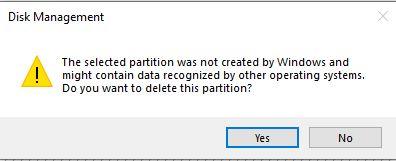
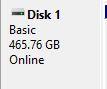
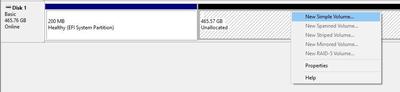
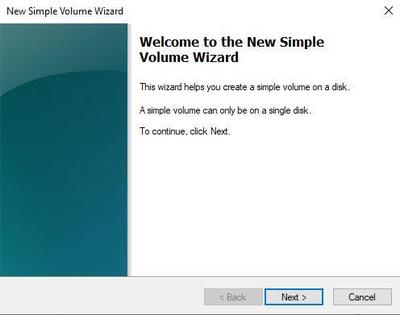
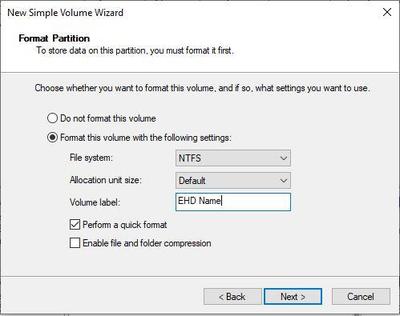
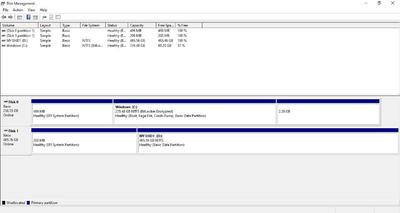
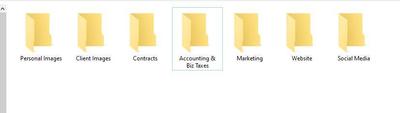
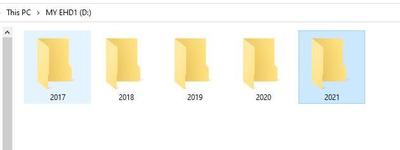
OK! Let's get that external powered up, don't hook up the USB Cable right now. Speaking of USB, for the best performance, be sure to utilize a USB 3.0 Port. Deleting a Windows Partition and creating a new one is pretty straightforward, and just takes a few minutes to complete. No special software is needed, especially software from the Hard Drive Manufactures; all that is required is built into the Windows Operating System so do not use ANY Manufacture's software, it just gets in the way. So let's begin! Right-Click on the Start Button and select Disk Management: This will bring up the main Disk Management Utility Window. Make note of which hard drives are currently mounted. Most folks will only see one HD, labeled Disk 0: Now insert the EHD into your USB port and allow it to mount/spin up. It should appear in the list. In this example, note "Disk 1" that appeared in the list after it mounted. This will be the drive that I will modifying; your Disk Number might be different so pay attention and be sure to select the correct drive. There is no difference, it's just another number in the list. It could be listed as "Disk 3" or even "Disk 5," Again...THE IMPORTANT THING IS THAT WE CHOOSE THE CORRECT DRIVE! This is why we hold off hooking up things until now. I want you to pay attention to WHAT drive your new EHD is, so you don't screw up and delete the wrong drive! That would be bad. Select the Partition that you would like to Delete. The box will go from a plain white background to one that has slashes in it and should be highlighted. This is Windows' way of letting you know which Partition you have chosen: Now Right-Click on that Partition and select Delete Volume. It should go without saying, that you really-really-really want to be sure that this is the correct Partition to delete. A Warning Message will appear asking for permission to delete. If the Partition was created on another type of OS, such as a Mac, this error message will appear differently. This is completely normal, just click "Yes" and wait a few seconds. Error Warning with a Windows-Created Partition: Error Warning with a Macintosh-Created Partition: After deleting your Disk Management Window should have your (new) EHD as a large, solid/continuous black line: At this point, if your HD is 2TB or smaller, we can continue with the Wizard to create a new Partition. If your EHD is 3TB or Larger, then we will need to covert the Drive from a MBR Disk to a GPT Disk. This step ONLY affects those with EHDs that are 3TB or larger. GPT is meant to create a single partition that is larger than 3TB since MBR has a 2TB maximum limit. Make sense? To convert it to a GPT Disk, right click on the Disk # Box in the left column you are modifying and select "Convert to GPT Disk" and follow the prompts. (Click OK, OK, etc., etc.) Note: I do not have a 3TB Drive hooked up for this document, and am using this next example as a guide. Your 3TB HD will be larger in capacity than my smaller one that I'm using in this tutorial. The important thing is to right-click on the Drive # box that you want to convert to a GPT Disk: After Right-Clicking on the Drive # square in the left column, select "Convert to GPT Disk" and follow the prompts. Again, this is only for the folks who have 3TB or larger Hard Drives! 2TB or smaller, leave it at a MBR Disk. Now for the fun part, creating a new Partition! Right click on the area that has a black stripe and select, "New Simple Volume." The Wizard should appear, click Next: Specify the Volume Size. For the majority and this example, we will leave it at the default, which is the maximum capacity of the drive. If you are going to create multiple partitions on this Hard Drive at different sizes, I'd use an online calculator tool to create the size you need. For example, if you wanted to create a 6TB partition, you would enter 6,291,456. But to keep things simple, leave it at the default and click next. Assign a Drive Letter. This is the spot that you can assign a drive letter if you choose. For example, if this EHD is one that will contain personal files. we could change the Drive Letter to P:\ for "Personal Drive." Again, this is completely up to you to decide. There is no right or wrong answer. If you'd like all of your EHDs to be the "E Drive" (i.e. E:\ ) then change the default to E by clicking the Down Arrow next to the Drive Letter and selecting E. Please note, that if you use an external DVD Drive, or another drive that uses the same drive letter, things might go wonky for you if you hook up both devices at the same time. So don't be afraid to "spread" things out. Drive Letters A --> E are the most traditional, so anything that is "H" or above is almost always fair-game. After making your choice, click Next. We will leave it at "D" for this example. The next screen is very important. It's the "Format Partition" selections. For today's modern Windows Computers' hard drives that are meant for permanent storage, you want to use NTFS. Some devices like Thumb Drives, you would want to use FAT32. Again, for this example we will leave it at the default of NTFS. The Allocation Size should be left at the default and it is highly recommended that you give your HD a name, to keep things organized. "Data," "Photos," "EHD #2," etc. are all examples. Keep is short and simple. Before clicking Next, be sure to click the check-box next to "Perform a quick format!" Otherwise it will take HOURS to format your HD! Leave the "Enable file and folder compression" UN-CHECKED. Click Next. A Summary Window should appear with your selections. Confirm them if you'd like and click Finish. The Hard Drive will begin the process and Windows will assign it a letter and name. This process should take less than 30 seconds, but this depends on the speed of your computer and Hard Drive. Some complete this task in as little as 5-7 seconds, others take longer. When completed, the Disk Manger should have the drive in the list, along with the name that you chose for the drive: Exit out of the Disk Manger and either use "This PC" or the "Windows Explorer" to use the new Drive. With any new Hard Drive, now is the time to think of a Directory Structure on how you want to organize your Hard Drive. This is completely up to you, but I would take the time and think of how you are going to store stuff, rather than it become a dumping ground for your files/images. Here is one example: You could also keep things very simple, and have folders that are just the year: The sky's the limit! So make your Directory Structure a good one!


-
Keep in mind: They are ALL CRAP. Anything that is man-made can fail. In reality, you are picking the lesser out of all the Evils. With that in mind, here is what I tend to avoid: ANY HD that is $99 or $79 from a Big Box Store. ANY HD that is "Eco Friendly or Green" - These are the drives that I really avoid like the plague. They are often cheap and have very nice buzzwords about being good for the planet because they consume less power...blah-blah-blah. Let's all sing Cum-Ba-Ya Children!! We are protecting Mother Earth!! BULLSHIT. These type of drives DIE ALL THE TIME. So what happens then? They end up in Landfills, so any "Green" thing that made you feel better when purchasing this crap gets tossed out the Window. The only difference between a working Green / Eco-Friendly Drive and a dead one is about 3 weeks. Seriously. E-Waste is a very real thing, and since China has stopped taking all of our crap, you'd be surprised on just how much our "recyclables" end up in Landfills. Don't even get me started on plastic water bottles and plastic shopping bags. But it's all about feelings, right? But I'm digressing. Anyway... I also tend to avoid 5400 RPM Drives as well. For traditional HDs, I like mine being 7200RPM. Yes, there is a difference in speed read/write times between a 7200RPM Drive and a 5400RPM Drive, and those Eco Drives that I'm bitching about are usually the 5400RPM variety. How do you know what do you have? The easiest way, though not 100% is if your EHD has a separate AC Cable that connects to the drive, then it usually is a 7200RPM type. 5400RPM models just have the USB connection and that's it. USB will support a 5400RPM Drive but the 7200RPM Models need a little more "Umph" and require their own power source. For me personally, I avoid Seagate HDs, I've had too many fail on me over the years. Normally, I prefer Western Digital Drives, but only a certain kind. The Western Digital Black Drives. Honestly? It is really tough for me to recommend a typical EHD that's an "affordable" model. People are not used to spending $500 or more on a EHD. Heck, the one I linked to above is $850! So this is where I pay attention to the reviews. If a particular drive has lots of positive reviews, and I really do go over the reviews, ESPECIALLY the negative ones, to weed out things. When reading reviews, you need to keep this in mind: Everything is awesome when it works, but what happens when it breaks? How is Customer Service and Turn-Around Times for Warranty Claims? Also, it's important to have multiple copies of your HDs and have them stored off-site. This way if something very bad were to happen, you are just inconvenienced and not in a full-blown panic. It happens more often than it should; people have everything on one EHD and then it dies or gets knocked off a desk and then they realize the weight of the situation. A HD Failure should be an minor irritation and a time-suck of a few hours, not spent begging for help in forums or using software to recover any possible files. Or at the very worst, forking out $1500-$2000+ for a Data Recovery Service to perform their Voodoo Chants and do major surgery to get your data back, if they can at all.
-
I like and own G-Drives. Here is the latest version of what I have: G-Drive 18TB Thunderbolt 3 I will warn you, these are Enterprise-Grade Beefy External Hard Drives that are not cheap. I have a 12TB capacity myself.
-
This is where Damien’s and my opinion differs. I also primarily work off and external drive, but I do not use a standard USB EHD, my EHD is a fancy Enterprise Grade HD connected via a Thunderbolt 3 port, which is extremely fast. My TB3 G-Drive feels just like I’m working off an internal, though my internal SSD is much faster regardless. If all I had was USB 3.0 to work with, I’d copy my projects / sessions to the main drive, work on them, and then move the files & images to a EHD. Some of our members are forced to work off an external, due to them only having a laptop with a Microscopic Internal HD, usually 250GB or less in total capacity. Those folks have no choice than to work off an external. it’s really a personal preference, but again, if you want to work off an external, make sure you use the fastest port on your computer and please use a high-quality EHD, not one that’s a $79 Special drive from a Big Box Store.
-
Something is wrong with the Hotshoe or the Godox Transmitter you are using is incompatible with your camera body. It could be a something stupid like one of the pins not lining up 100% from the transmitter to the hotshoe. What make/model/brand of camera? Is there any kind of firmware updates for the Godox stuff?
-
Here is the process for taking a 27" iMac from your era apart. If you aren't careful, you could rip the Display Cable out of the Connector on the Motherboard. In which case, you are screwed.
-
It looks good then!! Enjoy your purchase!
-
No, and external HD will not help you in this situation. You need a new INTERNAL Drive. It's that Fusion Drive that's killing you. A SSD Drive will speed things up, but it's just a band-aid. It's also something that you really can't do yourself, because if it's an iMac, you need to take apart the whole damn thing just to get the HD out (you start by removing the screen.) While I understand it's a good way to help things out in the short term, I feel you are going to be right back at square one in a year. Plus, Macs after 2011, the screens are held on by a special glue strip, so you will need an install kit as well as the HD, plus a interface cable that bypasses some sensors on the Apple HD. I think you are just opening up a Can-of-Worms trying to make it something it's not.
-

Hear question concerning megapixels
Brian replied to Michelle Gifford's topic in Photo Gear & Equipment
Yeah, who knows...they might salvage things. Even if it costs say, $600 for the repair, that's a lot less than a few thousand on lenses that won't be in stock anytime soon. If you need that lens to make money and let's face it...you need lots of money, this is a just cost of doing business. Just remember to save the receipt for this years taxes. Hopefully they can fix it and you can put it to good use to get cash. -
Both are fine. Just be sure to get Windows 10 Pro for right now. The reason is, Windows 11 is BUGGY. Personally, I'm waiting until 2025 before I even attempt upgrading to Windows 11. But it sounds like they are selling you a Windows 11 license, with downgrading to the previous version, which is completely fine. When it comes time to upgrade to Windows 11, you will be able to without major issues. How much Video RAM for the Graphics Card? You want at least 8GB in 2021/2022. All I see is this: I'd say you are 99% there. Monitor: For $379, this isn't a bad one: https://www.amazon.com/Dell-Ultra-Thin-FreeSync-DisplayPorts-Certified/dp/B091955LC7/ref=sr_1_12?keywords=dell%2Bultrasharp%2B27%2BIPS%2B2560%2Bx%2B1440&qid=1638934611&sr=8-12&th=1