Brian
-
Posts
4,137 -
Joined
-
Last visited
-
Days Won
55
Everything posted by Brian
-
As long as you include, "Dungeons of Daggorath" you should be good.
-
Oh, there's more than just the calibrator? Yeah...it's best to get light bulbs that are around 6400K-6500K and have your walls painted a neutral color, like gray to help cut down on color casts. Here is the Paint / Color that I used for my area where I edit photos: Sherwin-Williams -- Gray Screen (SW7071) It's my Ryobi Battery Charger for my cordless tools. I also have a few charging units for my fancy flashllights.
-
Just think, how are you going to top this for next year? Bwhahahahaha!!!
-
Oh, your Passport is too full as well. Remember how I said you don't want to go over 75% - 80% full on ANY HD, internal or external? I'd budget for a another HD, maybe something around 8TB - 12TB.
-

Computer requirements - not for photography
Brian replied to Kerry Bebeau's topic in The Windows & PC Hardware Forum
I will warn you, COVID has dramatically affected things computer-wise. Laptops are hard to come by, at least the "Good" ones, and the prices are $500-$1000 more than they were a year ago. So really read the fine-print and specs. Today's $1000 laptops are last year's $400 models. It's honestly the worst time to be in the market for a new computer. Good Luck! -
She better put that thing to use, otherwise I want you to adopt me!!
-
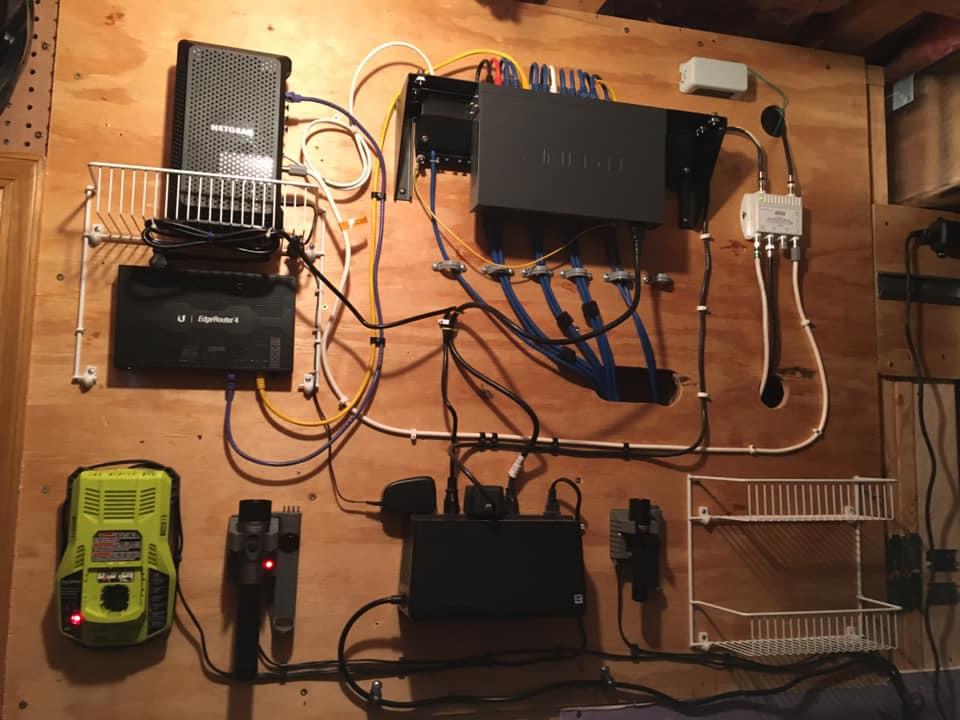
Nope, haven't bought one yet. I've been slacking. Well, I haven't really been shooting or editing photos due to COVID (Not traveling, etc. ) Honestly, I've been more focused on things like upgrading WiFi, running Cat 6a Ethernet in my house, due to my Wife now working from home and she needs speed. From what I can tell, the SpyderPro X works fine with the new iMacs and Catalina. Edit: This is what I've spent my money on doing:

-
You are looking for a Scanner such as this one: Epson Perfection V600 Photo Scanner
-
You have all sorts of problems. Especially this one: You have a Powerful Mac Pro from 2013...but it's completely crippled!! It would have been better AND cheaper to buy a tricked out 27" iMac than to get a Mac Pro with only a 256GB HD with 12GB of RAM. It's like you have a 1200HP Engine, but a Transmission that was meant for a 4 cyl Honda Civic. Your HD is NOT LARGE ENOUGH. That needs to be replaced / upgraded as well. Fortunately, in addition to RAM, OWC makes a HD replacement for your Mac: https://eshop.macsales.com/shop/ssd/owc/mac-pro/2013 I would get at least a 1TB m.2 SSD Drive. It seems they have a kit that allows you to transfer your main HD into the replacement drive. ($340). So larger HD and 64GB of RAM is what I'd recommend for you at the moment. Otherwise, you are looking at a new iMac computer.
-
Computer requirements - not for photography
Brian replied to Kerry Bebeau's topic in The Windows & PC Hardware Forum
It’s really not that different than what I recommend to edit photos on. i7 CPU 16GB RAM At least a 500GB main boot drive, preferably one with a 1TB main drive. In your son’s case, a lightweight model with a comfortable keyboard to type on takes priority. Since it’s not one to edit photos on, the Screen doesn’t need to be IPS based and the video card can be a basic one. What you really need to be on the lookout for is if components like the RAM are soldered you the Motherboard. These models can not be upgraded after the fact. So really pay attention to the tech specs. Sealed units are common these days, the trick is finding out if you need to upgrade something before clicking “Add to Cart.” Otherwise you are stuck with what you purchased. -
I’m VERY GOOD at spending other people’s money. It’s a gift...
-
The alternative is a 27" tricked out iMac. The price will be the same, and she will get more performance for the money, but let's face it...she's 13 and all her friends have Laptops, so there's no winning that battle.
-
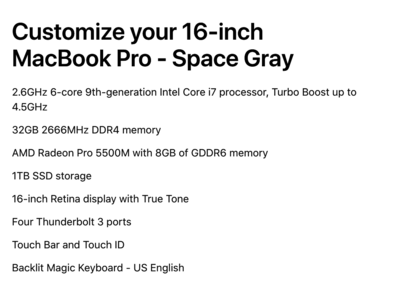
Remember, there is no upgrading after the fact. 32GB of RAM is a must. A 1TB HD is a must. Video, get the 5500M with 8GB. When you get to your price-point, 200 is chump-change. Just make sure you add AppleCare on top of everything. Here is what I configured, it came out to $3199, which is a more realistic price for a "Good" MBP:
-
The other thing that comes to mind, is if you recently upgraded your Camera Body which has a lot more Megapixels than the older one. I found this out the hard way when I bought my D850 with my 2017 fancy iMac. Basically the 100MB Raw files that my D850 generated made my "Superfast 27" iMac - complete with 'Go Faster' Racing Stripes" come to a complete crawl until I upgraded the RAM to 64GB. So if you are shooting with a 45MP - 60MP camera body, on a 2013 computer with only 12GB of RAM, that's why. It's amazing on just how far camera bodies have come, even basic models are 24MP, which requires more RAM to process.
-
You need a lot more RAM. These days I recommend a MINIMUM of 16GB and really want people to have 32GB. You only have 4GB to play with and 8GB is being taken up by the OS and other programs. At this point, I'd max out your computer to 64GB and be done with it. Mac Pros are really funny when it comes to RAM, and it doesn't like you mixing different types of RAM modules. So in reality, it's just easier and better in the long run to replace the existing RAM set and install a fresh matching set. You will remove the 3 currently installed sticks and replace them with these: OWC 64GB DDR3 1866 MHz RDIMM Memory Kit (4 x 16GB, 2013 Mac Pro). The current price is $199, which isn't that bad for 64GB total. That's only $50 a stick. Yes, you can upgrade the RAM yourself, here is a YouTube Video demonstrating the process. Now the other thing that I'm curious about is your hard drive capacity. How much is being taken up on the internal and externals? You do not want to go more than 75% - 80% full on ANY hard drive, Internal or External, when it comes to a Mac. In reality, I like keeping my Macintosh HD as clean as possible, currently I have about 737GB Free on my Macintosh HD. Also, as I just mentioned, a Full External HD will also kill performance because the MacOS really doesn't differentiate between an Internal HD or External one. Finally, your video card is getting a bit long in the tooth. In 2013, it was probably decent, but all of Adobe's current products utilitze the Video RAM and Video CPU for a performance boost. These days I usually recommend a 8GB Video Card, with a beefy Video CPU chip for PS CC 2020.
-
It’s due to our “Throw Away Society.” Why bother making something that will last? How about we make the stock holders happy and make people buy new phones / computers / cars / blenders / washing machines, etc. sooner rather than later? This is why I recommend The more expensive options. Not because I’m a snob, but I hate-hate-hate wasting money on this shit.
-
It's all a crap-shoot. Nothing is standard and it really depends. But with the current models that I've seen, they are all sealed units.
-
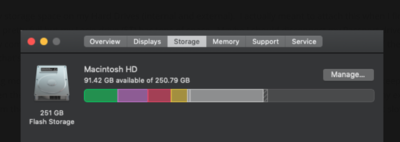
Do not upgrade! Ugh, You have a trifecta going here. 2011 iMac, way too slow by today's standards. If you think it's slow now, just wait...it will come to a crawl. 77.4GB of free space is EXTREMELY DANGEROUS. You are at the level where data corruption is a real possiblity. Start purging, like NOW. You do not need those 75 photos of your lunch from 7 years ago. Be ruthless. You want to shoot to get at least 30% free of your total storage capacity, or higher. On a 1TB HD, we are looking for 300GB - 400GB Free. This is tougher to accomplish on a small HD, like a 500GB or 250GB. As I mentioned in my article, if you upgrade to Catalina, your PS CS6 will cease to work PERMANENTLY! No, there isn't a work-around. No, there won't be any patches from Adobe. It will flat-out stop working FOREVER! If you were to upgrade, you more than likely would have nothing but problems. Combine that with the fact that upgrading to Catalina is a one-way proposition, there's no going back, you would have set yourself up for a lot of aggravation. My advice? Don't upgrade, stay where you are. Start saving for a new iMac, it's time for a new one. Even if it takes you a year or two, you are at the point of replacing your computer. Please read my pinned articles about what to buy when it comes to a Mac. And for all the love that is good-and green, DO NOT PURCHASE A 21.5" IMAC! They are to be avoided like the Plague!! A 27" iMac is in your future, with a price to match. Oh, you will need to budget for a new Calibration Tool as well, such as the SpyderPro X Series. That being said, the Spyder5 Elite does have an upgrade patch to get it to work with Catalina, but the new iMacs have even fancier screens and I'm not sure how accurate your Calibration would be. I think it's OK for now, but if you can't afford a Mac and have to wait a few years, that will probably make a difference and the Spyder5 Elite won't be able to handle say...a 2022 iMac (or whatever.) Make sense? One more thing, if you do get a new iMac, Adobe Photoshop CC 2019 or Adobe Photoshop CC 2020 will be in your future.
-
It really depends on your situation. What OS level are you at? Is it asking you to upgrade to Catalina? What version of PS? Do you own a calibration device? If so, what is the Make/Model. How much free HD space do you have? What type of Mac is it? How old? While you are getting me all of those details, feel free to give this a read:
-
Nope. That is an internal main boot HD. Remember, with today's Macbooks...both the Pros and the regular ones, you can not upgrade after the fact. You are forced to purchase things like extra RAM or bigger HDs and better Graphics Cards at the time of purchase. Everything is practically integrated or soldered to the motherboard. Gone are the days of you replacing your own batteries, adding a Stick of RAM or even having an access panel to replace / upgrade the HD. It's just not Apple that is doing this, but practically all laptop manufacturers, though Apple is the worst offender. Even so, laptops are made so cheaply these days, you really can break something quite easily taking one apart to upgrade something. In reality, if you get 3 years out of a laptop, you are ahead of the curve. They do not "...make them like they used to," now more than ever. It's more profitable to sell you a laptop every 24-36 months; yes, even if you spend $4000 on a fancy MBP, there are no guarantees that it will last longer than 3+ years just because your forked out $4000+ on a laptop. Again, spending that insane amount of money will not guarantee "better quality." Well, at least when it comes to laptops.
-
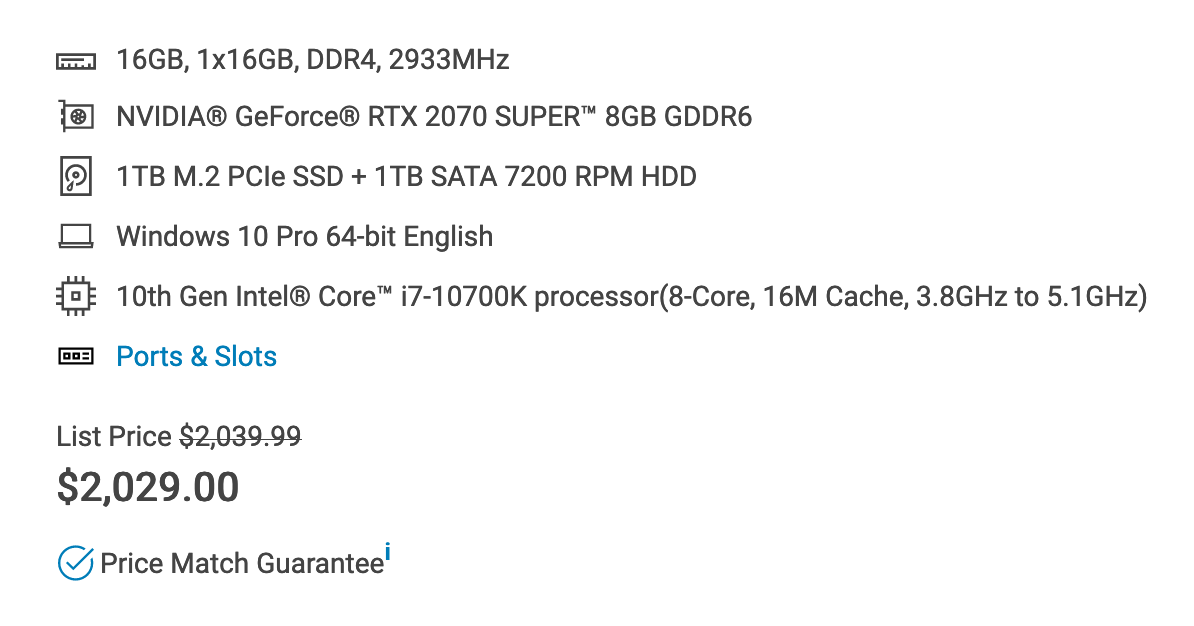
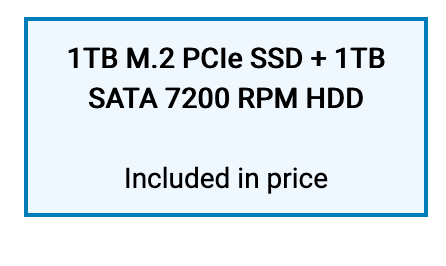
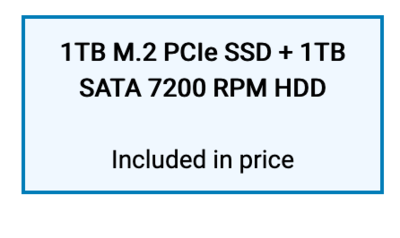
Well, that's good news. Honestly, if you can stretch your budget to around $2000, this is how I would configure the Dell XPS System I linked to: 10th Gen Intel® Core™ i7-10700K processor(8-Core, 16M Cache, 3.8GHz to 5.1GHz) 16GB, 1x16GB, DDR4, 2933MHz Dell Multimedia Keyboard-KB216 White (English) 1TB M.2 PCIe SSD + 1TB SATA 7200 RPM HDD Dell Wireless Card W1810/QCA9377 (1x1 AC,BT 4.1) NVIDIA® GeForce® RTX 2070 SUPER™ 8GB GDDR6 Wired Mouse Sapphire White MS116 I would put extra money towards a better video card and a i7 CPU. You really don't want a i5 these days if you are looking to keep your computer for around 7 years or so. As far as HDMI, honestly, I'd get a computer that has two Display Ports, and then get a DisplayPort to HDMI cable, or even an adapter. DisplayPort is the future and there is all sorts of adapters you can get for it, there is even a DisplayPort to VGA (which I do not recommend getting, just pointing it out.) The GeForce RTX 2020 Super 8GB GDDR6 option has three DisplayPorts on the back, perfect for a multiple monitor setup. Then all you would have to do is upgrade the RAM. Get a 32GB kit (two 16GB sticks) from Crucial.com and increase the RAM from 16GB to 40GB. Of course, if you are looking to save a little cash, get a 16GB kit and increase the RAM to 32GB.

-
Now, the only exception that you or I could make is if she has a friend that has a MacBook that is doing the same thing / using the same software. I'm curious on what the specs are with that Mac Laptop and we can use those specs against current models. That said, you still are paying at least $2600.
-
I agree. I'd start looking there first, before messing with anything on your computer.
-
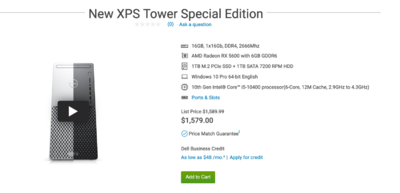
THERE'S YOUR PROBLEM. Well, that and your CPU is very under-powered by today's standards. Yeah, it's time for a new computer. Well, good news and bad news...I was able to configure a system for you. Bad news is, that it's not 100% of what I recommend, but it should get you closer to a "Normal Experience" these days. Keep in mind, speed is relative. Your computer sounds like it's been struggling for awhile, so any improvements in terms of speed will be a bonus, because you don't know any better. It's just too bad that $1500 this year doesn't go as far as it did just 12 months ago, before COVID19. You really need to save up just a bit more and be closer to $2000. But I get it, I realize that this isn't always possible. So without further ado... Dell XPS Special Edition Tower -- $1579 Make sure you upgrade the Main HD to a 1TB m.2 SSD Drive!! A 256GB Main Drive is MICROSCOPIC BY TODAY'S STANDARDS AND SHOULD BE AVOIDED LIKE THE PLAGUE!!! This is really a short-term solution. When I recommend / configure things for the members here, I have a 7-8 year lifespan in mind. Anything less will require replacement sooner rather than later. So that configuration should get you about 3 years at most before it becomes "Too Slow" again.
-
Damien is correct. Don't ever save stuff to your desktop, whether your are Windows-based or a Mac. Stuff gets corrupted easily when they are on the desktop. Especially if something happens to your Windows profile. Usually at this point, I get the response, "Well...I've always saved on my Desktop and nothing bad has ever happened!" Yep. That is usually true. Until it does. It's like saying, "I've always driven 85MPH-90MPH on the Highway and have never gotten pulled over!" Until you do. Now for the Red X Problem. It could be a bunch of things. From your Cloud Storage being full and your computer has lost its connection to those files, to something like your Icon Cache File needs to be reset / purged / deleted. Have you done anything at this point? Run any commands or whatever? Also, how full is your HD? What are the specs of your PC? When is the last time you have run Windows Update? Please fill out this form and post the results here in the thread: Details about your Computer's Health