-
Posts
210,678 -
Joined
-
Last visited
-
Days Won
3,424
Everything posted by Damien Symonds
-

BEC Editing ??
Damien Symonds replied to janedeere's topic in How to achieve a certain look or effect
Still too dark. -

Help with Bridge and PS
Damien Symonds replied to Inês Maia's topic in The Windows & PC Hardware Forum
Stupid Beta is causing so many problems. -

Help with Bridge and PS
Damien Symonds replied to Inês Maia's topic in The Windows & PC Hardware Forum
Lots of people are having this problem. Some people have said they actually needed to reinstall everything. -
I'm pretty sure the instructions are the same.
-

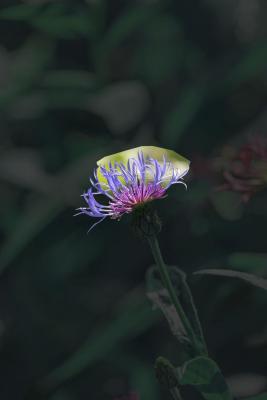
Dark cold green background
Damien Symonds replied to Mariia Morello's topic in How to achieve a certain look or effect
-

Dark cold green background
Damien Symonds replied to Mariia Morello's topic in How to achieve a certain look or effect
A Hue/Saturation layer: +95, 0, -75. But the masking would be insane bordering on impossible I'm afraid. -
It's not better than scanning if you have a good scanner. But since you don't have a good scanner, then yes, photography is better.
-

BEC Editing ??
Damien Symonds replied to janedeere's topic in How to achieve a certain look or effect
Right. Now you should be able to see how your photo (posted earlier in the thread) was too dark. Go ahead and edit it again and post it for me. -
This is a strange comment. Of course you would use your actual camera, not your phone. https://www.damiensymonds.net/2010/10/tips-for-photographing-old-photos-for.html
-

BEC Editing ??
Damien Symonds replied to janedeere's topic in How to achieve a certain look or effect
Please follow the page ALL the way to the end. -
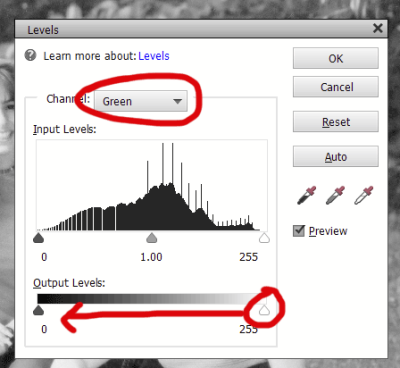
I hope I can explain these steps clearly enough. STEP 1 On the Red layer, press Ctrl L to open the Levels dialog. Because it's the "Red" layer, we're going to leave the red channel untouched, and only adjust the green and blue channels. So go to the green channel first, and drag the white Output slider all the way to the left: Then go to Blue, and also drag that white Output slider all the way to the left. This will result in the whole photo looking red and black. Press OK. Then change that layer's blend mode to "Screen". STEP 2 Now go to the Green layer. Again, press Ctrl L to open the Levels dialog. This time we're leaving the green channel alone. Move the white Output slider all the way to the left on both the red and blue channels. Press OK, then change that layer to "Screen" blend mode as well. STEP 3 Now go to the Blue layer and press Ctrl L. Move the white Output slider on the red and green channels (and leave blue alone). Press OK. For this one, don't change the layer blend mode to Screen, but leave it on Normal. STEP 4 Now you should be able to move the top two layers to create your effect. Let me know how you go.
-

BEC Editing ??
Damien Symonds replied to janedeere's topic in How to achieve a certain look or effect
Can you do this for me? -

BEC Editing ??
Damien Symonds replied to janedeere's topic in How to achieve a certain look or effect
Posting guidelines -

Photoshop
Damien Symonds replied to Falon's topic in Photoshop / Elements / Bridge / ACR questions or problems
Bridge is free for everyone, no matter which package you have. -
It's good. Nobody will give it a second glance.
-
Gee, probably just the Patch Tool?
-

Photoshop
Damien Symonds replied to Falon's topic in Photoshop / Elements / Bridge / ACR questions or problems
No, nothing outstanding that I can see. -
The texture seems stronger on yours than mine, somehow, doesn't it?
-

Photoshop
Damien Symonds replied to Falon's topic in Photoshop / Elements / Bridge / ACR questions or problems
Are you up and running with everything, @Falon? -
I'm fairly new to it myself. I just used the default settings, and swiped aggressively with it.
-
Aim for the best representation of the stripes in the fabric. Too low, not stripy enough. Too high, other texture starts to appear.
-
It's old school FS. People like me were doing FS way before it had a name. Duplicate the Background layer twice. Change both of them to smart objects. Hide the top layer, then apply Gaussian Blur to the bottom layer, to get rid of the texture. Add the blank layer and clone out the letters. (Not shown in the PSD) Group those two layers and add a layer mask to the group, and mask. Return to the top layer and apply the High Pass. Add the blank layer and smooth the texture using the Mixer Brush. Put both those layers into a group, then change the group blend mode to Linear Light, then add the layer mask and mask.
-
Here is mine: https://max.mailbigfile.com/76cd4e1e6c83632dd2b6901a96c01148/listFiles.php


