Damien Symonds
-
Posts
210,834 -
Joined
-
Last visited
-
Days Won
3,434
Everything posted by Damien Symonds
-

White balance or colour casting on dog
Damien Symonds replied to TaniaB's topic in Help with editing
The overall dog will look fabulous once you take the Levels Class, don't worry. I can't give advice about white balance here, sorry. Only in the class. Regarding the cast, I think a Hue/Saturation layer would be great. Choose Yellows, and nudge the Hue slider slightly to the left. -
Well, the dead easiest way would be a Solid Color layer on "Hue" blend mode. Try that, but zoom in and carefully look at the detail, to make sure nothing looks dodgy.
-
White balance or colour casting on dog
Damien Symonds replied to TaniaB's topic in Help with editing
Are you referring to the grass cast on the dog's belly? -
Nothing, honestly. It just means there's a lot of detail in that part of the tonal range. You're not losing anything at all, I promise.
-
Are the highlights to blown to print well?
Damien Symonds replied to AngieMcHenry's topic in Help with editing
You're welcome. Please don't wait too long to join the Skin Class. It will rock your world. -
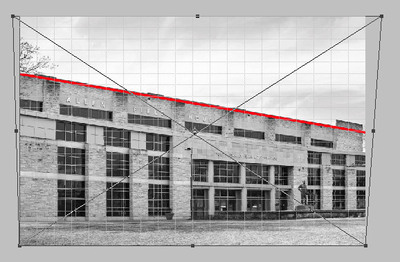
I just tried it, and got no "U" shape. I just used Perspective, then Skew.
-
Hi Kris, may I see a screenshot of what you've tried so far? With the grids turned on and the transform handles active?
-
Are the highlights to blown to print well?
Damien Symonds replied to AngieMcHenry's topic in Help with editing
No, leave the Saturation alone. Just use the Vibrance slider. -
Are the highlights to blown to print well?
Damien Symonds replied to AngieMcHenry's topic in Help with editing
I think it should be ok. But out of interest, did you try Vibrance? It's supposed to protect skintones. -
16-bit vs 8-bit
Damien Symonds replied to Cherry's topic in Photoshop / Elements / Bridge / ACR questions or problems
Yes, unless you know you'll need to do MAJOR editing in Photoshop.- 1 reply
-
- 1
-

-
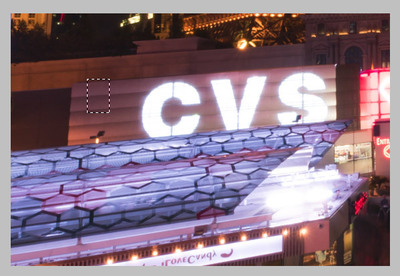
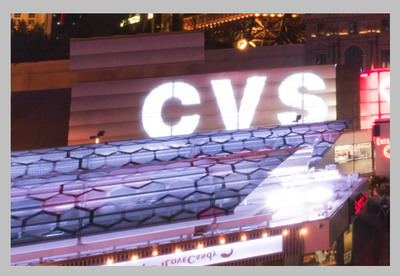
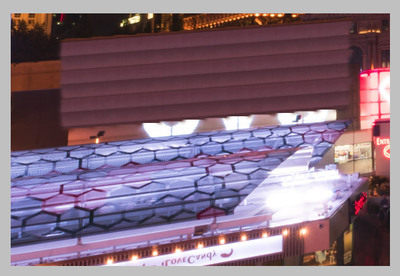
You mustn't try to fix the lines - that's the way to banding and misery. This will have to be a replacement job. https://www.damiensymonds.net/preventing-banding-in-backdrops/
-
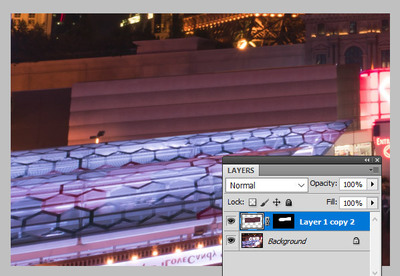
Ok, so I figure it would need to be like this ... 1. Select a small area of evenly-lit wall: 2. Ctrl J to put it on its own layer, then move it to a different part of the image, so it's visible: 3. Ctrl J it again, and move it across and line it up with the other one. Then Ctrl E to merge them together, then use the clone tool to meld the join if necessary. Keep repeating this over and over ... ... and over and over, until you have enough to cover the whole space: 4. Move it into place, and mask it on:

-
Lightroom Fatal SQLite Corruption
Damien Symonds replied to Banksiagirl's topic in Lightroom questions or problems
Google will give you heaps of hits. -
Hi Aubrey, could you give me a closer crop of the area?
-
Lightroom Fatal SQLite Corruption
Damien Symonds replied to Banksiagirl's topic in Lightroom questions or problems
You can do those in Bridge too. Just sayin'. -
Lightroom Fatal SQLite Corruption
Damien Symonds replied to Banksiagirl's topic in Lightroom questions or problems
I have called in the LR cavalry, and hopefully they'll be able to help you with your question. Take a deep breath and remember that your images are safe. They're still on your hard drive. And you can still use Bridge to browse and edit them any time you like. -
Yeah, you have to keep going, so the edges of the shadows are completely soft.
-
I look forward to seeing how you go. Remember that this requires time and patience. Don't rush it. And be prepared to start over occasionally, if you mess up. It's not easy.
-
B/W editing style
Damien Symonds replied to April H.'s topic in How to achieve a certain look or effect
Oh yeah, it looks like utter shit. -
B/W editing style
Damien Symonds replied to April H.'s topic in How to achieve a certain look or effect
Download the PSD I have to go out for a while, I'll check in and see what you think of it later. -
B/W editing style
Damien Symonds replied to April H.'s topic in How to achieve a certain look or effect
Ok, so this?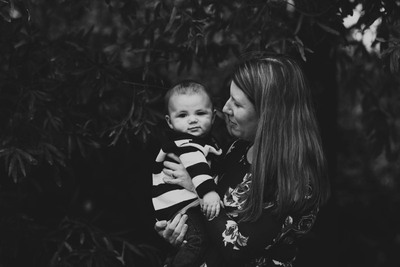
-
B/W editing style
Damien Symonds replied to April H.'s topic in How to achieve a certain look or effect
Yes, it'll work. But gosh, a clean-processed black-and-white please. -
EXIF Data
Damien Symonds replied to NateDanforth's topic in Output - print, websites, Facebook, email, client disk, etc
Oh gee, you're missing out. You always must sharpen for output, whether print or web. -
EXIF Data
Damien Symonds replied to NateDanforth's topic in Output - print, websites, Facebook, email, client disk, etc
In your original description of your workflow, you didn't mention resizing and sharpening. Remember to NEVER let any automatic resizing happening, you must always do it yourself, to the exact pixel dimensions you require for whatever website you're intending, then sharpen accurately after resizing. -
EXIF Data
Damien Symonds replied to NateDanforth's topic in Output - print, websites, Facebook, email, client disk, etc
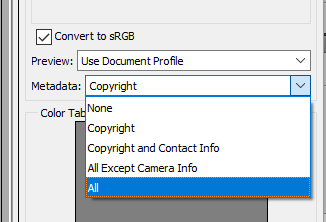
Then yes, use Save for Web. Under "Metadata" choose how much you wish to include.