Damien Symonds
-
Posts
207,083 -
Joined
-
Last visited
-
Days Won
3,255
Everything posted by Damien Symonds
-
Yeah, see the awful banding in your new background?
-
 http://s2.quickmeme.com/img/c5/c5f0d947e06737cf448ab355cd385f063cfd9d2cf4da081b7a5b53bc9fce95fb.jpg
 -
1) Looks great!! 2) Yes, because your adjustment was only minor, the risk of "stumpiness" was low. 3) I wouldn't think so. Have you read this? 4) Ctrl-apostrophe, the same way you turned them on.
-
Can you tell me what quality level you choose when saving jpegs to upload here?
-
No, that layer must not be clipped to the others.
-
That's right.
-
Yep, you're doing great! I'm not sure if I clarified, the Levels layer only needs to be applied immediately around the hair. It doesn't matter anywhere else.
-
I mean a WHOLE screenshot. I need to see all your tools and panels also.
-
May I see a screenshot?
-
No, normal mode. It should be turning the photo black-and-white where you're painting. Is it?
-
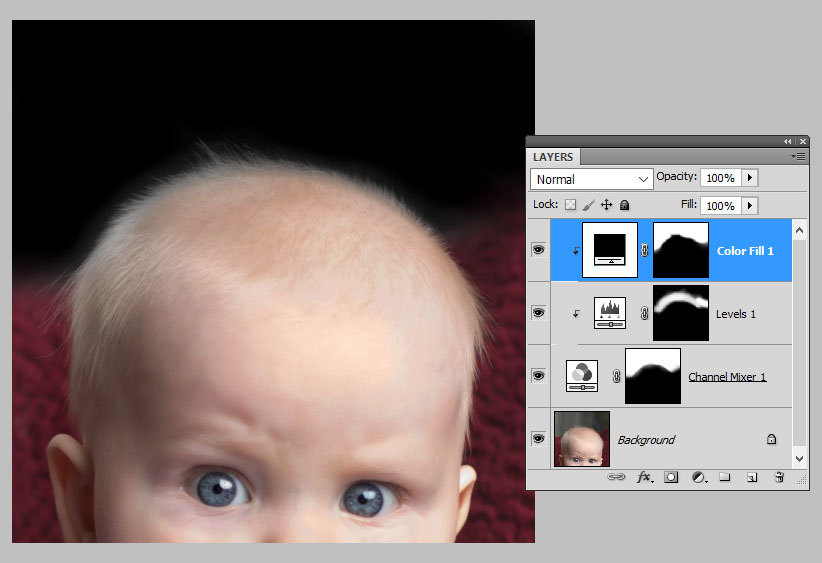
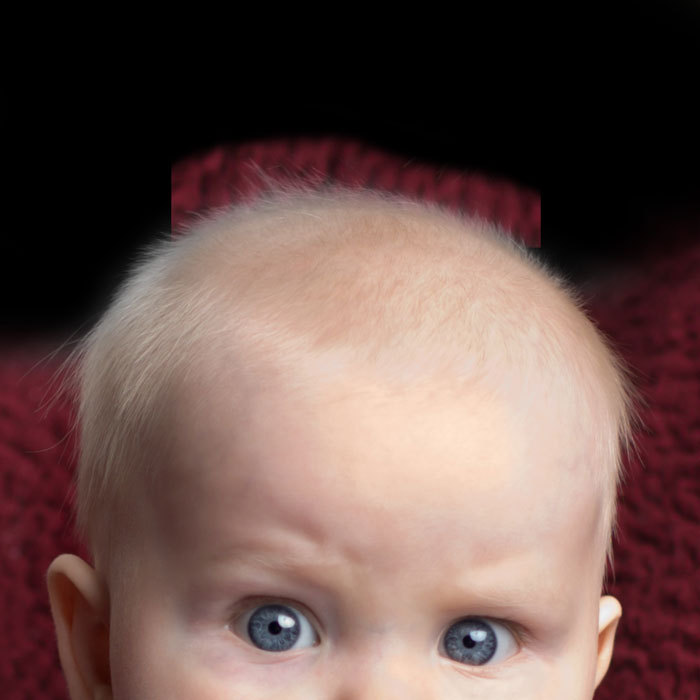
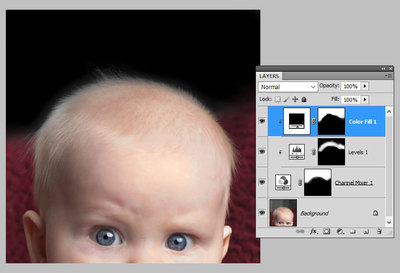
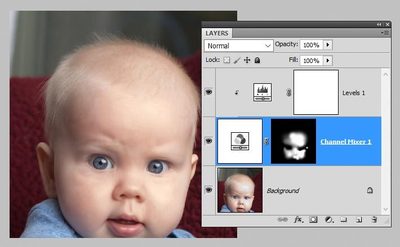
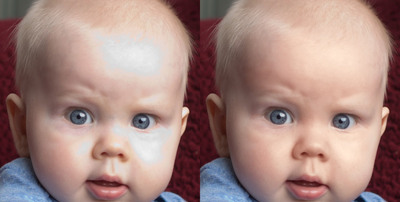
Sorry about the delay. So I think the trick here is to make the background perfectly black first. First, a Channel Mixer layer with "Monochrome" checked, and +50/+50/0 as the three numbers. As before, this will make the whole photo black-and-white. Invert its mask, then paint all over the background and let the painting encroach slightly onto the hair and the blanket. So that the edges of his hair are now black-and-white, if you know what I mean. Then clip a Levels layer to that, and pull the black slider in to 90. This will make the whole area very dark. Invert its mask to black and leave it for now. Then add a black Solid Color layer. Clip it to the other two layers, then invert its mask. Then paint all over the background, and go close to the hair and the blanket, but don't quite touch them. Then return to the mask of the Levels layer. Choose a 10% white brush, maybe about the size of his eye or a bit bigger. Paint gently on the edge of his hair. The goal is to make background amongst the hair just as black as the black background above it. Just as black, but don't overdo it, or the hair itself will start to disappear in some places. That will get you the result I posted above. After that, you can copy and paste whatever chunk of blanket you need, put it above all the other layers, and set it to "Screen" blend mode. With a simple amount of masking, it should blend in ok. Here's a little bit I did: The whole purpose of this method is to keep as many wisps of hair as possible, without any tedious strand-by-strand masking. (By the way, you forgot his ear in your skin fix.)
-
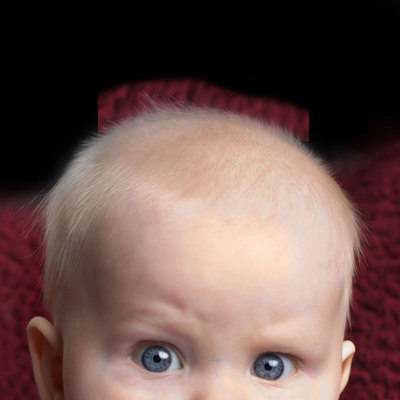
Excellent. Now we can get back to the subject of the blanket. May I have a 100% crop of the top of his head?
-
Just go to each channel in the little drop-down menu (it says "RGB" by default).
-
No, the Raw Class is ... raw. Nothing to do with Photoshop.
-
Error message
Damien Symonds replied to NicolePringle's topic in Photoshop / Elements / Bridge / ACR questions or problems
Yes, they changed the interface recently. Functionally, everything is still the same. I urge you to renew The Raw Class. It's completely updated, and heaps better than ever. -
The pixels are really damaged. Until we fix this problem, any attempt to fix the cast will look really bad.
-
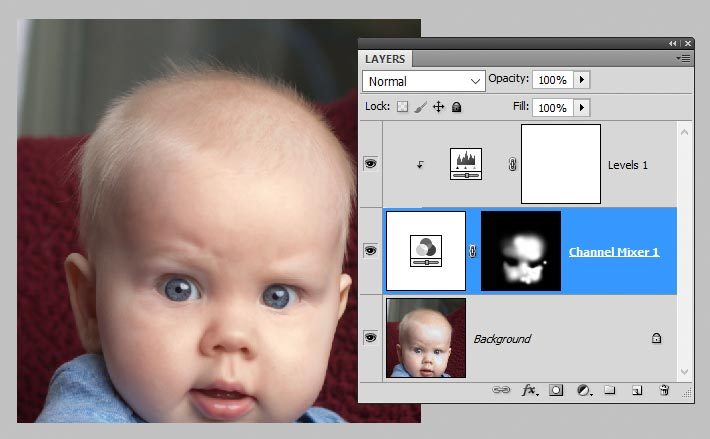
First, a Channel Mixer layer, with the "Monochrome" box checked, with these values: Red 0 Green +50 Blue +50 At this point, the whole image will be black-and-white. Then a Levels layer, clipped to the CM layer, with these values: Red 0/2.20/240 and 0/255 Green 0/1.10/255 and 0/245 Blue 0/1.00/255 and 0/225 At this point, the whole photo will be weirdly reddish. Then click on the mask of the Channel Mixer layer, and invert it to black. Then paint on the problem areas. No.
-
Here's my fix. Give me a moment, and I'll screenshot and explain the steps:
-
Error message
Damien Symonds replied to NicolePringle's topic in Photoshop / Elements / Bridge / ACR questions or problems
Further to Samantha's question ... From Bridge, there are two ways to open Raw files. One is Cmd O (for "open") and the other is Cmd R. Can you try both, and see if one works better than the other? -
No, it still looks pretty awful. Did you actually shoot raw?
-
Gosh, no, something's gone badly wrong here. Do your raw processing properly, then post the closeup again.
-
In case you're not already aware of it, this will help a lot: http://www.damiensymonds.net/2010/10/shift-while-brushing.html
-
Yes, I think I can. It'll be tricky, but I'm moderately confident. Go ahead and do your raw processing first, then post the SOOR for me and we'll discuss the background.
-
Also, may I see the whole SOOR? Also, please don't waste your computer space by being in 16-bit. It's entirely unnecessary.
-
Actions
Damien Symonds replied to Amelissa1's topic in Photoshop / Elements / Bridge / ACR questions or problems
Has this problem always existed, for as long as you've had the action? Or is it something that has started happening more recently? Also, can you do this for us?