Damien Symonds
-
Posts
207,305 -
Joined
-
Last visited
-
Days Won
3,267
Everything posted by Damien Symonds
-
Well, the next time you have a photo, post it here IMMEDIATELY. And I urge you to take a little time to read these.
-
 Fair enough. And just to check, have you read this?
 -
He'd pour a tall drink, and start patiently cloning out the most prominent strand. He'd ignore all the thinner wisps, because he values his sanity.
-
Good on the left, bad on the right.
-
And stop using Photomechanic.
-
Gee, your cloning is pretty obvious in the background
-
Whoa. For future reference: http://www.damiensymonds.net/2010/09/extract-then-copy-vs-copy-then-extract.html For now, I suggest adding a Levels layer above the dad layer, and clipping it thereto (Ctrl Alt G). Then change the Levels layer's blend mode to either Soft Light or Overlay, and see if you like the slight extra punch.
-
I have a suggestion, but I'm not sure how it will work. May I see a screenshot of your layers panel?
-
Oh my goodness, it's wonderful.
-
These are files that you're selling to a client?
-
Oh gee, Stacey, that's a gift, use it. Your Grandad's feet are at a plausible angle that your Dad's are not. I'd try to use GD's feet, and merge the two men mid-leg if at all possible. It wouldn't be easy, but it would DEFINITELY be worth it.
-
Yes, it looks great to me.
-
May we see the original? I agree with Christina, for whatever it's worth. I think his opacity should be lower.
-
If your Grandad was there before, could you have used his feet shadow?
-
No, sorry.
-
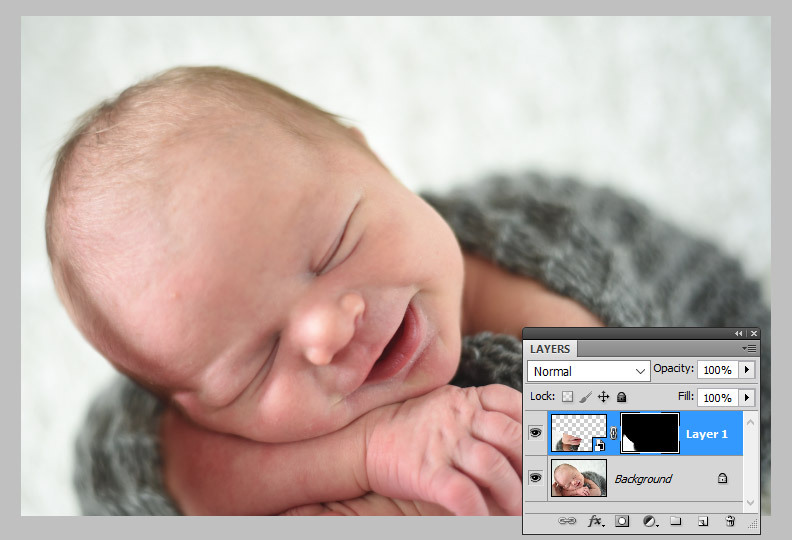
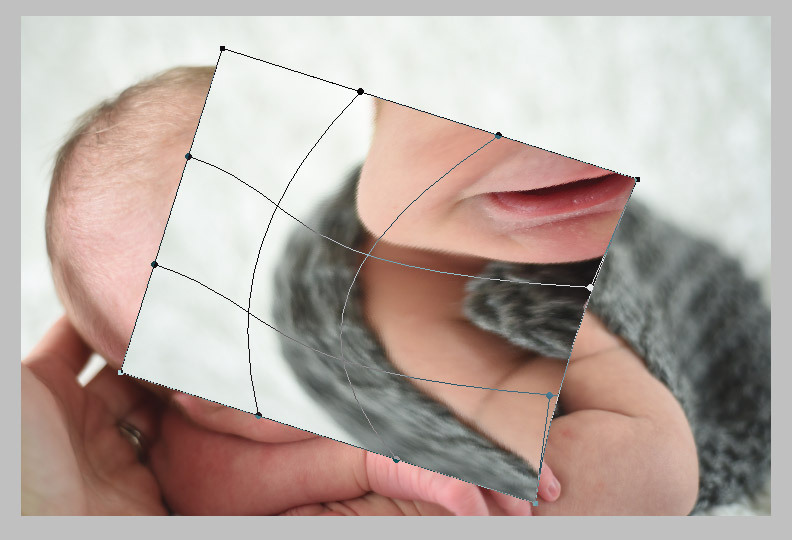
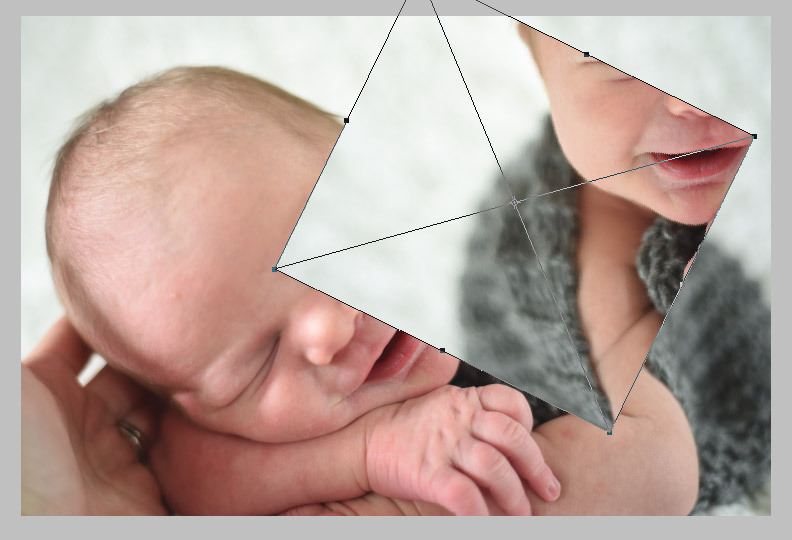
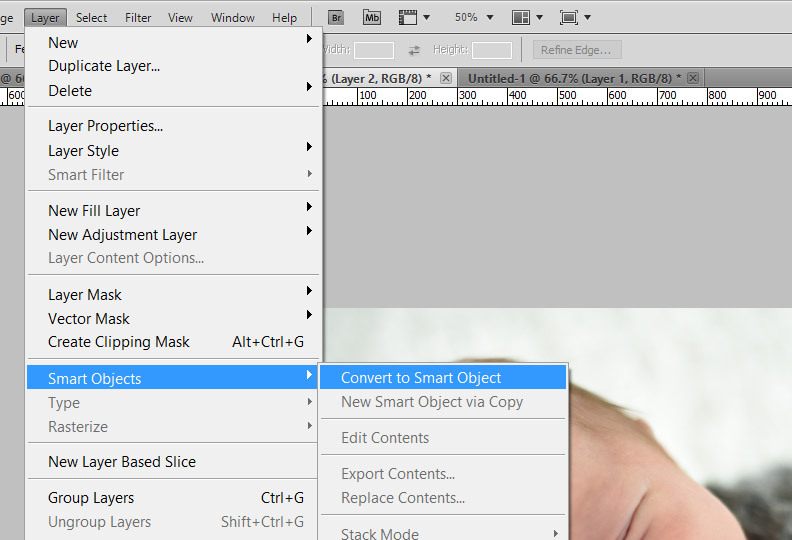
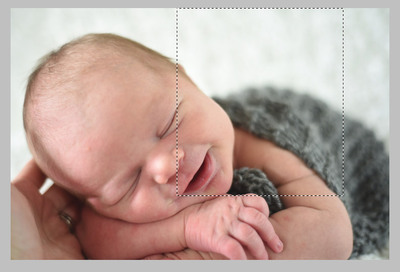
My ugly hand is next to the sweet newborn smile! :(
Damien Symonds replied to ShannonJoy's topic in Help with editing
You're welcome. Can't wait to see your result. -
Forget that nonsense. It's lying to you.
-
Raw files don't have colour space. They get whatever colour space you give them. Which raw program are you processing them in?
-
What file format are they?
-
Tracy, please stop posting new threads with the same question. I need to see the photo you're working on.
-
My ugly hand is next to the sweet newborn smile! :(
Damien Symonds replied to ShannonJoy's topic in Help with editing
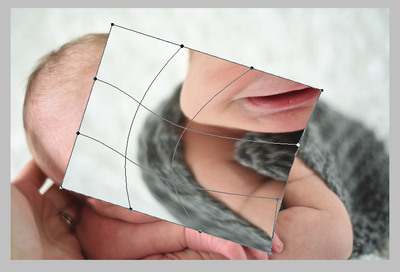
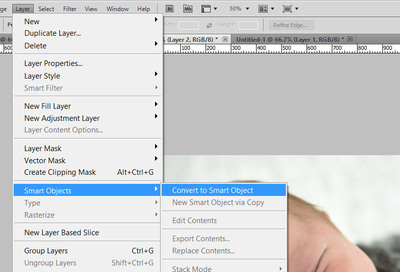
Ok, here goes ... First, I identified the piece of fabric that seemed most likely to work. I made a huge selection around it. It's always important to select more than you need in these cases: I hit Ctrl J (Cmd J for you) to put that section on its own layer. Then I immediately went to the Layer menu to make it a Smart Object: The way the light was falling, I figured I needed it to be the other way around, so I went to Edit>Transform>Flip Horizontal. Then Edit>Free Transform (Cmd T) so I could rotate it, so that the fabric was approximately at the angle I needed: But it wasn't curved enough. So I went to Edit>Transform>Warp. And I warped the hell out of it, so that the fabric curved around the line of the elbow in a plausible manner: Then I lowered the opacity of the layer by half, and moved it into position. (At this stage I might have also used Free Transform to shrink the whole thing a bit, as well. I can't quite remember, sorry.): Then I added a mask and masked it on: You can see from the above image that it was a bit too bright. See the bright patch of skin nearest the elbow? So I added a Hue/Sat layer and lowered the Lightness by roughly half. I clipped this layer to the fabric layer, then inverted its mask to black, and gently painted the darkness on until it matched plausibly: I hope this helps.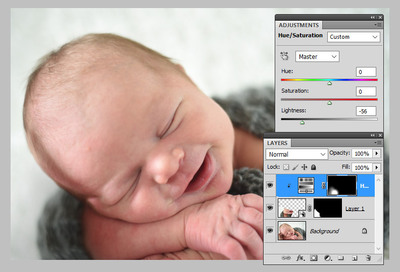


-
My ugly hand is next to the sweet newborn smile! :(
Damien Symonds replied to ShannonJoy's topic in Help with editing
All web files are tiny. It's nothing to do with you or your camera. Give me a few minutes and I'll show you what I did. I'm glad you like it. -
Yes, a little higher with the Luminance slider.
-
Sorry, I thought we'd already covered that. Set your crop tool to the exact dimensions they need, including the 300ppi part, when cropping to shape.
-
Gosh, this is so difficult. I'm struggling. What does the Curves layer do? How many points on the curve?