Brian
-
Posts
4,137 -
Joined
-
Last visited
-
Days Won
55
Everything posted by Brian
-

lacie external hard drive installation
Brian replied to annmarie's topic in The Macintosh User Group
Just think, manufactures have been known to charge $30-$50 extra to do what you just did! -
Yes. This is normal. Especially if you have a new iMac with a 5K Retina Screen. You will notice more flaws in your photos, and start to see more of the quirks and shortcomings with your lenses. Isn't technology fun?
-
lacie external hard drive installation
Brian replied to annmarie's topic in The Macintosh User Group
Told you it was easy. -
Hmm...something could have updated without you knowing. Microsoft is forcing auto-updates now more than ever. Laptops are also a pain in the arse when it comes to monitor profiles. Even though the Spyder is working, it is quite possible that the software has a glitch. It could also be the NVIDIA drivers. What I would do is un-install the Spyder4 Elite Software. Reboot. Then download the new Sypder4 Elite Version 4.5.8 software. It seems they came out with an update and your version is outdated.
-
lacie external hard drive installation
Brian replied to annmarie's topic in The Macintosh User Group
You are done!! -
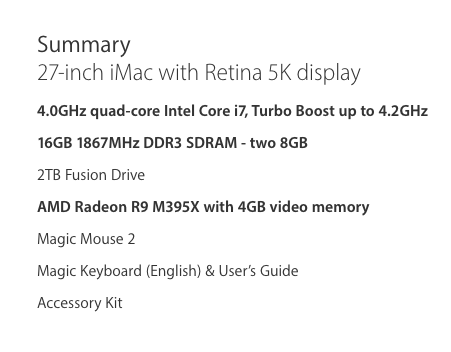
Stock $1799 iMac, which should be perfectly acceptable for the majority, unless you have a Nikon D800/800E, Nikon D810 or one of those Canon 50MP cameras. Then you really need the "SuperFast Edition" that I posted above.
-
If I had money to blow and wanted a "SuperFast Edition" iMac, I'd customize the $2299 model with the following upgrades: Cost: $2999 - Not including AppleCare & Shipping/Tax Then I would purchase the 16GB RAM kit from Crucial to max out the RAM to 32GB.

-
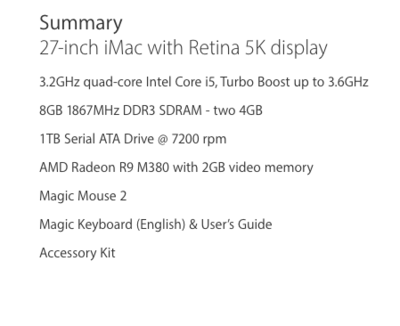
Whatever you do, SKIP THE 21.5" iMac line. They are a waste of money and can't be upgraded easily after the fact. By the time you purchase a $1499 21.5" iMac and upgrade it to 16GB, you are $100 less than a stock $1799 iMac. As far as the 27" iMac, believe it or not, the stock $1799 version should meet most people's needs. If you want something better, you should look at the $2299 model. Like I said, "Go Big or Go Home." After purchasing the iMac, I'd head to Crucial.com, run their scanning tool and upgrade the RAM to 24GB (Purchase a 16GB kit.) Whatever you do, try not to purchase Apple's RAM. It is extremely over-priced for what it is.
-
Have you upgraded to Windows 10 lately? Has anything changed on the laptop? Driver updates that you are aware of?
-
Apple really wants you to "Go Big or Go Home." What is your budget and what are you planning on doing with the Mac? Editing Photos? Video?
-
lacie external hard drive installation
Brian replied to annmarie's topic in The Macintosh User Group
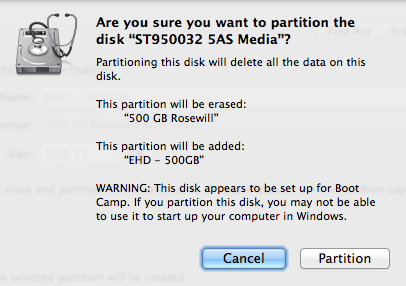
There seems to be an existing LaCie setup partition that's getting in the way. I'd click Erase at the top and see if you can delete it. -
lacie external hard drive installation
Brian replied to annmarie's topic in The Macintosh User Group
Now the new LaCie 3TB should appear on your desktop. Try moving or copying a file to it. If it works, you are golden. For those wondering about why I use Mac OS Extended (Journaled), here is the link: -
Transferring images from Card reader or tethered device
Brian replied to Taniaharrisxx's topic in The Macintosh User Group
Christina is correct. You basically have to rename Photos program itself to disable it. This is done from the Command Line and there really isn't a easy way to get rid of it. Also, each time you update El Capitan, it will more than likely re-appear, since Photos is part of the default Mac OS programs. Here are the instructions that I wrote in another thread: ---------------- Ah, Photos. The Demon Spawn of Apple's Aperture and iPhoto. It is such a nuisance that really gets in the way, MUCH MORE than iPhoto ever did. Now I've heard the "Default / Easy Way" to disable Photos doesn't always stick, and you have to do this each and every time you hook up your camera. Even if you have used the same cards. Once you format them, Photos treats them as brand new devices. Oh, speaking of which, please...I beg you, use a card reader when importing with a Mac!!! Life is so much easier when you use a card reader. I know it's tempting and "I've always used my camera, blah-blah-blah..." USE A CARD READER WITH A MAC. PERIOD. First things first... What you should also do, turn on the various devices to appear on the desktop when inserted / mounted. This makes importing images a breeze, since your CF / SD cards will appear like EHDs on the desktop. Open the Finder Program Next to the Apple Menu at the top should be the Finder Menu. Click the Finder Menu and look for Preferences. Look for "Show these items on the desktop" and make sure that Hard Disks, External Disks, CDs, DVDs and iPods are ALL CHECKED. Click the red circle to close out the window. Now things like Memory Cards, External Hard Drives and the like will appear on your desktop. Then all you have to do is double click on the icon, find your photos and COPY them to their ultimate location. Then use Bridge and go find the files that you just imported. NOW LET'S BEGIN!! Disable Photos - Method #1: Insert the card into the reader or hook up your camera to the computer. Open the Photos App and click the Import Tab. You should see the device name, if you don't see your Canon 7D listed, again...use a card reader. Uncheck the box next to where it says "Open Photos for this device..." Click the red circle and that should save your changes. Now, I've heard through the Grapevine that you must do this procedure each and every that you insert a new / formatted card or hook up your camera. Turning Photos off this way doesn't stick. You need to do it all the time. *Sigh* Apple REALLY wants you to use their software, they are convinced that it's the BEST-EST!! It doesn't surprise me one bit that Apple Tech Support won't be of much help. They are instructed to make sure that Photos is left installed and running. WARNING!! - WARNING!! - WARNING!! THE FOLLOWING ARE ADVANCED TECHNICAL INSTRUCTIONS!!! PROCEED AT YOUR OWN RISK!!! FOLLOW THEM TO THE LETTER!!! Disable Photos - Method #2: THESE SET OF INSTRUCTIONS ONLY WORK FOR YOSEMITE!! (Mac OSX 10.10.xx) Head to your Applications folder. Look in your Utilities Folder then look for a program called Terminal. It should be a square looking black icon. Click on it. Now a command box will appear. Some people might argue that this step isn't necessary, but I'm a tech and like doing things at a "root" or "#" (Pound Prompt, not hashtag in this case.) Type the following command: SUDO SU It will prompt you for the password for the profile that you are logged in as. For most people, type in your Mac's normal password. Press Enter. If everything works out, you should see something like sh-3.2#: The numbers and letters don't matter, what does is you are at a POUND (hashtag) PROMPT. Type the following at the command prompt, or better yet...copy and paste this command: defaults -currentHost write com.apple.ImageCapture disableHotPlug -bool NO Press Enter. Type exit (lower case) & press enter. Type exit again (lower case) & press enter. Close the Terminal Box. Reboot. Disable Photos - Method #3: THESE SET OF INSTRUCTIONS ONLY WORK FOR EL CAPITAN!! (Mac OSX 10.11.xx) Head to the Apple Menu and select Restart Wait a few seconds and the screen should go completely Black Before the G Major Chord Chimes, press and hold the Command + R Keys and hold them until the Apple Logo Appears. Release the Command + R Keys when you see the status bar appear below the Apple Logo. I'd wait about 5-10 seconds. The Utilities Menu should appear. Select the Applications Menu from the top and head to Utilities. The choose Terminal. You should be at a Pound Prompt, "#" with some letters and numbers near it. For example, -bash- 3.2#: (or something similar.) Again, the numbers and letters do not matter, what does is you are at the Pound (hashtag) Prompt. Hit enter a few times. It should add a few lines which makes things easier to see. Type: CSRUTIL disable and press Enter. (Yes, this is Case-Sensitive. Big CSRUTIL and small disable.) Type exit, (lower case,) press enter, and close the Terminal Window. Head over to the OSX Utilities Menu, which is next to the Apple Menu in the upper left corner. Select Quit OSX Utilities. A pop-up box will appear. Click on Restart. Let your Mac boot as normal and Login with your main profile. Head to your Applications Folder, then select Utilities and then choose Terminal. Type the following command: SUDO SU You should be prompted for your profile's password type it in and press enter. If everything works, you should be at a Pound Prompt. "#" Copy and paste this command into the terminal window: mv /System/Library/Image\ Capture/Devices/MassStorageCamera.app /System/Library/Image\ Capture/Devices/MassStorageCameraOff.app Press Enter. What this command is doing is renaming the MassStorageCamera.app to MassStorageCameraOff.app. This way the Mac OS doesn't know where the App is. If you need to restore it, we can just copy it back to its original name. Now we are almost done! Type exit and press enter... do this twice. You should see [Process Completed] appear. Close the Terminal Window. Restart your Mac. When the screen finally goes black and before the G Major Chord Chimes, press and hold the Command + R Keys. Yes, we have to go back into the Apple System Utilities Menu to turn the csrutil back on. It's important to do this. Keep holding them until the Apple Logo Appears. You should see the status bar below the logo. Release the keys after 5-10 seconds. The Utilities Screen should Appear. Look for the Applications Menu at the top, then click Utilities and select Terminal. You should be at a Pound Prompt. "#" Type CSRUTIL enable and press enter. (Yes, this is Case-Sensitive. Big CSRUTIL and small disable.) Type exit and close the Terminal Window. Head to the OSX Utilities Menu and select Quit OSX Utilities. When prompted, click Restart. That's it! You are done!! Let your Mac reboot as normal and Photos should be completely disabled from auto-loading. -
lacie external hard drive installation
Brian replied to annmarie's topic in The Macintosh User Group
We are almost done. Two more steps. First, click Apply at the bottom. A Warning Box will appear asking if you really-really want to do this, click Partition. Wait a few minutes while the HD Partition and formats / mounts. When it completes, you should see it appear in the Finder like the internal HD or on the desktop if you have that feature turned on. A message may appear asking if you want to use the HD for Time Machine. Since this will more than likely be a "Data Drive," say "NO" for the answer to use this drive for Time Machine.

-
lacie external hard drive installation
Brian replied to annmarie's topic in The Macintosh User Group
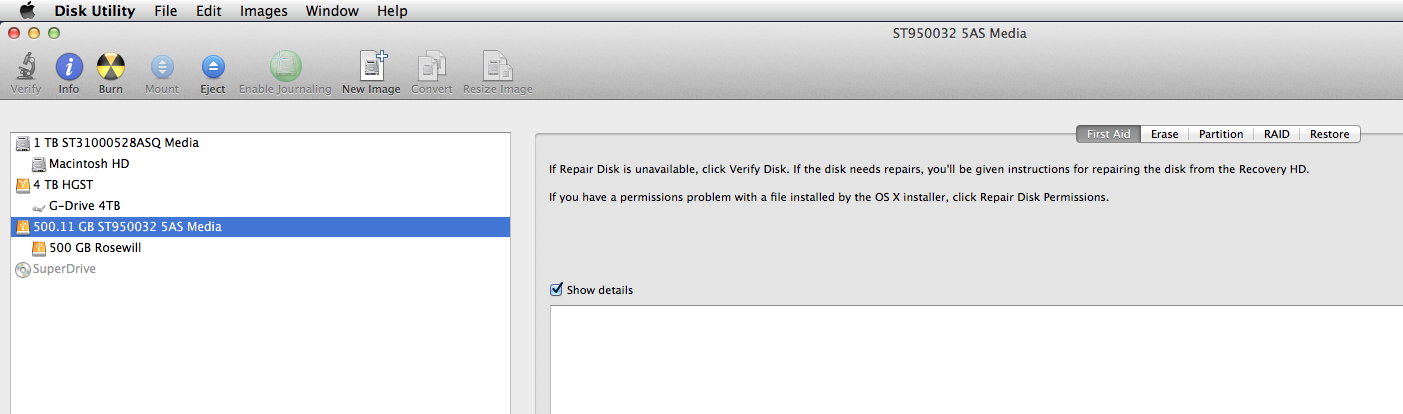
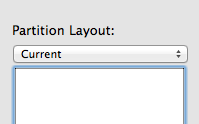
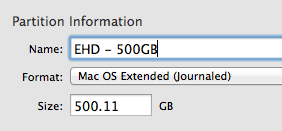
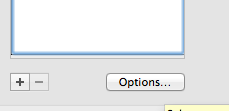
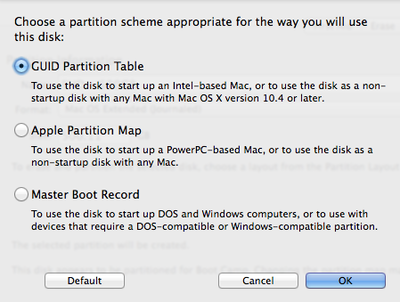
From there, select the Partition Tab on the Right From there click the right down arrow next to "Current Layout" Select 1 Partition From there, we want to head towards the right column and give the HD a Name. Call it "LaCie 3TB" or whatever. It is Extremely Important to select Mac OS Extended (Journaled) for the format. You do not want Case Sensitive or any other formats. (More on this later.) As for the size, just leave it at the default. Now this is a another important step. Before you click Apply at the bottom, head to the lower portion of the partition column and select the OPTIONS button. Select GUID Partition Table. It should be the 1st one in the list and then click OK at the bottom.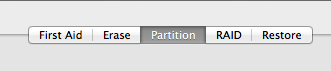

-
lacie external hard drive installation
Brian replied to annmarie's topic in The Macintosh User Group
Plug in your new EHD. Here are the steps, your screens might look slightly different, but you should be able to figure it out. Head to your Applications folder then look for the Utilities Folder. In the Utilities Folder, you should see Disk Utility. Click on it. Now, your screen might look a little different since I'm on Mavericks, but you should be able to figure this out. What you want to do is select the FIRST LINE for the HD listing. (In the example above, substitute your new LaCie EHD.)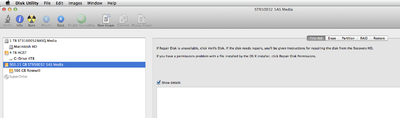
-
lacie external hard drive installation
Brian replied to annmarie's topic in The Macintosh User Group
Yeah, it wants you to use the stupid LaCie Software. Hang on... -
lacie external hard drive installation
Brian replied to annmarie's topic in The Macintosh User Group
4. Since you are on El Capitan, your windows might look different than mine, since I'm still on Mavericks. Once in the Preferences Section of the Finder Menu, look for a section with these choices: You want Hard disks, External disks and CDs, DVDs and iPods all checked. This way they will appear on your desktop. Make those selections and click the Red Circle to close the window and apply the changes. 5. Plug in your new LaCie EHD. Does it appear on the desktop? Can you open it and drag a simple file to it? I want to make sure it can be written to. (Take a screen shot or create a simple text file. Nothing fancy, we just need to drag this file to the new LaCie EHD.) If all goes well, you should be set. If you can not write to the drive, we will need to format it. (Which is easy to do.) 6. If we need to format the drive, DO NOT use any stupid software from the manufacturer. One: We don't need it. Two: Manufacturer's Software usually does something stupid or installs itself somewhere and the drive doesn't get formatted correctly.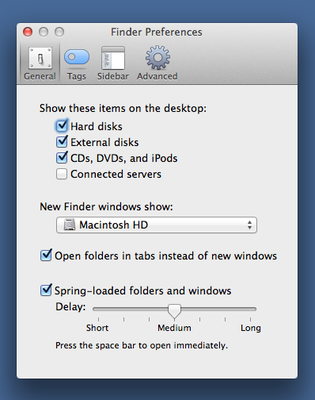
-
lacie external hard drive installation
Brian replied to annmarie's topic in The Macintosh User Group
Before we get into the whole reformatting thing, could you do this first? Open the Finder Program Look towards the top left corner of the screen. Click the Finder Menu, which should be just to the right of the Apple Menu. Select Preferences.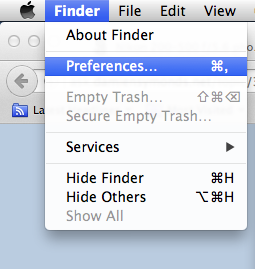
-
lacie external hard drive installation
Brian replied to annmarie's topic in The Macintosh User Group
LaCie HDs are usually Mac Formatted, unless is specifically states that it's "Windows Formatted" on the box. What version of Mac OS are you running? -
I'd get this monitor to go with it. It's A$529: http://accessories.ap.dell.com/sna/productdetail.aspx?c=au&l=en&s=dhs&cs=audhs1&sku=391-BBUT
-
The A$1599 is a good buy: http://www.dell.com/au/p/xps-8900-desktop/pd
-
Always format in-camera. It sets up the file system / directory structure on the card. Glad to help.
-
The Lexar reader is fine. As far as corruption, believe it or not, it's mostly caused by deleting photos in camera. *GASP* Also bent pins in the reader / camera can cause all sorts of issues I never put much thought into this but it makes sense. Please, give this article a read to see what I'm talking about: http://www.dslrbodies.com/newsviews/the-data-recovery-interview.html It's a bit long, but there are some good take-always. As for me, I've never had a Sandisk Card go bad since I switched to digital from film back in 2007. Like I said, perception is reality. In all fairness, if you are the type of shooter that takes lots of photos on the same card over and over, CF / SD media does wear out. So you might have just gotten bit. Or it could have been the card I personally cycle / retire my cards every 18 months or so. I write the month and year on the card to keep them straight. Now, after 18 months, they don't necessarily get thrown away, just demoted to secondary usage. New cards are primary.
-
Lexar is also a decent brand, but I personally prefer Sandisk. A few friends of mine have had a few bad Lexar cards lately, so I'm pretty conservative in recommending them. That said, perception is reality. Oh, a USB 3.0 Card Reader will read older cards just fine.