Brian
-
Posts
4,112 -
Joined
-
Last visited
-
Days Won
52
Everything posted by Brian
-
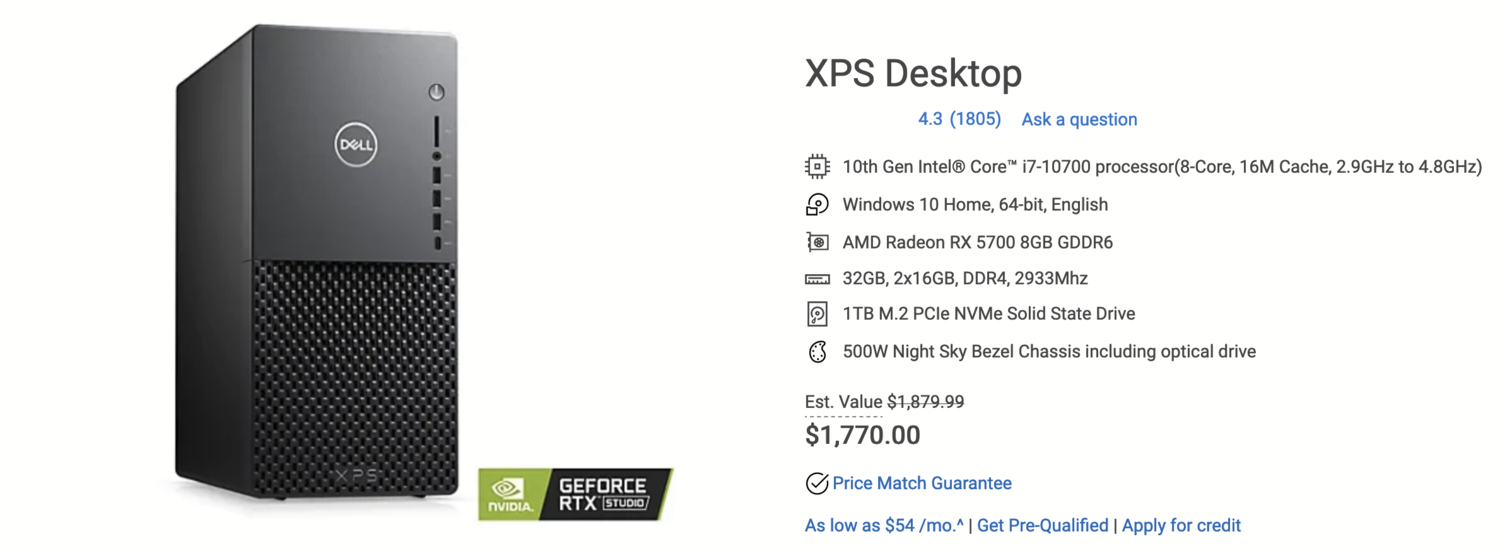
I was able to configure a "Cheaper" option, here is the configuration: Here is the Link to the XPS 8940 that I configured above. CPU: 10th Gen Intel® Core™ i7-10700 processor(8-Core, 16M Cache, 2.9GHz to 4.8GHz) Video: AMD Radeon RX 5700 8GB GDDR6 Blu-Ray Drive: Tray-load Blu-Ray Drive (Reads and Writes to BD/DVD/CD) (This is required for some reason.) Power Supply / Chassis: 500W Night Sky Bezel Chassis including optical drive (500W P/S is required by the beefier Video Card.) RAM: 32GB, 2x16GB, DDR4, 2933Mhz (Since we are spending this much money, might as well spend another $150 and be done with it.) Hard Drive: 1TB M.2 PCIe NVMe Solid State Drive (This by far is the biggest "Gotcha" with computers today. Spend the $$ and get a 1TB Main Drive.) Wireless: Dell Wireless Card W1810/QCA9377 (1x1 AC,BT 4.1) (Honestly, nothing beats a hardwired Ethernet Connection, but here is a basic Wi-Fi option.) Warranty: 1 Year Hardware Service with Onsite/In-Home Service After Remote Diagnosis (Seems to be Hardware Only. If you want more phone support, you'll spend an extra $90 at the very least.) Everything else is at the default configuration. I hate McAffee and Norton Antivirus. Those two are worthless pieces of crap these days and it would be the 1st thing I would remove. There is a software package that will remove all of the bits and pieces of McAfee AntiVirus, and I would highly recommend it. It's called the McAfee Removal Tool. Then I would purchase Webroot. Get the $59.99 Option. Yes, the more expensive plan is $51.99 right now and there are minor differences, which you probably won't take advantage of. The big one being come next year, when you have to renew (Antivirus Software is subscription-based now) it will be $79.99 instead of $59.99.
-
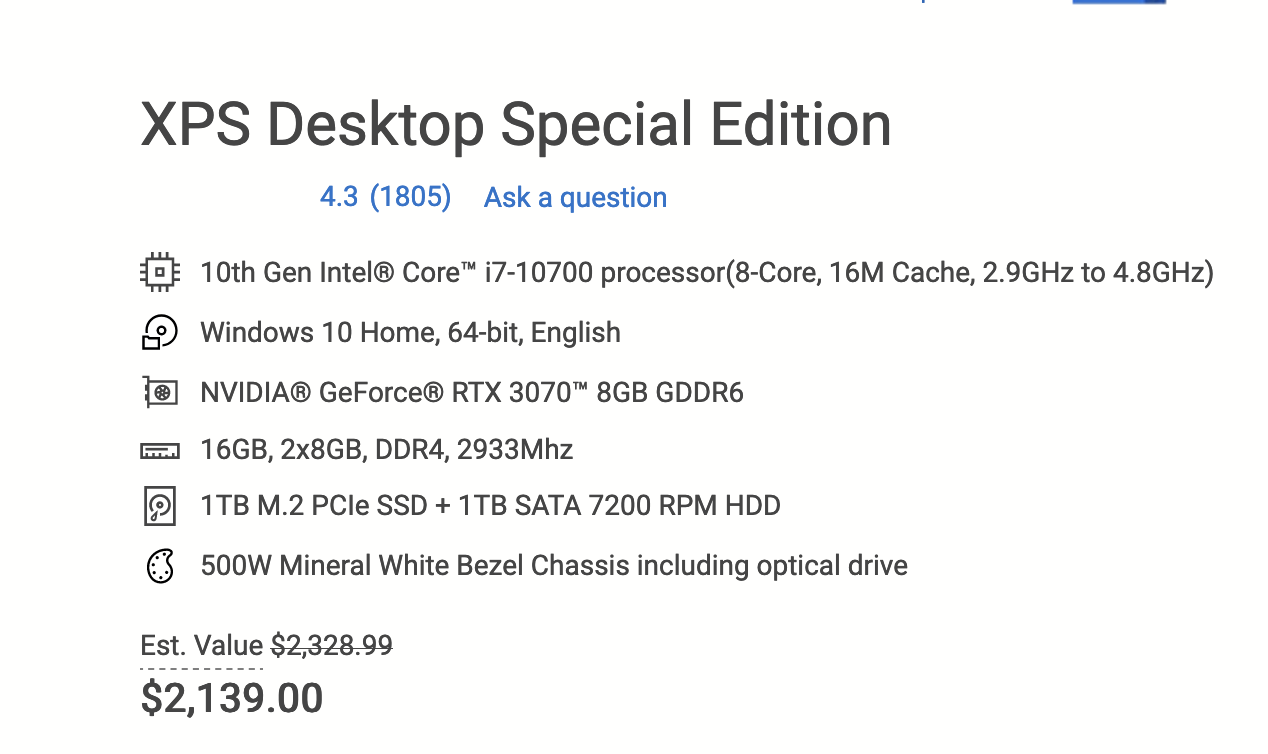
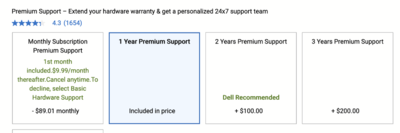
Which one were you looking at? The link only takes me to the main page, not the specifics of the configuration. Honestly, prices are insanely high right now and you are looking to spend around $2000+ for a "Computer for Editing Photos." Here is what I came up with: You really need to click customize and make sure you choose everything. For example, unless you pay an extra $90, you will be automatically signed up for a MONTHLY CHARGE OF $9.99 FOR "WARRANTY" AND "PHONE TECH SUPPORT." Here is what I'm talking about: Now if you don't want to pay extra, you will need to select "Basic Support" which seems to be just Hardware and not any phone support. This is unacceptable. I'm really re-thinking my recommendation for the Dell XPS line.


-

Weird shadow circle line thing on all of my photos
Brian replied to EDi's topic in Photo Gear & Equipment
Yep. Something is on your sensor. If you don't own one of these yet, please purchase one: From B&H: Giottos Rocket Blower - Large From Amazon: Giottos Rocket Blower - Large What you will do is use a fully charged battery and look for a setting in your camera such as, "Mirror Lockup for Cleaning." Select that and press the shutter button. It should flip up the mirror mechanism and then you will take the tip of the Rocket Blower and point it towards the sensor. MAKE SURE THE TIP DOESN'T BUMP INTO THE SENSOR and give it 5 or so blasts of air from the blower. It also helps that you hold the camera face down, so whatever dust or hair falls to the floor and away from the camera sensor. -
I'm moving this thread to the Windows Forum... Stay Tuned.
-
Ugh. You aren't going to like my answer. Oh, you have a Fusion Drive. That's part of the problem. Honestly, I think you will more than likely have to "Nuke" the HD (Format and Reinstall) and put on MacOS Catalina. Chances are, the Genius Bar is going to have to do it since Catalina is not longer available, at least online. Alternatively, you can call Apple and see if they can get you a download link so you can create a Bootable Thumbdrive. Upgrading to Big Sur is mostly a one-way proposition. There is no going back at this point, other than formatting and reinstalling everything. The only other way, is if you had a Time Machine Backup that was un-touched by Big Sur. Then it's plausible to boot in Diagnostic Mode, Format your Main HD, and then re-install from the Catalina Time Machine Backup. Those are your choices. I wish I had better info for you. Either way, I'd schedule an appointment with the Genius Bar if you can. The AppleStores are kinda weird now with COVID-19, so make sure you schedule an appointment.
-
Dell UltraSharp vs non-UltraSharp
Brian replied to Elliot's topic in The Windows & PC Hardware Forum
Just make sure you have the latest version of calibration software and a set of test prints. You might get lucky and it will calibrate just fine. -
Are Gaming Laptops reasonable for photo editing?
Brian replied to Gretchen's topic in The Windows & PC Hardware Forum
So you still haven’t bought the “Stick Drive” yet and just the one that looks like a regular HD? Here is what I would do: If you are able, definitely upgrade your laptop’s RAM to 32GB! Replace the existing main drive with the Samsung 870 drive. You want a large main drive. Clone the existing main HD to the new Stick Drive. If you already purchased the SSD Drive, keep it and have your guy install it while it’s open. It will only take him 5 minutes or so to set it up. Seriously, it’s not a huge deal for him when it’s already opened up. Even though you will probably be spending around $500 for the whole thing, it’s a lot cheaper than forking out $1400 for a new one and then you have to install everything, which is a time suck. -
Are Gaming Laptops reasonable for photo editing?
Brian replied to Gretchen's topic in The Windows & PC Hardware Forum
Well, that would give you a larger Data Drive, and that would be “better” than you using an External HD to work off of, but ultimately you really need a larger Main HD. Remember how I said cloning your main HD would be a PITA? That’s why your computer guy took the easy way out. Hell, I could help you install that HD and partition/format it for free. Stick Drive, he is probably referring to one of these: https://www.amazon.com/Samsung-970-EVO-Plus-MZ-V7S1T0B/dp/B07MFZY2F2/ref=mp_s_a_1_3?dchild=1&keywords=pcie+ssd&qid=1608696032&sr=8-3 So the question is, does he offer cloning / duplicating services? He should. Yes, you could go with a 2nd HD, but you aren’t solving your problem: having to deal with a small main drive!! Adding a 2nd HD is the easy way out. Should take less than 30 min to do, but I understand quoting an hour. in my humble opinion, I’d do both. Replace the “Stick Drive” and clone it and add a second SSD drive. In case he tells you he can’t do it, some of the better cloning software packages will allow you to create an “Image File,” which is kinda like a really big zip file, but it’s different; it’s made up of a sector-by-sector copy of the source drive. You then use this software to copy the contents over to the new drive, have it adjust the partition sizes (to use the full capacity of the drive,) and it’s like it never happened. Except you have a larger main drive to work with. All your stuff, Photoshop, Actions, email, etc. it’s all in the same place. If you do just get the 2nd HD, let me know and we can tweak things to make it “better,” but they are more work-arounds than anything. -
I bought these for my wife last year for Christmas: https://www.bestbuy.com/site/bose-companion-2-series-iii-multimedia-speaker-system-2-piece-black/8864513.p?skuId=8864513 Of course, if they are too expensive, any computer speaker should be fine.
-
Dell UltraSharp vs non-UltraSharp
Brian replied to Elliot's topic in The Windows & PC Hardware Forum
Oh, one other thing I'd like to add... Take those reviews with a "Grain of Salt." You are editing photos and chances are, your screen will be kept on the dim side in order to match your prints. So you won't have to deal with the "Blooming" and that sort of thing, because you won't be pushing your monitor to be so bright like in those photos. -
Dell UltraSharp vs non-UltraSharp
Brian replied to Elliot's topic in The Windows & PC Hardware Forum
Thanks for the head's up. If it has both ports, just get the -D version. You already have a HDMI cable laying around, so save yourself the $40 or whatever it is. -
Dell UltraSharp vs non-UltraSharp
Brian replied to Elliot's topic in The Windows & PC Hardware Forum
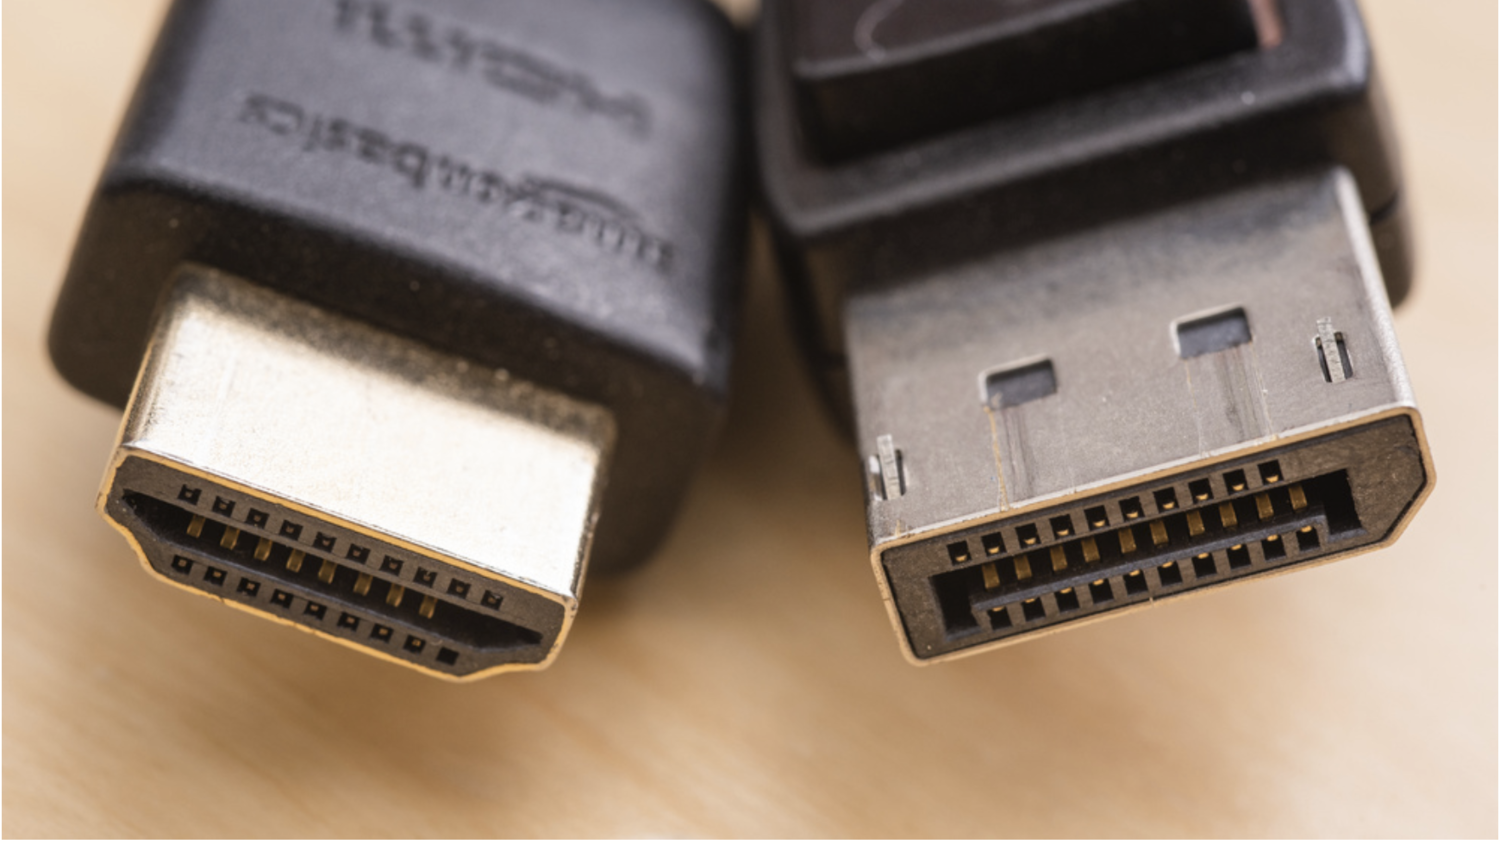
OK. Yes...the main difference between the -D and -DX is the -D is the DisplayPort version and the -DX is the HDMI version. There is a 3rd option, the -DC, is meant for computers/laptops with a USB-C / Thunderbolt port. Most Windows users probably won't fall into the third category. As for which one to get? It really depends on what type of ports your computer has. Going forward, DisplayPort will be the standard. You can convert a DisplayPort that's on your computer to HDMI, but not the other way around. Make sense? So if your computer has a HDMI port and you buy the DisplayPort version, you can't go from HDMI to DP. BUT you can go from DP to HDMI. or DP to VGA or DP to DVI-D. There are all sorts of cables that go from DP to another type of port; DisplayPort is quite flexible with your options since DisplayPort is "Open Source" which means that it's also "Royalty Free." That's why the DisplayPort version is cheaper, the Manufacturer doesn't have to pay a Royalty Fee to the company/individual who owns the Patent for HDMI. So you could get the -DX version and use the included HDMI cable. Or if your computer has a DP, I'd get that version. Dell Monitors are nice like that, they usually include cables. Again, it all depends on WHAT your computer has, or the computer that you will buy in the future. How do you tell? HDMI is on the left and DisplayPort is on the right: Source of image: RTINGs.com Also from that web page: I'm pretty sure that most people have heard about the new Xbox One Series X and PlayStation 5 game consoles. There is buzz with HDMI 2.1 as that has enough bandwidth to support 120MHz refresh rates, which is great for video games. (Well, some of them.) So it's getting all the attention, and might make some think about sticking with HDMI. This is "fine," because you have to keep in mind, you are probably editing still-photos if you are asking questions here; please don't get caught up in the hype as you will not take advantage of the current "Bells & Whistles" that HDMI 2.0 provides. Heck, the same can be said about DisplayPort 2.0! That said, DisplayPort 2.0 hasn't been released yet. When it does, it will become the new "IT Girl" and all the articles and hype will be about DP 2.0. Bottom Line: As for which one to get, if your computer has a DisplayPort Port...go that route. If it doesn't, the safer bet would be to get the HDMI version and if you have to, buy a DisplayPort to HDMI Adapter from Monoprice.com ($13.99) in the future, so-be-it.
-
Dell UltraSharp vs non-UltraSharp
Brian replied to Elliot's topic in The Windows & PC Hardware Forum
What video ports do you have on your computer? DisplayPort is the future. DisplayPort is better when it comes to 4K Displays. If you have a DisplayPort on the back of your computer, you can get a DP to HDMI cable. That said, DO NOT BUY CABLES FROM PLACES LIKE BEST BUY!! They are extremely overpriced for what you get. I buy my cables from Monoprice.com. That $50 cable you will see at Best Buy, is probably $12 at Monoprice! Or less. As for the difference, hang on...need to look at it from my computer and not my phone. -
Dell UltraSharp vs non-UltraSharp
Brian replied to Elliot's topic in The Windows & PC Hardware Forum
SKIP IT!! That VA panel is meant for video games. For the “display panel type” it will say IPS. Not TN, not VA. VA Display Panels give you a similar viewing angle as IPS, but with the quick refresh rates of TN. So it falls in the middle between IPS and TN. As I mentioned above, that 32” Curved VA monitor is meant for First Person Shooter Video Games. As far as the Ultrasharp, yes...it’s better to get that line of Dell Displays. Here is one I would buy: Dell Ultrasharp U2719DX 27-Inch WQHD 2560x1440 Resolution IPS Monitor with Infinity Edge Bezels, Black https://www.amazon.com/dp/B07KGR784M/ref=cm_sw_r_cp_api_glc_fabc_C2x4FbHCKCG44 -
Are Gaming Laptops reasonable for photo editing?
Brian replied to Gretchen's topic in The Windows & PC Hardware Forum
Yeah, that’s the drive. I might have screwed something up or the website is being stupid. Swapping out a HD for that model is about a 3 on a 1-10 scale. The tough part is cloning the HD. That’s more of a 9. Here is a video demonstrating the process for your laptop -
Are Gaming Laptops reasonable for photo editing?
Brian replied to Gretchen's topic in The Windows & PC Hardware Forum
The laptop you were consider is fine. It checks all the boxes and that is a fair price. Your current laptop is upgradable, you just have to remove the bottom panel, disconnect the battery and then the existing HD, then install the new one and reverse the process. The toughest part will be cloning one HD to the other. This is the drive that I would install: Samsung 860 Pro SSD 1TB If you wanted to, you could go higher and get a 2TB model. You would also need to get a Sata to USB adapter and cloning software, like Acronis which would clone and expand your existing HD to the new one. So for roughly $275-ish, you could upgrade your existing HD if you went the 1TB route. -
Are Gaming Laptops reasonable for photo editing?
Brian replied to Gretchen's topic in The Windows & PC Hardware Forum
IF you can get a deal, go or it. If that laptop checks all of my "boxes" and is $1300, I'd buy it. (IPS Screen, Dedicated Video & Video RAM, 1TB HD, etc.) Laptops have been in huge demand due to people being forced to work-from-home due to COVID-19. So the prices were elevated. In reality, $1200-$1500 is a "typical" budget. I just don't want people to think that the $450 laptop from Wally-World is going to cut it. It depends. If the unit is not a "sealed unit" and you can have the HD replaced, by all means...go that route. A 1TB SSD or a m.2 version isn't THAT expensive anymore. We just have to figure out what your laptop has. The only thing that would need to be done, is to clone your old HD onto your new one, and if you don't want to go through all of that trouble, I'm sure a local computer shop offers those services. Or you could try doing things yourself and that depends on your comfort level. What laptop make/model are you working with now? Can you take a photo of the bottom and maybe find an access panel and post it here? This is what drives me insane with today's laptops. 256GB SSD drives make them "quick" to boot, consume less power which helps battery life, and are very cheap for the Manufacturers to use. A 256GB SSD Drive is meant for "General Computing," NOT Photo-editing. In fact, the majority of people with laptops that are having Photoshop Problems tend to stem from a lack of space on their main Hard Drive. Why? Because it's a stupid 256GB (or smaller) HD. I hate those small HDs just as much as Damien hates Lightroom. -
Purchasing gear again with resale value in mind
Brian replied to rahullele's topic in Photo Gear & Equipment
Don't forget, 85mm gives you more compression, which tends to make people's faces look more natural. That's why 85mm and 105mm are your typical "Portrait" focal lengths. Longer focal lengths do this; it's just not the magnifying affect you get with just cropping in, the "look" of the photo is also different. For your situation, yeah...a 24mm is your target. 28mm is your typical Smartphone wide angle, so keep that in mind. It sounds like a 24mm, 50mm and 70-200 will work just fine for how you shoot. -
Purchasing gear again with resale value in mind
Brian replied to rahullele's topic in Photo Gear & Equipment
Well, with COVID-19 all around, people out of work, photography in general seems to be waning, it doesn't surprise me that you aren't getting top dollar for a 70-200 E. Of course, as I write this, that lens is on sale for $1896.95 brand new, which is probably why you are being low-balled at around $900. Canon, Nikon and Sony are all experiencing slumps in terms of units sold and finances. Mirrorless is on the fore-front of practically every blog or YouTube video. Mirrorless is the new "It Girl." If you are asking my opinion, and with your post you are...I will never-ever-ever-ever-ever recommend a 3rd party lens unless if I absolutely have to. When I buy gear, I buy it for the intent of what images I can produce, and if I can make money off of it, so be it. I view them as tools, and not investments. If you go looking for things that have a high resale value, especially in the photography world, the quickest way you will make money is to sell ALL of your camera gear and go do something else. OEM is still King when it comes to re-sale value, you are just in a crappy market. That $1200 Sigma or Tamron Lens, you might get $100 for it. Maybe $200 if it's one of those Sigma ART lenses and if it's in high-demand. Pawn Shops and Used Camera sellers want to make money. They aren't there to be fair or to be your friend. They WILL low-ball you without remorse. They will take your lens for $900 and probably sell it for $1800. But with your lens going for $1900, that won't happen, it will probably go for around $1400 used. Now, if the 70-200 was still going for $2700, then you'd probably get around $1500 or so for it. Of course, this depends on the stock on hand and the condition of the lens. For example, if an Earthquake hit Japan again, or one of the countries that made a particular lens, had floods / natural disasters, which results in Nikon not being able to produce a particular lens or whatever product. If there are significant back-orders, this creates a huge demand for them, which increases prices on the resale/used market. This isn't the case. Especially with Mirrorless being all-the-rage these days. So your question is, can you live without a 24-70? Absolutely. I would own a 35mm, a 50mm and a 85mm. To keep costs down, I would get 1.8 versions of all of those lenses. Of course, since you have a Mirrorless body, I would get the Mirrorless versions of those focal lengths. This will allow you to get the best out of your Z6II. Even if you were getting a Nikon 24-70 for your Mirrorless, do not purchase anything but the Nikon 24-70 S lens. That lens is designed for all of the Z6II's image stabilization features. (The 5-point Axis.) Your typical lenses that were meant for DSLRs only do 2 or 3 axis, something like that; I can't remember off the top of my head. In terms of sharpness, there is a huge difference between the 24-70E with adapter and the Mirrorless version of the Nikon 24-70 S lens. Night and Day. Hands down, get the "S" version for your Mirrorless. I have a friend, who I know in real life, shoots baby portraits. Her D4 and 24-70G where just getting a bit heavy for her after a day of shooting and she switched to a Nikon Z6 and kept her 24-70G lens. She ended up hating the 24-70G with adapter and couldn't trust it. Sure it was "fine" on a gig, but having to take 12 or more photos to get 3-4 keepers that were TACK-SHARP was tough. Eventually the lens started having focusing problems and I convinced her to get the 24-70 S version, the one meant for Nikon Mirrorless Bodies. She reported back...HUGE world of difference. It got to the point that she is shooting less photos and 90% of them are keepers; in other words, she has a problem deciding which ones to keep because they are all "good enough." The 24-70 S lens is meant for the Nikon Mirrorless Line. So with that out of the way, let's talk pricing: Nikon 35mm S 1.8: $696.95 Nikon 50mm S 1.8: $496.95 Nikon 85mm S 1.8: $696.95 That's a total of $1890.85. plus any applicable Tax and Shipping. That should cover you in the most common ranges that people shoot at. Something wide, something long and something in the middle. The benefit you get with a Prime, is that it just worries about one focal length, so they tend to be sharper. The problem with them is you are always changing lenses, so you introduce dust into the mix AND the likelihood of you dropping one increases on a gig. Plus you have to have a bag on your shoulder to carry all three lenses around, plus your 70-200 with adapter. Nikon 24-70 S f/2.8: $1996.95. Currently, it's on sale for the Christmas Season. Not sure when it will end, but it is $300 off. So as I write this, that is a $106 difference. The benefit with a Zoom is really the convenience, you mount a lens and just go to work. I am a "Zoom Person." I've tried switching primes, but I run-and-gun too much during Weddings...but I do see the advantages of a prime lens. Zooms just work better for me and the way I shoot. In your case, you already have a 50mm 1.8 S, so that's only $1393.90-ish which is around the cost of a Tamron or Sigma (Yet-to-be-released Mirrorless Version) 24-70 lens. I'm thinking those lenses will be at least $1400 or $1500. Why? Because it's Mirrorless. It's the whole "Newness" thing and people are paying a premium price for things. Of course, I could be completely wrong, and they are $999.95. But I don't think so. $1200 would be the bottom price, in my humble opinion. So buy or wait? That's up to you. I think you will end up spending more than $900 in whatever direction that you go. (OEM or 3rd Party.) I really wished Nikon didn't charge $2700 for the 70-200. That was just plain stupid. I bought mine for $2200 when it went on sale and thought that was a good deal. Now with it being $1900, we both lost money. Anyway, WHAT focal length are you typically at? If you only used your Tamron 24-70 30% of the time, that tells me it wouldn't be worth it for you to blow $2000 on a lens. Especially in today's market. People aren't getting photos taken. So that changes it more to a hobby than a profession, at least until the world stops being insane. OK. Here is my advice. Go with Option #2 or #3. Hold off for now. Analyze on what you shoot, how you shoot a particular subject and at what focal length are you drawn to. Were you always wide or long? What Aperture? f/2.8 or wider? or were you at f/4 and such? This will determine on what to buy next. Let's say you are around 35mm or 38mm A LOT and just didn't realize it. Then a 35mm 1.8 S would be your target. If you lived at 70mm...then get a 85mm 1.8 S next. See where I'm going with this? You could do 90% of people stuff with a 50mm and a 85mm focal length, then throw a 70-200 in the mix. You just have to re-think and make it work. I've seen businesses built with those two prime lenses and a 70-200 Zoom. Of course, it depends on what you shoot. If you are doing weddings, then you will need a 24mm or 35mm in addition to the other focal lengths. But right now, people aren't getting married. Or baptized or anything else that is group related. It's been a slow year all-around. Hopefully the second-half of 2021 will be better. PS: I am interested in a Z6ii Body and will be getting a 24-70 S lens. That would make it the 3rd 24-70 that I own. I would just use my 70-200 E with Adapter and make things work. But for now, I'm holding off. I have other things to buy 1st and really haven't traveled anywhere this year. -
...and your fear has caused you to get so far behind, if you do upgrade or even replace your iMac, you are looking at Photoshop CC. Period. CS5/CS6, even PS CC 2015 and PS CC 2017 are not compatible with Mac OS Catalina OR Big Sur. So keep in mind, if you do stick with a Mac, Photoshop CC is in your future. For the most part, Catalina is pretty stable now. The downside is that we are up to Big Sur. So really, you don't have much of a choice if you think about it. I will say this, PS CC 2019 is also really stable, so if there is an option to install that version for you, I'd upgrade to that. The latest / brand-new version of Photoshop has its quirks, but Adobe always seems to be patching something, so who knows, in six months from now, you may not have any issues. Honestly, the majority of folks who have problems have unstable systems to begin with. They have all sorts of crap all over the place, Desktops with tons of files on them, not enough HD space, haven't bothered to install patches and updates, do not perform any routine maintenance on their computers, no good backup strategies, etc. It's like they just put gas in the car and never do any oil changes over the years. Then they wonder why their engine breaks in the middle of nowhere? For your situation, I truly believe that you have a hardware issue, so your experience is a bit skewed. It's too bad that the idiots at the "Genius Bar" didn't really help you. As for what to buy, I've written a few articles on this very subject. They are pinned and starred at the top of this forum. Here is that I recently updated, give it a read: Quick & Dirty new iMac Configurations
-
How can you make “dark setting” photos not look orange?
Brian replied to BrittanyCollins42's topic in Photo Gear & Equipment
If you have access to a printer, I want you to print out a white balance sheet. Here are instructions on how to do it. After you create one, take a few photos of it. I want to see how the white looks. Post the results here. -
How can you make “dark setting” photos not look orange?
Brian replied to BrittanyCollins42's topic in Photo Gear & Equipment
After you default your camera, I want you to learn all of its menus and specifically, set the Picture Style to NEUTRAL. This way when you look at the back of your camera, it will look more like the photo that is brought into ACR / Lightroom. -
How can you make “dark setting” photos not look orange?
Brian replied to BrittanyCollins42's topic in Photo Gear & Equipment
Are these orange images from your computer after importing into ACR or is this a shot from the back of the LCD with a cellphone photo? -
How can you make “dark setting” photos not look orange?
Brian replied to BrittanyCollins42's topic in Photo Gear & Equipment
That is weird. What are the White Balance values? Have you manually set WB in the past to a certain value and it needs to be changed back? Or is it on Auto White Balance? As of right now, I’d say you are looking at either buying a new camera or sending your current body in for repairs. Have you tried defaulting your camera’s settings? -
Setting up Second hand desktop....A dilemma
Brian replied to Gingersnaps's topic in The Macintosh User Group
If you need help setting up a new EHD, I can provide assistance. Do not spend extra for a “Mac Formatted” HD. This is the “Apple Tax” that manufactures put on their Mac Products. They know that people are willing to pay more for Apple’s products and will add, usually $30, to the cost of a “Mac Compatible” EHD. This is pure BS. ANY external drive should work. All that is required is about 5 min of your time to format and participation your new HD; no special software needed, it’s built into the OS.