Damien Symonds
-
Posts
212,046 -
Joined
-
Last visited
-
Days Won
3,485
Everything posted by Damien Symonds
-
Yeah, that part is letting it down.
-
Are you talking about the shirt?
-
Download the PSD file I began by duplicating the Background layer and doing the Liquifying on it. Then I added the mask and masked it on. Then I realised I needed some new shadowing, so I created the Hue/Sat layer below the Liquify layer for that purpose. Finally, I realised that some grass was crooked, so I added the Clone layer for that purpose. If some or all of that doesn't make sense, add The Layers & Masks Class to your list.
-
Ok, then this is going to be challenging for you. You'll find plenty of YouTube videos to teach you; I've recorded one here. Give me a minute and I'll upload the PSD file of my edit, I hope you'll be able to make some sense of it.
-
Ok, phew! Glad you like it. Have you used the Liquify function before?
-
So I think your best (only) chance is to liquify the skirt down: Do you think it's plausible enough to get away with?
-
Ok, I've got a fix to show you for your consideration. Let me know when you've fixed the colour space problem, and we'll go ahead and start discussing her skirt.
-
Oh gee, I beg you, PLEASE don't wait a moment longer to take the Raw Class. However, your job right away is to fix the catastrophic colour space problem. Follow this troubleshooter all the way to its conclusion. While you're doing that, I'm going to have a play with your photo and see what's possible for the fix.
-
May I see the whole photo, or at least a larger area, so I understand the context here?
-
Oh gosh, the pattern is going to make it difficult, that's for sure. Go ahead and do your raw processing as normal, then post again for me, including a closer crop of the area (I always feel seedy asking that!)
-
Download the PSD
-
This is the best we can manage, I think: Some texture is lost, but hopefully nobody will look too closely. I'll upload the PSD in a moment ...

-
It's a fairly simple matter of layers and masks. Honestly, the editing side of things isn't challenging - it's the conception and photography you need to get right. Angles and lighting and so on. You need to give them a fair bit of thought. Edited: What Christina said.
-
Oh no, how annoying! Maybe we have to use the other sleeve, and darken it somehow? May I have a closeup of the other one?
-
What? I haven't given you the Photoshop steps yet! But yes, a re-shoot is the best option if available.
-
Yeah, your fake one looks fine. I don't know, to be honest. I wing it every time this question comes up.
-
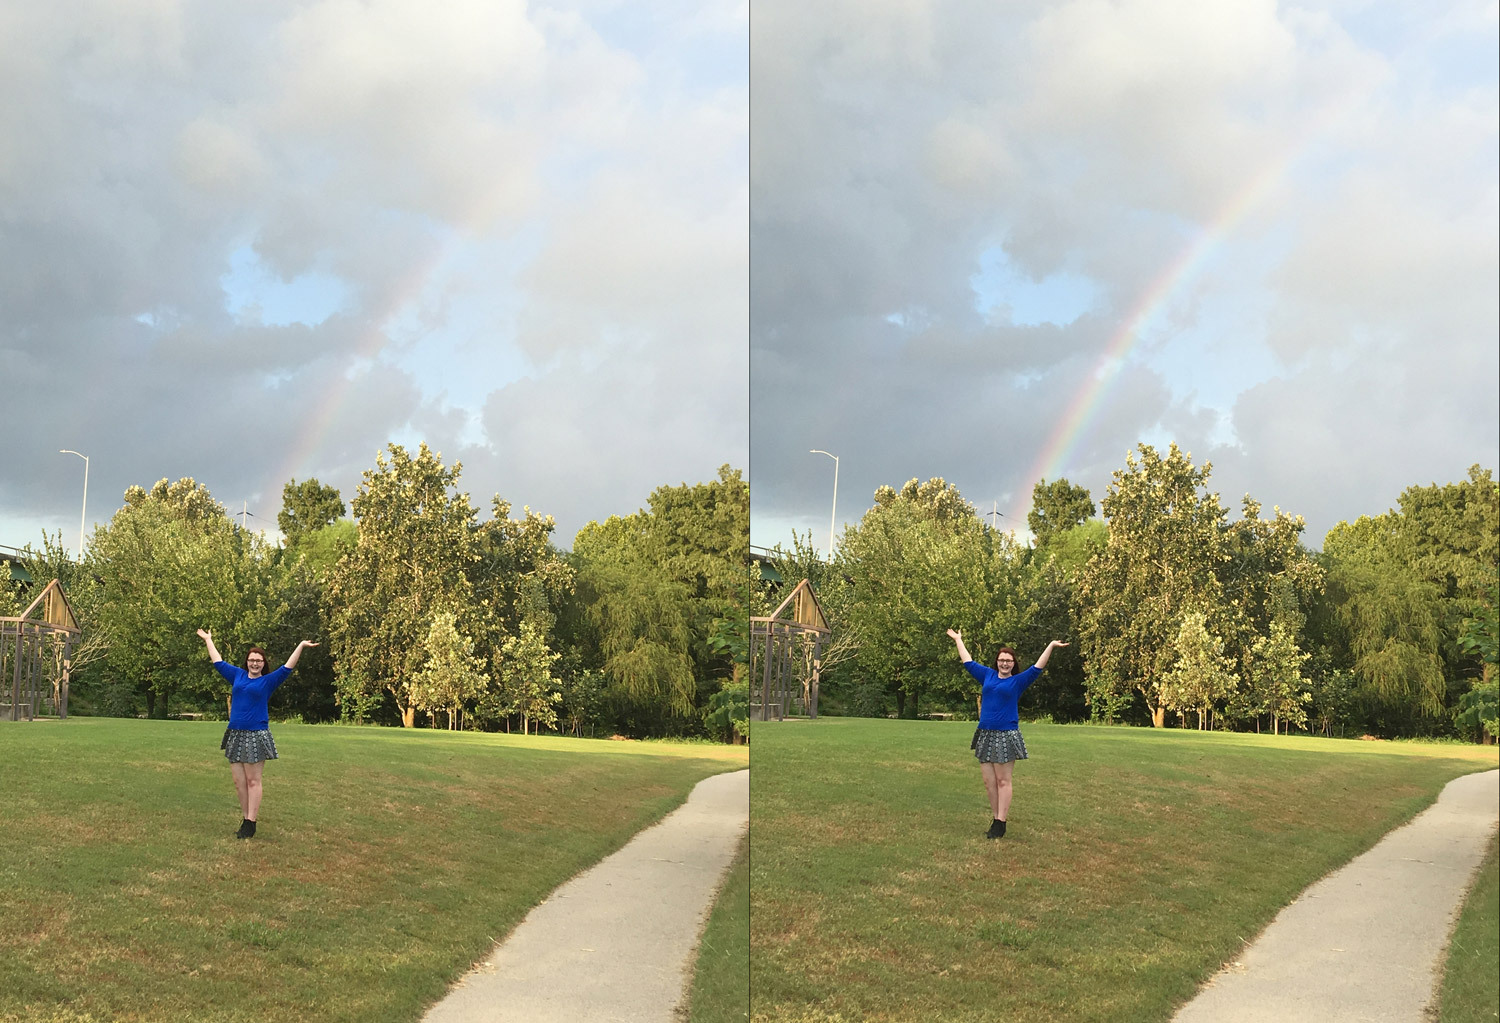
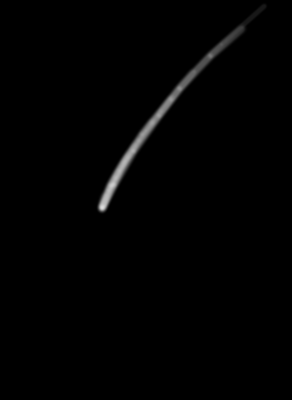
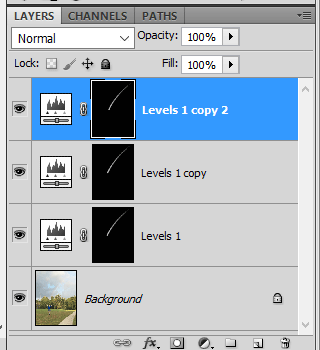
Ok, so I started by adding a Levels layer, and on the Red channel, moving the middle slider to 1.50. Then inverted the mask, then gently painted over the rainbow, along the red area, slowly building up a bit of red glow. My mask looked like this: Then I duplicated that Levels layer, and on that new layer, I put the Red channel back to normal, and instead moved the middle slider on the Green channel to 1.50. Then I chose the Move Tool, and nudged the layer across to the right a bit, to create the green part of the rainbow. Then I repeated that process one more time - duplicated the layer, put the Green back to normal, and put the Blue middle slider on 1.50, then nudged it across some more. Here's what the layers panel looked like at the end:
-
 Hi Julie, which version of Photoshop do you have?
 -
Yes, I agree with Christina. It'll have to be a transplant from another photo. There's no way to fix this.
-
hiding panties
Damien Symonds replied to stacey fahringer's topic in Miscellaneous questions or problems
Oh, I think the sun spot is plausible. I think this looks great. -
This is something I've always struggled with, I must admit. They're hard to enhance, aren't they? This is the best I can manage. Better than nothing?

-
hiding panties
Damien Symonds replied to stacey fahringer's topic in Miscellaneous questions or problems
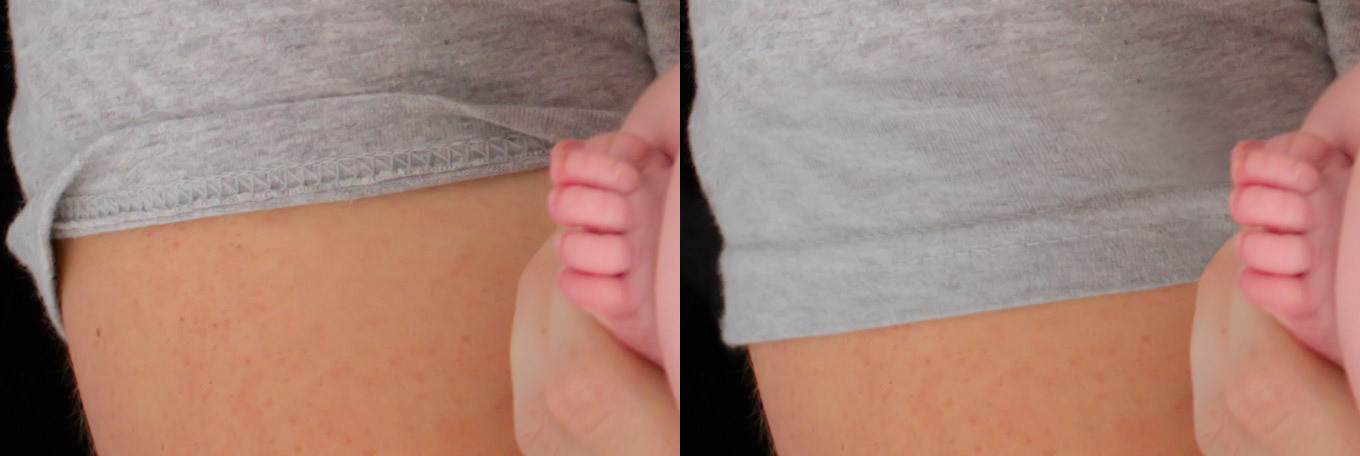
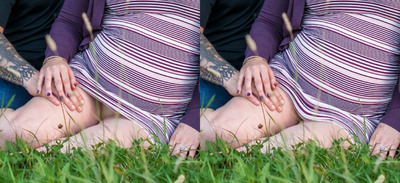
For the record, this is incredibly difficult. Don't assume that you suck just because you can't make it look amazing. I can't either. As it happens, I think you've done really well. I just think there should be more on his leg right up under the bend in her knee. -
hiding panties
Damien Symonds replied to stacey fahringer's topic in Miscellaneous questions or problems
Great! Now add a D&B layer and work on burning some artistic shadowing where needed. -
hiding panties
Damien Symonds replied to stacey fahringer's topic in Miscellaneous questions or problems
If you turn that layer off and on a few more times, you'll see a spot you missed on her skirt. Also, blend the sand above his leg a bit more gently. -
hiding panties
Damien Symonds replied to stacey fahringer's topic in Miscellaneous questions or problems
There's still an edge on the sand, at the bottom.