Damien Symonds
-
Posts
212,005 -
Joined
-
Last visited
-
Days Won
3,482
Everything posted by Damien Symonds
-

Replace background with light colored hair
Damien Symonds replied to Boca Life Photography's topic in Help with editing
Not really, no, sorry. You'll be able to get away with it if you use a really light sky. -
The best way to mask and replace the background
Damien Symonds replied to cathm's topic in Help with editing
Can you please send me the exact jpeg file you sent to the lab for printing? https://www.hightail.com/u/BellePhotography Can you elaborate on this? You must NEVER sharpen during editing. Sharpening must only happen on the output file, after flattening and cropping/resizing. -
I'm so sorry Clare, I've got nothing. I have no methods for this I'll move it into the general discussion area, in case somebody else has a solution.
-
Lab print is no longer matching
Damien Symonds replied to SandySilveira's topic in Monitor calibration questions or problems
No, ignore that nonsense. I don't know why labs persevere with the 120 myth. If previous prints still match just fine, then you got a dodgy print run. Demand a reprint. -
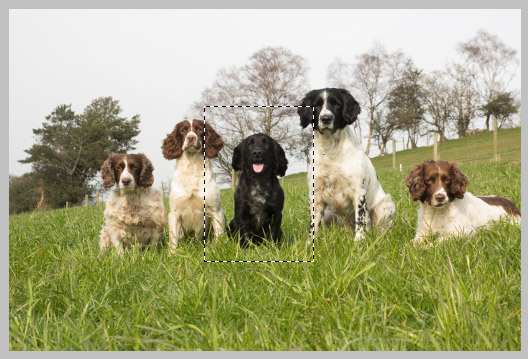
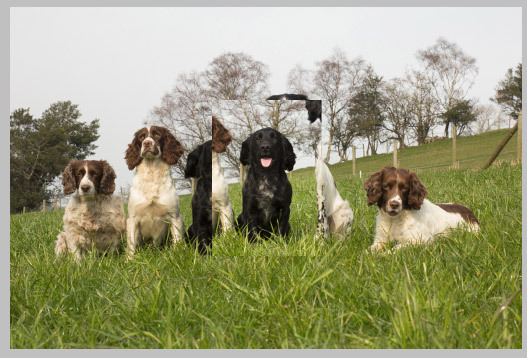
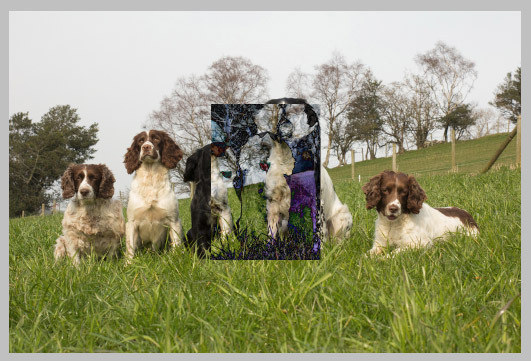
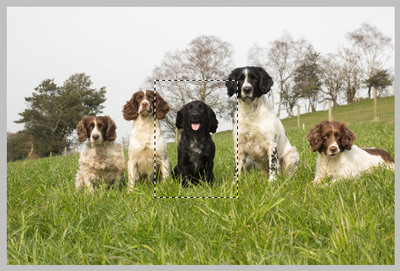
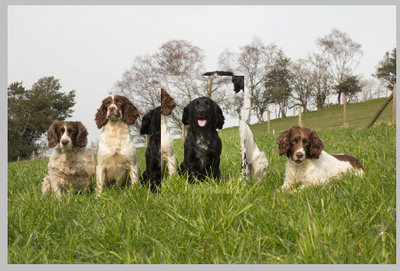
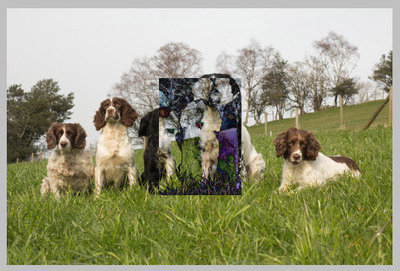
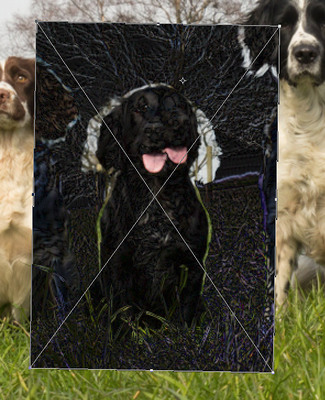
First, open the donor image and select a generous chunk around the dog: Then open the base image and paste the dog onto it: Immediately change the layer to a Smart Object, then change its blend mode to "Difference": Ctrl T to get the transform handles. Zoom in as far as needed, and line up the tree branches just above the dog's head as accurately as possible. Then Alt-click on them to set the middle point there, then rotate to line up the grass around the dog's legs also as accurately as possible. In my play, I also found I had to enlarge the dog a tiny bit. Once it's all lined up as accurately as you can, put the blend mode back to Normal, hide the dog completely with a black mask, then paint it in. (I've shown the mask in red view here):

-
Oh gosh no, just swap the whole dog. This method.
-
Lab print is no longer matching
Damien Symonds replied to SandySilveira's topic in Monitor calibration questions or problems
Do you still have some of the older prints handy? If they still match, then you know that your screen/calibration hasn't changed, and you can legitimately begin to suspect a lab mess-up in this recent batch. -
Oh boy, these are tough. May I see a closer crop of the area?
-
Isn't this a moot point? Your lady is missing her legs. She won't possibly work in that scene.
-
Are you saying you want to put the lady (second link) into the scene (first link)?
-
Well, heck, troubleshoot both of them, and see which one gets closer. Then, as Christina said, edit on that one.
-
Gee, that looks way too close up, surely? I only wanted you to just fill the frame with the rug. If you put that behind the basket, it will look incongruous.
-
Calibration Frustration
Damien Symonds replied to Lady Photog's topic in Monitor calibration questions or problems
No, Lady Photog, you have to stop saying it like this. Your mindset is all wrong. Your prints aren't cooler than your screen. Your prints are what they are. They are set in stone. What you mean is that your screen is warmer than your prints. Please do this. -
This is really important. But I need to see the photos to be sure of the best way to manage this.
-
Calibration Frustration
Damien Symonds replied to Lady Photog's topic in Monitor calibration questions or problems
Can you post a couple of the images here? The actual jpeg files you sent to the lab. -
Monitor Sharpness Settings
Damien Symonds replied to ozmaen's topic in Monitor calibration questions or problems
Yes, generally I recommend leaving any monitor sharpness settings at their factory default. You don't want your screen too soft, of course, but too sharp is also a bad thing, for exactly the reason you mentioned. -
No no no no no. You must NEVER do it that way. Please show me the two photos.
-
Your images are huge. They can easily go that big. But I'm worried. The printers should know this.
-
How very odd. Surely they print stuff this big all the time?
-
Sorry, I don't understand the question.
-
Removing reflector reflection from eyes
Damien Symonds replied to Cherry's topic in Help with editing
Yes, but only VERY lightly. -
Removing reflector reflection from eyes
Damien Symonds replied to Cherry's topic in Help with editing
Oh gosh, that is unfortunate, isn't it? Still, I think simply adding a blank layer and choosing the Spot Healing Tool (set to "Sample All Layers in the options bar) should get rid of it ok. -
Please Marcel, I beg you, take the challenge.
-
So the pixel dimensions of your file should be 7200x6000, is that correct?
-
Well, Facebook makes it quite easy for us, they've told us specifically that the best sizes to post are 720px, 960px or 2048px (on the longest edge). More info here. Other websites ... well, you have to delve into their information to find out their recommended sizes. More info here. Sharpening advice here.