Damien Symonds
-
Posts
211,993 -
Joined
-
Last visited
-
Days Won
3,482
Everything posted by Damien Symonds
-
Well, you'll have to burn some shadows in there, I guess.
-
That's right. That's why I didn't replace it entirely. Better to leave the natural shadows there.
-
 First, have you read this?
 -
My settings are completely irrelevant, because I was working on a different size file to you. Just play and see what looks most suitable. You don't need to do anything special. Just apply Gaussian Blur to the smart object, and it will automatically do it as a smart filter.
-
Best way to extend image to cover canvas wrap area
Damien Symonds replied to Snook's topic in Help with editing
No, at this size, perfect. -
Storage and file keeping
Damien Symonds replied to JoZolg's topic in Miscellaneous questions or problems
Some general info in this article too. -
Depending on your version of Photoshop, you might see the option for "Place Embedded" or "Place Linked". Use embedded. You'll find examples of File>Place here, here, here, here and here. It's Gaussian. You should be able to see it in my screenshots. No, it's really huge, sorry. Too big to upload. Just follow the steps I showed you, you'll do fine. No, just give it a good chunk. More than you think you'll need.
-
Yep, that's fine. They want RGB. sRGB is a flavour of RGB. You don't need to change anything at all.
-
It's possible that we're confusing two different issues here. May I have a link to the EXACT requirements you've been asked to follow? Or if there's not a link, copy and paste them here? Because if they truly just have asked for "RGB", then you're already in RGB. Info
-
It's fine, you won't do any damage to your photo.
-
No, none at all. Converting up is never a risk.
-
This one: http://macpaw.com/
-
Canvas issues.
Damien Symonds replied to Markbd's topic in Photoshop / Elements / Bridge / ACR questions or problems
Save this as a PSD, and close it. Then follow the canvas instructions, placing this file. -
I want to change the color of just the hat
Damien Symonds replied to Lauren hardy photography's topic in Help with editing
'Fraid so. -
Canvas issues.
Damien Symonds replied to Markbd's topic in Photoshop / Elements / Bridge / ACR questions or problems
PLEASE follow the instructions that Samantha linked. -
I want to change the color of just the hat
Damien Symonds replied to Lauren hardy photography's topic in Help with editing
It should be a simple matter of adding a light pink Solid Color layer, set to Multiply mode. What won't be a simple matter is the masking :\ -
Screen looks red
Damien Symonds replied to photodoula's topic in Monitor calibration questions or problems
Yep, better than nothing. -
Yes, it's vitally important that you don't do this. I haven't written instructions for the Smile, but the first part is the same as "Part 1" of these instructions. That is, you have to manually match the brightness, and choose the best available colour setting, before you begin the calibration.
-
You mean the upgrade to Elements 14 is $69, right? They're not selling individual tools, I'm assuming. Which version do you have at the moment?
-
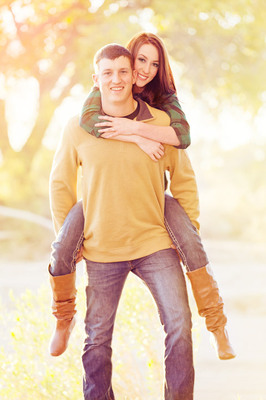
How'd they do that?
Damien Symonds replied to Patty U's topic in How to achieve a certain look or effect
That's it? Just "Thanks"? Any comments? -
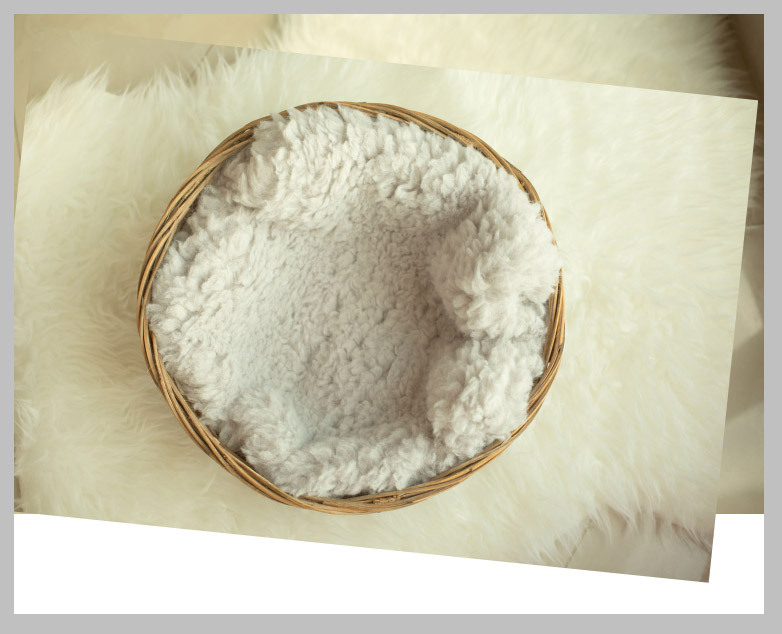
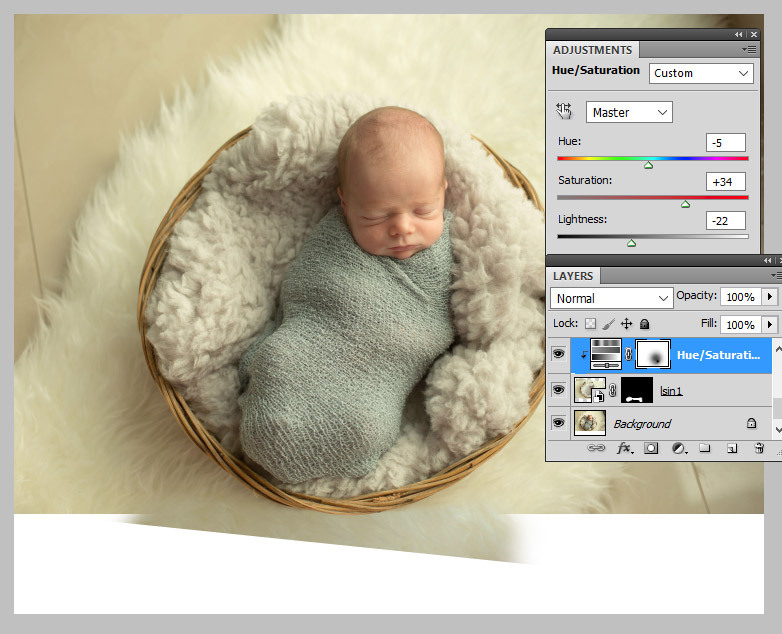
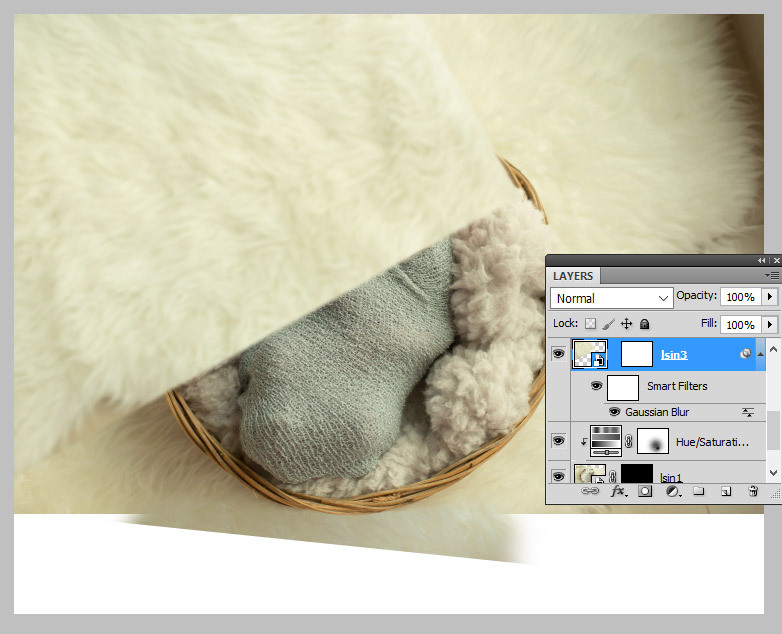
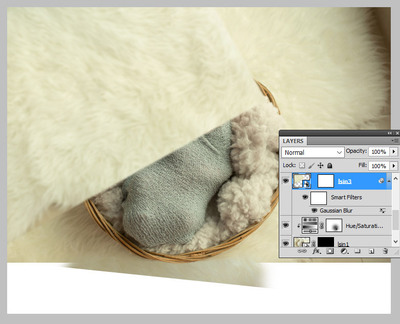
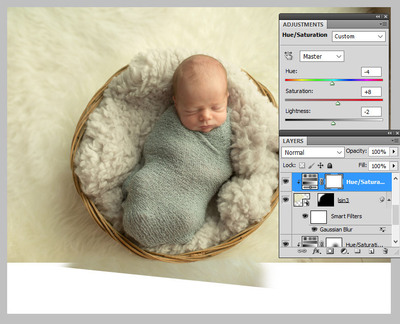
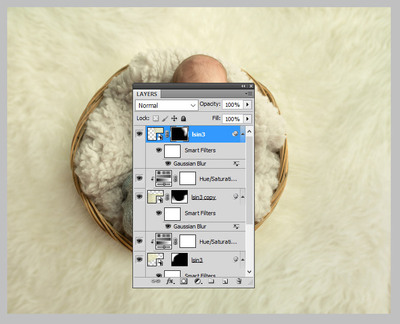
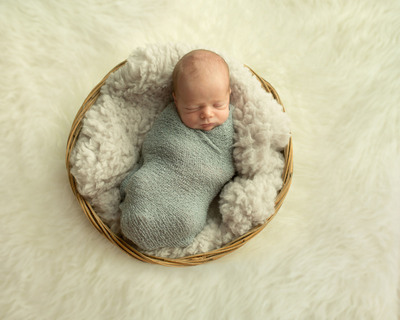
First, I extended the Canvas Size of the main photo a bit. Then I File>Placed the basket photo on the main photo. By lowering its opacity, I was able to use Ctrl T to transform (scale and rotate) it so it lined up as perfectly as possible. Then increased the opacity to 100% again: Then I added a mask and masked it in to that immediate missing area down there. It was a little too light, so I also clipped a Hue/Saturation layer to it, and fiddled with the sliders until it was roughly a suitable colour. I also had to mask that Hue/Sat layer a bit, because it needed more darkening on the left than the right: Then I File>Placed the rug photo. It was a bit too in-focus, so I blurred it a bit. Then I kinda positioned it in one corner, rotating it a bit to make the fabric flow as plausibly as possible: Then masked it in, and again, clipped a Hue/Sat layer to make it match suitably: Then repeated the same process a couple more times, to fill in all the space:


-
Good for you. Well worth the effort.
- 1 reply
-
- 1
-

-
Something like this?
-
Screen looks red
Damien Symonds replied to photodoula's topic in Monitor calibration questions or problems
If you have prints from two labs, we can rule out print error. The next thing to rule out is a calibrator fault. To that end, do you have access to a different computer you can calibrate with the Munki? To see if it turns out red as well? -
How'd they do that?
Damien Symonds replied to Patty U's topic in How to achieve a certain look or effect
Um ... something like this, maybe?