Brian
-
Posts
4,122 -
Joined
-
Last visited
-
Days Won
52
Everything posted by Brian
-
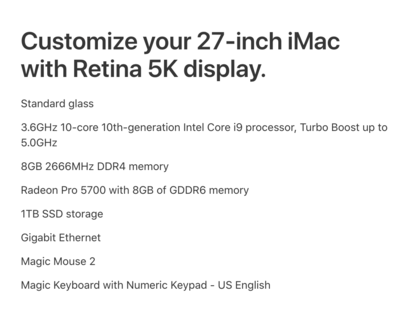
First things first... Is this the 27" model or the stupid 24" or 21.5" model? The reason that I ask is, when it comes to Apple: Go Big or Go Home!! What I always recommend to people, including myself, is to start with the most expensive 27" iMac Model and then go upgrading things. Why? Because Apple charges you MORE FOR THE SAME EXACT COMPONENT UPGRADE if you went with the lower model trying to "Save" money. That's right...that 1TB HD upgrade is CHEAPER if you went with the most expensive 27" iMac!! So if you chose a $1999 or $1799 model, the HD upgrade would probably cost you about $100 more. Nice, eh? When it's all said and done, this is what I would buy today, right now. I would then purchase a 32GB Upgrade Kit from Crucial (or their resellers) to upgrade the RAM from 8GB to 40GB. This upgrade should cost you no more than $300 or so. For the same upgrade from Apple, well to take it to 32GB, would cost $1000 on top of the iMac's cost and you will have less RAM in the end. So why pay $1000 and get less? Save that money and get more for it. Anyway, here is the configuration: Cost is $3229 before AppleCare, Shipping & Tax. Prices are in US Dollars. Do yourself a favor and DO NOT BUY A 21.5" iMac. You are not saving ANY money in the slightest. Apple has crippled that iMac line and they can not be easily upgraded after the fact, since there isn't any access panels. You get a better motherboard, better components, better speed, better configuration options if you went with a 27" model. The 21.5" iMacs are meant for General Computing...meaning: Wasting time on FB, Pinterest and the like, answering e-mail, paying bills, watching Netflix, stuff like that. The 21.5" iMac is fine. As soon as you throw "Photo Editing" or worse yet, "Video Editing" into the mix, you are no longer a "General Computer User." Why do I recommend the things that I do? Because when I build my computers, I have a 7-8 year time-frame in mind. I'm not forking out my hard-earned cash every two years or so. My 2017 27" iMac is still going strong and I have at least another 5-6 years of usage out of the thing. So I'd rather fork out $3600 now, have it last for 7 years than to fork out $2500 every 24-36 months. KWIM? $3600-ish vs $7500. Something to think about.
-
I'd get one that has the DisplayPort. Well, if your computer has a DisplayPort. Personally, I like the Dell Ultrasharp IPS based displays.
-
DisplayPort is the most flexible out of all the port types. It's Royalty-Free, which makes Manufactures want to use them. There are all sorts of adapters / cables. DisplayPort to HDMI, DisplayPort to DVI, there is even a DisplayPort to VGA! So if you do get a dock that has two Display Ports, all you would need is to get the appropriate adapter/cable to attach to the existing monitors. If she upgrades her Display, DisplayPort is one of the standard ports going forward. As we've agreed above, just make sure the Dock has it's own power source to help with things. Let me know what you get.
-
IF her laptop has a single USB-C port, that would be perfect. This Docking Station is what I had in mind. I'm sure you can find something similar on your side of the planet. For the Display that is DVI, you need one of these cables: DisplayPort to DVI Cable OR if she already is using / has a DVI Cable, you need one of these DisplayPort to DVI Adapters. What she needs is very standard with today's technology, but at a Cavieat...she needs to have a USB-C (Thunderbolt 3) to obtain the optimum results. We can make things work with a USB 3.0 Port though...but not a USB 2.0 Port.
-
Also, what is the interface type of her two displays? HDMI? DisplayPort? Hopefully one of those two and not a VGA port. The “Powered Hub” Dock that I’m referring to should be around A$60-ish. In the States they go for about $40 on Amazon.
-
Yeah, I’d recommend getting a Dell Docking station IF you are looking to insert the laptop directly into the docking station. Otherwise, you could get one that I will refer to as a “Hub”, meaning it uses USB-C ports and has its own power. This way you can get the benefits of a dock without risking shorting the laptop if you purchased a generic one. What Dell Laptop does she have? I’m sure she has three screens going, my wife does at our home. I joke that she has a “Command Center” before I was able to create one.
-
Not all Macs make a startup sound. It’s normal. You can go in the Command Line and type a command to enable it, but this command doesn’t work at all on brand new Macs. The new Macs don’t make the sound at all; it doesn’t seem to be part of the ROM’s programming any longer. Oh the sound that people recognize the most is a F# Major Chord, in case you are wondering. Well, it has been a few differ tones over the years, even was a C Major Chord at one point. Give this video a watch for more info:
-
It's because you are using cheap lights. If you make a change, fire it off a few times. Also, weak batteries will screw with you as well. If you are looking for a light and you photograph babies & kids a lot, like your sample photos above, you are looking at a 250 Watt Seconds Light, such as the Profoto B10 OCF Flash Head (250 w/s). The 500 w/s light has too much power for the fuzzy-wuzzy sleeping baby photos. The cool part with the B10 is you can control them via your smart phone instead of forking out the $450 or so for the Hot Shoe TTL Controller.
-
Well, that’s the thing with flash photography, your camera’s metering system is completely worthless. Why? Because the light from the strobe isn’t present until you click the shutter. The WB values are compiled using the ambient light, and then suddenly change when the light from the flash hits the subject, albeit very briefly. That’s why I asked about what lights you use, the better lights will tell you what to expect for color temperature with their bulbs and what value you need to set your camera to when using their products. There is a difference between a $2000 light like a ProPhoto and a $200 light like a Alien Bee. Even a light like a Godoy AD400 might have issues, but photographers seem to like them and I even thought about getting one at some point. Cheaper lights, like Alien Bees, are all over the place and the color temp can change on you from shot to shot. This is the result of the power output of the Bee, it changes especially if you change the light power. It usually takes 3-4 flashes from the Bee to get it to settle down if you change something. You might want to utilize a Gray Card more often and use the WB eye dropper tool. Granted, it’s not 100% fool proof, but you will need to fiddle and figure out what works for you or at the very least create a starting point for your WB in post. Again, this topic is covered in the Raw Class. Edit: One more thing! Adobe’s thinking of White Balance Color Temp and the Camera Manufacturer’s thinking of WB Color Temp usually are different. So even though you may set your camera to 5000K (or whatever) it may not be what Adobe perceives as “5000K.” That’s the frustrating part with WB and Adobe’s products; the Camera Manufacturers do not share the “Secret Sauce Recipe” on how the camera bodies compile WB values, so there will always be a discrepancy.
-
Well, it’s not a bad idea. The problem is when people develop issues when they upgrade. Especially if they upgrade in the middle of editing sessions. That’s when it’s really bad. Also, you might not be using a tool that someone else uses on a normal basis that has issues, so from your POV, the new version works “fine.” For example, I do a lot of landscapes, I almost never use the liquify tool. If a person does portraits a lot, their liquify tool might develop issues, which usually generates a post in Ask Damien. Stuff like that.
-
If you update to Monterey, you must be prepared to use the latest versions of Photoshop CC, and the quirkiness that comes with it. PS CC 2019 doesn't work too well, and any versions prior to that version...forget it. I wouldn't even bother with PC 2020 either, PS CC 2021 or PS CC 2022 would be in your future with Monterey. Adobe always seems to find a way to make each version of PS more bloated, unreliable and incompatible with every new Mac OS release. If you have absolute FOMO and can't bear it any longer, then feel free to upgrade. Just don't do it if you are in the middle of sessions to edit. If you do and things go horribly wrong...that's on you. I'm on Catalina with my 2017 iMac. I have no desire or need to upgrade at this point. Unless you have a brand new iMac, with a brand new iPad, with a new iPhone and brand new Apple TV and use all of Apple's built in software to utilize the Apple Ecosystem, then you will benefit from upgrading. If you just edit photos, waste time on Facebook, spend way too much time on Pinterest, watch Netflix...you do not need the latest version of the Mac OS. I know, it keeps bugging you to upgrade. I empathize.
-
If AWB isn't working for you in studio, change it back. Unfortunately, I can't discuss White Balance issues / fixes beyond what I've already said, since those topics are directly covered in the Raw Class. The Neutral Setting is just for the Rear Display. This way the image you see on the LCD looks more like a Raw / "Blah" image in ACR. Try Auto NORM and see what happens. What lights are you using again? What color temp are the bulbs?
-
"Meh." LOL!! I'm past the point of being a Measurbator and wondering about this (insert fancy chart #'s) vs (that fancy chart numbers) and getting into arguments. It's not the gear, it's the stupid photographer controlling the camera. That's what matters. Buy better lenses. Take classes, improve your editing workflow. Go somewhere different and the most important thing...if you want to produce photographs of cool and interesting things, here is the answer....shhhh!!! YOU NEED TO TAKE F*ING PHOTOS OF COOL AND INTERESTING THINGS!!!! Duh!!! People always want to buy their way out of shit, thinking there is some secret to gear. I have a Nikon D4s Camera and a Nikon D850. Both are expensive and fancy cameras. I have the f/2.8 "Professional Grade" Lenses that some drool about buying. I have spent over $20,000+ on this shit. The D4s was Nikon's Flagship Body in 2014. (I think, too lazy to Google it.) Guess what? I still take crappy photos with expensive gear!!! Yep. No matter how much money I pour into equipment, and yes...fancy equipment does make it easier to take photos, and Professional Grade Lenses do make a huge difference, I won't lie, but in reality...it starts with me. With that out of the way, Nikon vs Canon vs Sony. "Meh." Either. Worried about Dynamic Range? Take a better photograph and get it right in-camera than trying to fix it later in post. Seriously! People talk about Dynamic Range like it's Horsepower or Torque or something. If you properly exposed your damn camera in the first place, you aren't worried about Dynamic Range in Post. Just think...printers that produce physical prints only have so much Dynamic Range that in no-way matches what a modern camera produces. It just won't. There are 5 levels of range between completely dark and completely bright: (Black/Dark) XXX | XXX | XXX | XXX | XXX (White/Light) That's it when it comes to prints. That's the Dynamic Range for Physical Media. 18% Grey/Gray is almost in the middle. That's why we strive for 18% Grey/Gray. I don't care if Nikon/Canon/Sony has a 100 billion levels of Dynamic Range, it won't make that much a difference when it comes to prints. Digital only? Do you know how many people are using un-calibrated displays? How many people view your photos on their smartphones in crappy lighting? We have enough trouble trying to convince photographers in Ask Damien to get calibrated, and you'd think that PHOTOGRAPHERS would be concerned about color more than anyone!! But nope, Calibration seems like a Mystical Art for many, complete with Potions and Chants. So to actually answer your question: Any one of today's modern cameras out-performs "Professional Flagship Bodies" from 10+ year ago. Think about it. ANY camera body, including basic entry-level Canon Rebel-type bodies. They are better than the top of the line cameras in years' past. If you have problems producing photos that you want in 2022, buying a whole new Camera Brand / Lens System is not going to make it all better. It will however, cost you money. Now for which brand. I say this to everyone: Try holding a camera in your hand. Go through the menus, see if they make sense. Does the camera body feel comfortable in your hands. Is it something that you could walk around with for a day and not think about it? When I switched over from Film to Digital in 2007, I actually held several Canon bodies and liked them a lot. But I could not stand the menu system. The little symbols and characters that made of the setting choices and focus modes did not make sense in my brain. I like words. Nikon's Menu System filled this role quite easily. "Focusing Mode," Display Brightness, etc. etc. That's the terms Nikon uses. Not a little tiny red icon next to a blue icon. Finally, if you are going to jump on the Mirrorless Bandwagon, keep this in mind: I don't care what fancy OEM adapter you use, MIrrorless Lenses that were designed to be used on Mirrorless Bodies WILL ALWAYS PRODUCE BETTER RESULTS. So if you do switch, budget to replace ALL your lenses with the MIrrorless versions. Granted, you can make things work with existing equipment, but a new set of lenses will be required to get the most out of your new camera body. Whichever brand you choose.
-
First question, does it restart? I'm just curious but I'm thinking this won't work either. After you are forced to pull the power, remove everything that is attached to your computer. Nothing in the USB ports, no HDs, etc. Just the Keyboard, Mouse, iMac and Power Cord. Then the next step is to Reset the SMC and PRAM. After that, Genius Bar is probably in your future.
-
Yes. You can also just send what you have now, or re-edit a few and stamp them with some text that says they are the tweaked based on the new calibration. But new prints are not required, you just need something to compare your screen to. If your prints in the past seemed “fine” and the new calibration profile is off, we need to know. Don’t ever think that since your monitor is calibrated, it’s “fine;” this is the reason that test prints are so important So definitely send some photos off that were edited before you calibrated. Usually test prints make up 5-10 photos on the average.
-
Well, here are a list of their Print Fulfillment Vendors. Out of all of them on the list, I would avoid Miller's. Yes, we know their Customer Service is #Amazing. We get it, but Miller's is stuck back in the 1990's and they are damn near impossible to get their prints matching. What I would do, is investigate each one of the Printing Vendors. They should have a section on their respective websites that offers test prints of some kind. Make sure your test prints are matte/lustre too. A little investigating will prevent having unhappy clients.
-
I use CPQ.com. Now some info on them, a little color goes a long way. Don’t oversaturate your colors or go “Nuclear” with them. I’d order a round of test prints from them, just to make sure if you don’t need to modify your editing style. I also use Zno.com for my Wife’s Photo Albums of photos taken from our trips each year. CGPro for my Canvases. Keep in mind, my “D55 Setting” works for me and my Mac’s screen. Your experience might be different, so get a few test prints from at least 3-5 vendors and marry the best one that matches the closest. You may not obtain 100%, but 95% or more is what you are after.
-
I’ve been at D55 for the labs I use with my Mac. Target is 80-82 on the average. It matches my prints. I also keep the Display at 2 Ticks from the left to match the brightness of my prints. Any higher and I get dark prints.
-
Again, your camera's LCD lies. The image you see on the Camera's LCD is the JPEG PREVIEW THAT IS EMBEDDED WITHIN THE RAW FILE AND NOT THE RAW FILE ITSELF!!! This is why I'm recommending you change the Picture Control on your Camera to NEUTRAL. This way the image you see on the LCD will look more like the Raw file does in ACR. The other thing I want you to do is adjust your LCD's Brightness to -1 or -2. Even though you are NOT supposed to judge exposure via the LCD brightness, for the very reason you are having an issue; it's a hard habit to break, people often look at the LCD and think their photo is properly exposed. Often, it is not. You need to pay attention to your Histogram(s) to properly judge exposure. Why? Because again, the whole JPEG Preview thing. It's not the Raw image on the Camera LCD. You could set the camera to something stupid like +5 or whatever and the image on the LCD will be nice and bright. But it does not affect the Raw file, that stuff is ignored by Adobe's Software. You could set the LCD to +100 and shoot everything to 1/4000th of a second at f/22 at ISO 64. (I'm being silly here, never do this. ) The point is, the image on the LCD will look properly exposed because the display is so bright, but be completely dark when imported into ACR. This is the same exact reason why people's prints come out too dark, it's because their computer's display is too bright! It's all the same BS. Here is how you set the brightness for the LCD. I have mine at -1. You might want to try -2.
-
Well, if the camera never moves and your lights stay the same, then you could fiddle with the WB settings. But the WB will still be off when importing into ACR, no matter what you do. Why? Adobe’s Camera Raw and the Nikon D850 interpretation of White Balance is different. ACR/Lightroom takes an educated guess of what the file says. Since WB is covered in the Raw Class, that’s all I will say on the matter.
-
I will bet you that you have all sorts of crap on your Desktop, right? If so, the more stuff you have on your desktop, the slower it runs. Give this Article a read. Speaking of speed/performance, the more crap you have on ANY HD, Internal or External, the slower it runs. When it comes to a Macintosh Computer, you never want to go more than 75%-80% Full on any hard drive. If you do, performance takes a hit. If your HD is more than 95% full, then you are in dangerous territory of things completely crashing. So before we really begin, can you fill out this form and post the results here in this thread? Details about your Computer's Health
-
Honestly? I've got nothing. I'd un-install everything PS Related, reboot...then run Glary to help with left-overs and do a fresh install of your Apps. Sometimes Nuking things and installing fresh is the only thing you can do.
-
Stop trying to screw around with fine-tuning your WB. Leave it alone. Unless you are in a studio, with VERY GOOD AND CONSISTENT LIGHTS, THAT DO NOT MOVE, and I'm NOT talking about Alien Bees, you really shouldn't mess with that WB Fine-Tune. Keep this in mind as well: The LCD LIES. Do not judge anything else other than composition when looking at your camera's LCD. In fact, I would even set the camera to "Neutral" in Picture Control and set the brightness of the Display to -1, this way it will look closer to the Raw File that you import into ACR.
-
Nikon is and was first an "Optics" Company. Basically, Nikon is slapping their logo on other company's stuff. LOL!! The things I recommended will work fine, regardless of brand. Tidbit: A long time ago, Nikon and Canon were partners. Nikon made the lenses and Canon made the camera bodies. I think this was just after WWII ended. So the whole Nikon vs. Canon thing is just Marketing BS. Kinda like the Beatles and The Rolling Stones. The media set out to make them "enemies," but the truth is, they were all really good friends.
-
You can also Un-install all versions of PS and then re-install. I’d just back up plug-ins, Actions, Brushes, etc. I wouldn’t worry about breaking things, it’s just one of those Generic Warnings. Just be sure to have your login info handy for the Adobe Mothership Program.