

Damien Symonds
-
Posts
212,133 -
Joined
-
Last visited
-
Days Won
3,488
Everything posted by Damien Symonds
-
 Strangely, mine has begun to do that too. Can you still click this button ok?
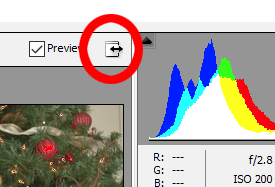
-
Screen turned white
Damien Symonds replied to Ang Bergmann's topic in Monitor calibration questions or problems
Gosh, that's strange. I doubt guest will work. It'll need to be somebody with the right access. It should be in /Library/Colorsync/Profiles -
Screen turned white
Damien Symonds replied to Ang Bergmann's topic in Monitor calibration questions or problems
Hi Ang, Restart your Mac in safe mode (google will tell you how). While in safe mode, find and delete the faulty monitor profile. -
Yep, that way
-
Yeah, your gradient went the wrong way. It should be white at the top fading to black at the bottom.
-
Dark Fall Edits
Damien Symonds replied to nikki_neste's topic in How to achieve a certain look or effect
I'm sorry, I don't understand the question. -
Download the file I hope it helps. It's not perfect, but it's the best that's possible. You can go ahead with your normal editing now, and it should be passable.
-
Dark Fall Edits
Damien Symonds replied to nikki_neste's topic in How to achieve a certain look or effect
That's excellent news. You've grown a lot in this short thread. Just wait until you take Levels. Your growth will blow you away. -
Dark Fall Edits
Damien Symonds replied to nikki_neste's topic in How to achieve a certain look or effect
But the bottom one is much more similar to the three examples you showed me. Have you changed your mind about your taste? (That's perfectly ok, I hate the bottom one.) -
There is, but unfortunately not in Elements. Can you send me the scan so I can do it for you?
-
Dark Fall Edits
Damien Symonds replied to nikki_neste's topic in How to achieve a certain look or effect
Do either of them speak to you? -
Dark Fall Edits
Damien Symonds replied to nikki_neste's topic in How to achieve a certain look or effect
Really? I used one at about R200 G30 B30 and it looked plenty red. -
Dark Fall Edits
Damien Symonds replied to nikki_neste's topic in How to achieve a certain look or effect
Gosh, that's nowhere near as red as the sample links you gave me. -
Dark Fall Edits
Damien Symonds replied to nikki_neste's topic in How to achieve a certain look or effect
Terrific! So, let's try something simple first. Add a darkish red Solid Color layer immediately above the Blurred layer, and clip it thereto. Then play with blend modes (and tweaking the colour of the red). I found that Soft Light mode looked pretty good. -
No, I mean a screenshot from Photoshop. Showing your layers panel and everything.
-
Dark Fall Edits
Damien Symonds replied to nikki_neste's topic in How to achieve a certain look or effect
At this point, may I see a screenshot including your layers panel? -
Dark Fall Edits
Damien Symonds replied to nikki_neste's topic in How to achieve a certain look or effect
The Lasso is what I always use for this. It's fast and effective. -
There's no doubt it'll be fiddly, but there's a chance it might be easier than you think. Go ahead and do your clean processing on the raw file, then post the photo for me and we'll discuss.
-
Dark Fall Edits
Damien Symonds replied to nikki_neste's topic in How to achieve a certain look or effect
That's excellent, except I think your gradient on the mask when a little too high. To just above her elbows would have been fine, I think? -
Yay!
-
Yeah, go for it. It should help performance.
-
Then may I see a screenshot again?
-
Not as blurred as I expected.
-
Dark Fall Edits
Damien Symonds replied to nikki_neste's topic in How to achieve a certain look or effect
The arms and chair and books probably should have been cloned out altogether. In fact, to be ultra safe, it might have been better to clone the child out altogether. The radius of the cloning has to be bigger than that of the blur, you see. -
Sorry, forget it. It's simply impossible.
