Damien Symonds
-
Posts
212,042 -
Joined
-
Last visited
-
Days Won
3,484
Everything posted by Damien Symonds
-

Printer Profile
Damien Symonds replied to Dasha's topic in Output - print, websites, Facebook, email, client disk, etc
Ok, definitely DON'T turn on Simulate Paper Color. They only say that for uncalibrated people who have their screens way too bright. Ok, if Perceptual seems to be what they use, that's fine. -
Print Actual Size
Damien Symonds replied to Schlle1's topic in Output - print, websites, Facebook, email, client disk, etc
No, the camera equipment doesn't really play a part. Tell me about the foot- and hand-prints. How will you make them? Will you paint the child's hands and feet, then have them press them onto paper? -
how to fake backlight
Damien Symonds replied to nery's topic in How to achieve a certain look or effect
Please read the section guidelines, especially rule 1. -
Printer Profile
Damien Symonds replied to Dasha's topic in Output - print, websites, Facebook, email, client disk, etc
Is Perceptual specifically what they advise? -
Wanting to future proof with calibrator
Damien Symonds replied to a topic in Monitor calibration questions or problems
Since you're considering using it on more than one, screen, I'd urge you to stretch the ol' budget to the Spyder Elite if at all possible. -
Yeah, gosh, that might do it! What do you think of this?

- 6 replies
-
- 11
-

-
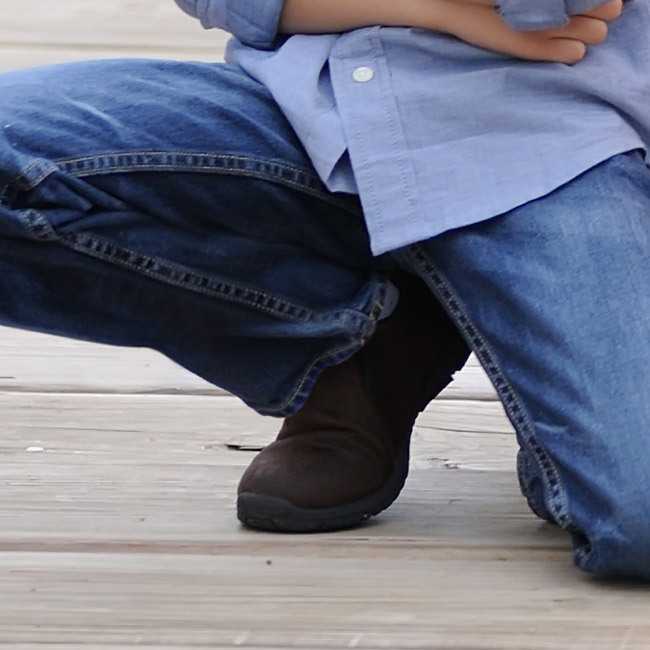
Such is the price of masterpieces. If making beautiful art was easy, everyone would do it.
-
Oh gee, this is difficult. Do you have any photos of him standing, that might provide some extra denim to work with?
-
I would say the texture is artificial in most cases, but the background itself (its colour and shadows) are probably real, or at least real-ish.
-
Second attempt at calibrating- need help
Damien Symonds replied to nlr7's topic in Monitor calibration questions or problems
Interesting. Can you post one of each photo? (Colour with skin, and a black-and-white) -
That's because you have the mask selected, most likely. I wrote about it here. I'll need to see a screenshot of what you're working on. It's unusual for this to be the correct solution for cast removal.
-
Adding black to the bottom/sides of this photo
Damien Symonds replied to ShannonV's topic in Help with editing
No, just go to Image>Resize>Canvas Size. Make it as big as you want - in fact, make it bigger than you want. At the bottom, make sure the "Canvas Extension Color" is white. I know it's tempting to make it black, but it's risky. Leave it white. Once you've done that, and hit OK, add a black Solid Color layer, then invert the mask, then paint the black onto those outside areas. Use a nice biggish soft brush, so the new black blends with the existing black. Lastly, turn that layer on and off a few times, to make darn sure none of your new black has encroached onto the baby. -
No, not screwed, but it makes things harder. I think you'll need to clone the floor upwards. Clone it further than you need, then mask a crisp line across.
-
Grey squares on white background
Damien Symonds replied to Claire Bear's topic in Miscellaneous questions or problems
May I see a 100% crop of the child's face? -
DO.NOT.ADJUST.YOUR.SCREEN'S.BRIGHTNESS.FOR.ANY.REASON.EVER.AGAIN.
-
Printer Profile
Damien Symonds replied to Dasha's topic in Output - print, websites, Facebook, email, client disk, etc
This looks quite normal. May I see a screenshot of your Proof Setup dialog? -
Looks great!!!
-
Do you have a photo of the setup (floor and backdrop) without any subjects in it?
-
No, I'd say what you've done is perfect. It adheres perfectly to the non-destructive principles.
-
I generally start with a bright rainbow-type one. Have I shown you this article?
-
What you "prefer" is completely irrelevant. Once your screen is calibrated and matches your prints exactly, THAT'S WHERE IT STAYS. Did you follow my instructions?
-
Yeah, the soft-proofing will tell you if the printer can't handle something.
-
Extending seamless background
Damien Symonds replied to JessicaKMsheridan's topic in Help with editing
For the first one, may I see a closeup of the back of her head? -
Extending seamless background
Damien Symonds replied to JessicaKMsheridan's topic in Help with editing
I think this could work for the second one: But if you're new to Photoshop, this is going to be darned hard. This is the method I used. But it's not for the faint of heart.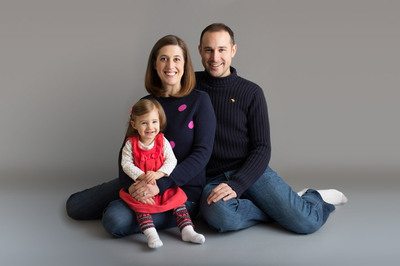
-
Extending seamless background
Damien Symonds replied to JessicaKMsheridan's topic in Help with editing
Best in the business, I promise: http://www.damiensymonds.net/training.html These are not simple at all. Don't feel bad that you haven't been able to achieve them. Let me play a little and see what's possible.