

Damien Symonds
-
Posts
212,199 -
Joined
-
Last visited
-
Days Won
3,495
Everything posted by Damien Symonds
-
Sure! What colour would you like the background to be? (Don't say black, by the way. It can't be done. It needs to be another light colour.)
-
 That does look like you've overdone it. I think 63 is unnecessarily high.
 -
Yes, I know, and you'll learn about the others in the Raw Class. But for now, those are the two important ones.
-
I'm sorry too. It's sports carnival day at my kids' school today, so I went along there for a bit. First place for my son in his race! I've come back to catch up on a few questions. I forgot about the noise! How incompetent of me! I'll need to see a 100% crop to assess the noise. Here are the instructions for raw noise removal. If you didn't do the noise removal properly at the beginning, then yes, you'll have to start over. For a job of this magnitude, it's CRITICAL that all noise is gone. As I said earlier, make sure you do all your editing in the exactly usual way. That means NO FLATTENING. Make sure you save your fully-edited master file as a PSD file with all the layers intact. Read this important information I'm so desperately sorry, I can't tell you how to sharpen, because you're not in my Sharpening Class. I can't talk about class content outside of class. (This probably answers your last question.) This is a VERY good question - possibly the most important question of all. But we'll come back to it a bit later, once all the editing is done and the PSD file is saved. Please remember, though, DON'T CROP DURING EDITING. Leave all those blank edges around your image and everything. This is so important. Read more info Yes, this is vital. I guess I don't need to remind you how BIG and PUBLIC this photo is going to be, so we MUST get the colour right. Yeah, I wish that too, but the important thing is that you're here now. We'll rock this, I promise.
-
This is SO important. Your photo will rock, or look f&*king awful, depending on getting the CMYK conversion right. You must ask the question, and don't stop asking it until you get a clear answer. "What CMYK profile do I use?"
-
In case you like it, here's the file so you can see how: Download PSD
-
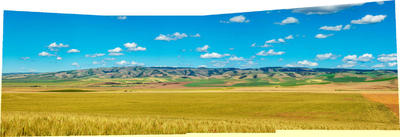
By the way, I know you didn't post for editing advice, but if it was my photo, I'd use Channel Mixer for the wheat. What do you think of this?
-
Great! So just do that again. DEFINITELY don't try to restitch anything.
-
Gosh no! Just make the wheat golden in your RGB file. How did you do it last time? A Hue/Saturation layer?
-
I can't stress this enough. You must have a completely edited master file in RGB.
-
If you had, you'd know that these things never look crisp up close. It's perfectly normal. I'm just trying to put your mind at ease about the quality aspects of this. And instead, I need to make you appropriately nervous about the issues that really matter. https://www.damiensymonds.net/2011/05/please-be-wary-of-cmyk.html No no! Not at all! You're doing perfectly.
-
I need to see the RGB master version, not the CMYK version.
-
Neither of us have time to debate this, nor to change what you've done. You've already stitched, so let's persist with it.
-
Have you seen one? For real, I mean?
-
These specs stink of BS. This job of yours will be printed at about 50ppi, so for them to say they need 150ppi is complete nonsense. Plus there's no information about the CMYK profile you need to use. Have you worked with these people before? Do you have any proof that they're actually competent? And they're sticking to this rubbish about "50% at 200ppi"?
-
Have you talked to a FabriArt representative about this job?
-
By the way, @Jamie Brown, NEVER do edits in CMYK. CMYK is an output space only, you must do all your editing in RGB exactly as normal. In fact, make your entire editing process completely normal. Don't crop, don't resize. Just do everything the same as you usually do, as if it was any other photo.
-
I need to know more about these specs. Did they send you a PDF of information? Or an email?
-
Let's assume nothing of the sort. Let's get one thing clear right away - the camera you have captures easily enough pixels for this job. Absolutely no multiple-image-stitching required. Of course, you might have another reason to shoot and stitch, if your lens can't allow you to capture a wide enough scene in one frame. That's cool. But megapixels are NOT a reason to stitch.
-
Scanning Photos & Negatives
Damien Symonds replied to Shannikk's topic in Questions about tutorials and articles
What did you ever decide to do with this, @Shannikk? -
Program for Organizing Files
Damien Symonds replied to Shannikk's topic in Miscellaneous questions or problems
Hey @Shannikk, have you read the Bridge Class yet? Have you been putting it into practice? -
Wonderful. Next is the Raw Class, and then Levels after that.
-
Why is flatter better?
Damien Symonds replied to DEG's topic in Questions about tutorials and articles
You just gave the answer. So all detail can be seen, and therefore manipulated in Photoshop. -
It's very difficult, but you will learn it as you go along. How far through the Layers & Masks Class are you?

